Brevo
The Brevo addon connects ClientXCMS to Brevo so visitors can subscribe to your newsletter from the site footer.
Enable the Brevo addon in ClientXCMS before configuring it.
Create a Brevo API key
- Sign in to your Brevo account.
- Open the account menu, then go to Settings > SMTP & API > API Keys & MCP.
- Open the API Keys tab and click Generate a new API key.
- Give it a recognizable name, such as
ClientXCMS, and generate it. - Copy the key immediately and store it securely. Brevo only displays the full value once.
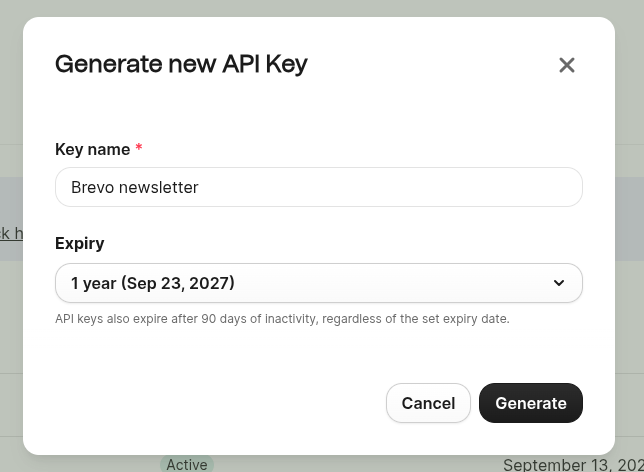
The API key grants access to your Brevo account. Never publish it or include it in screenshots. If it is lost or exposed, delete it in Brevo and create a new one.
Authorize your server IP address
You must authorize the public outbound IP address of the server hosting ClientXCMS before using the API.
- In Brevo, open Settings > Security > Authorized IPs.
- Click Authorize IP addresses.
- Add the public IP address used by your ClientXCMS server for outgoing requests.
- Confirm the authorization.
If your infrastructure uses several outbound IP addresses, authorize all of them. Enabling the blocking of unknown IP addresses rejects every API request coming from an address that is not on this list.
Configure ClientXCMS
- In the ClientXCMS administration area, go to Settings > Extension settings > Brevo.
- Paste the Brevo API key.
- Select the Brevo contact list that should receive newsletter subscriptions.
- Enable the integration and save the settings.
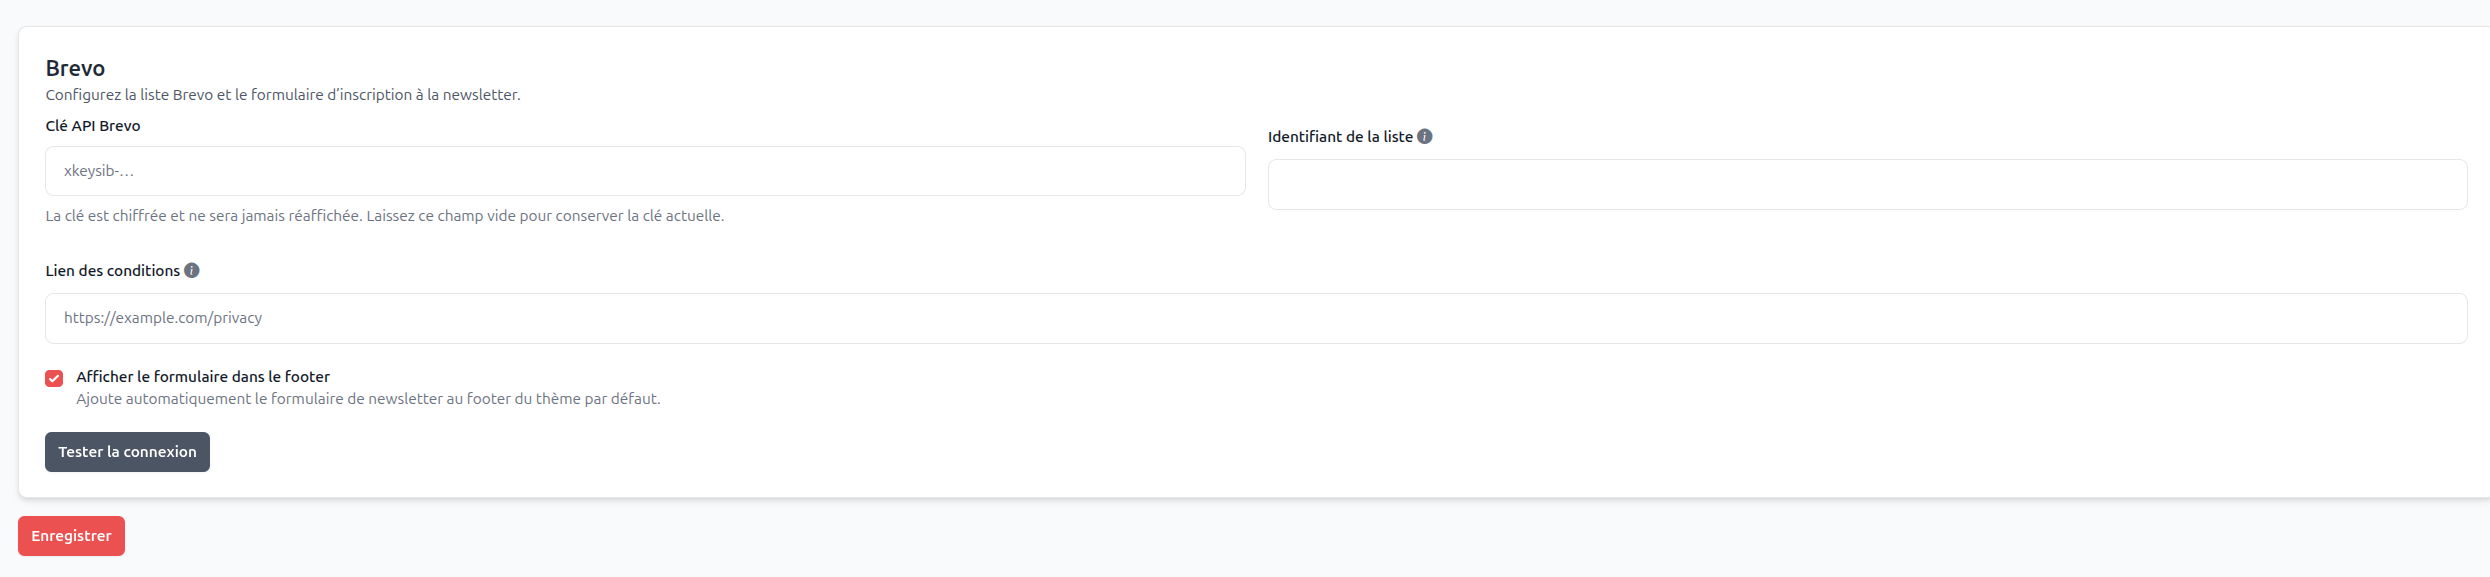
Once the connection is valid, ClientXCMS displays the configured integration and its selected list.
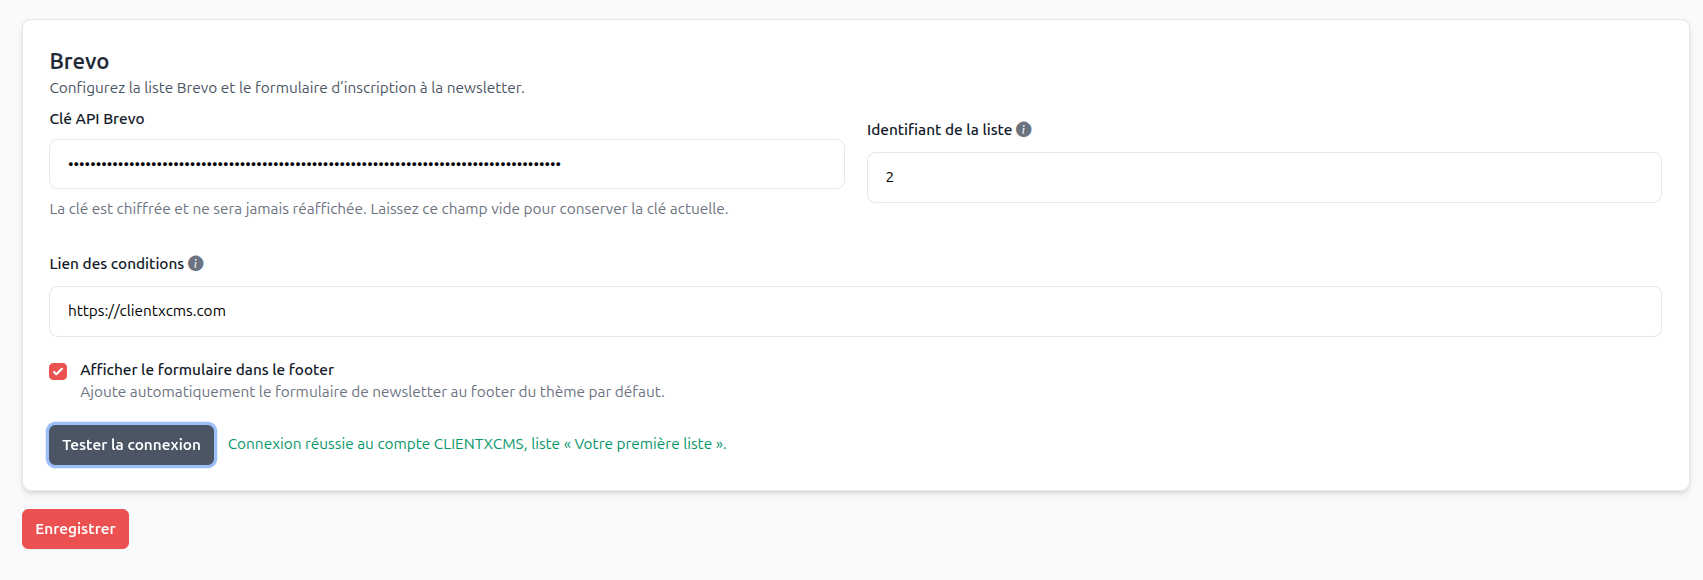
The newsletter form can then be displayed in the site footer. Submit a test address and confirm that the contact appears in the selected Brevo list.
