Qonto e-invoicing
The Qonto e-invoicing addon transmits ClientXCMS Factur-X invoices and e-reporting data through Qonto's regulatory API.
Do not enable transmissions until Qonto has confirmed access to its regulatory API for externally generated and already-numbered invoices. Standard Qonto banking API credentials may not be sufficient.
Obtain the Qonto credentials
Contact Qonto support or your Qonto account representative and request access to the regulatory e-invoicing API for externally generated invoices. During technical onboarding, obtain:
- the regulatory API base URL;
- your Qonto organization identifier;
- the API token;
- the webhook signature secret.
The webhook secret is used to verify notifications sent by Qonto. Store the token and secret securely and rotate them if they are exposed.
Configure Qonto
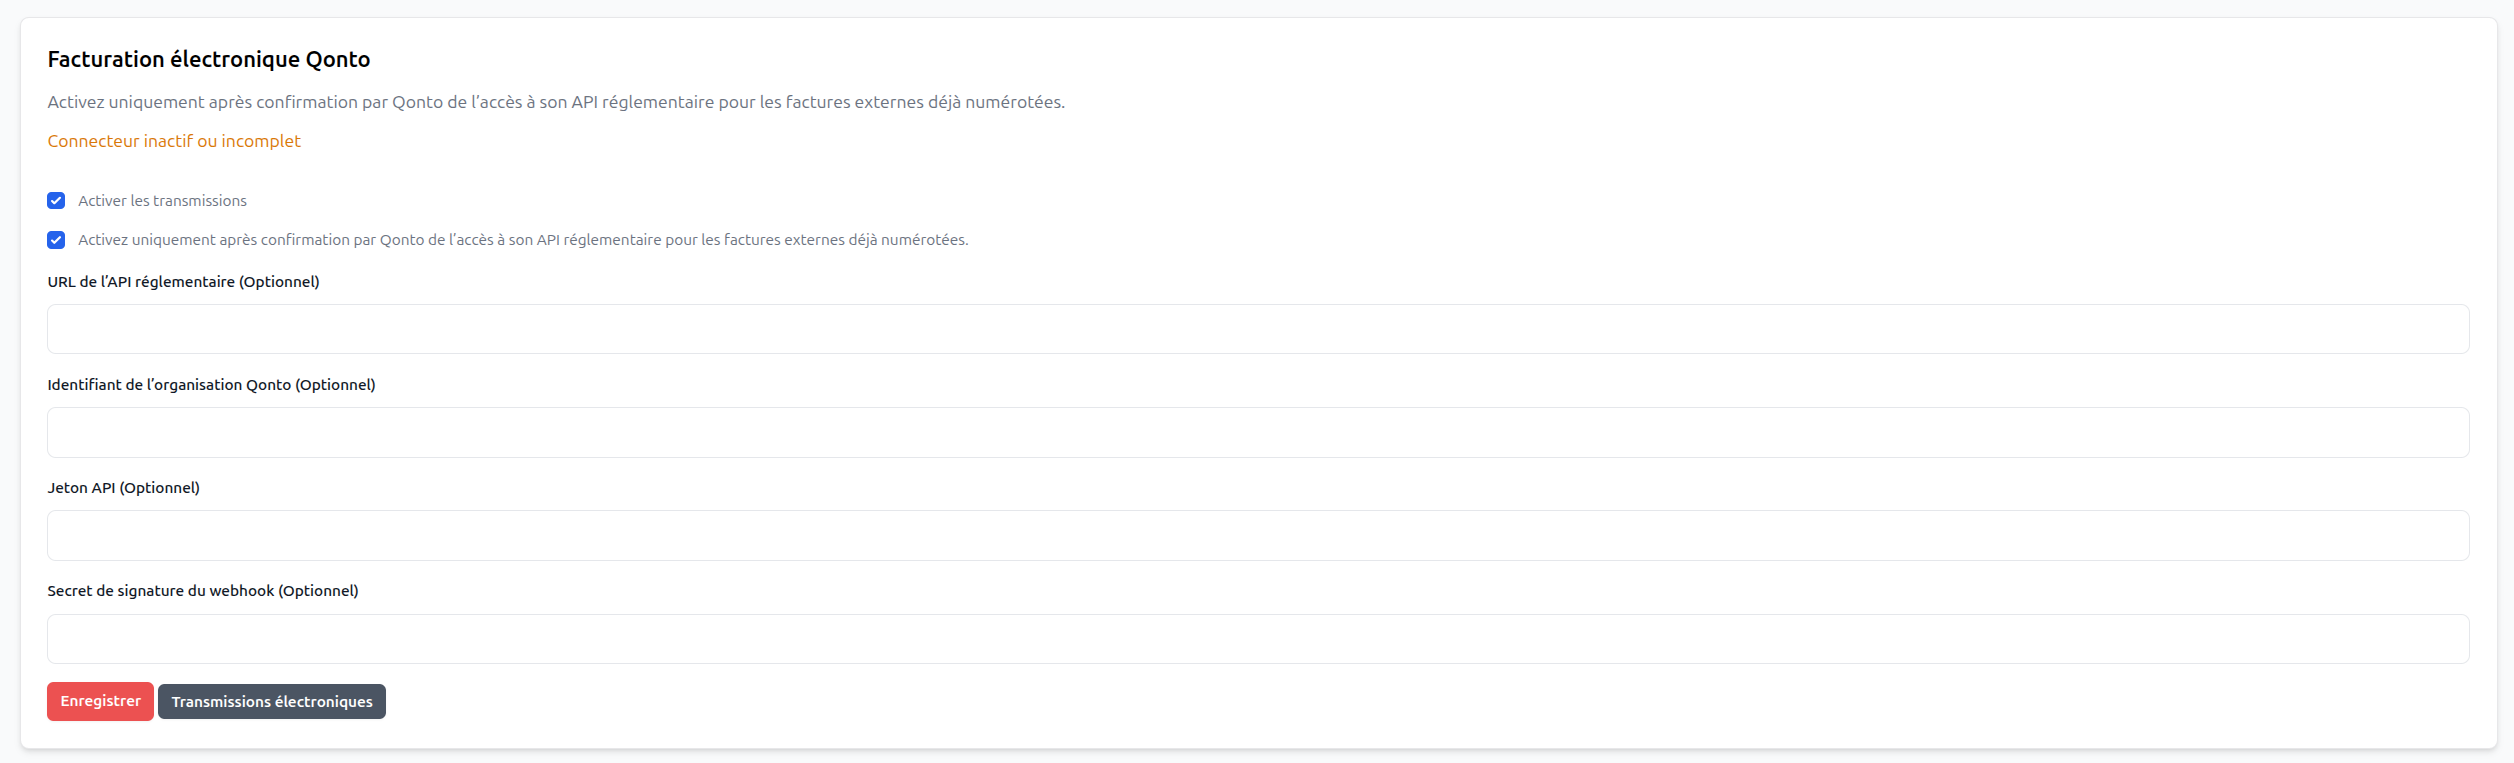
Go to Settings > Billing > Qonto electronic invoicing, then:
- Enter the regulatory API URL, organization ID, API token, and webhook signature secret supplied by Qonto.
- Enable transmissions only after Qonto has confirmed the access.
- Confirm the acknowledgement stating that the connector is intended for externally generated, already-numbered invoices.
- Save the settings.
- Use Electronic transmissions to review sent documents and their statuses.
Select Qonto as the active provider
First complete the seller tax identity under Settings > Billing > Billing. Then, in Factur-X and e-reporting:
- Enable the feature for new documents when you are ready.
- Select
QONTOas the Active provider. - Select
LOCALorCHORUS-PROas the Public-sector provider. - Configure the VAT regime, tax timezone, and optional activation date.
- Save the settings.
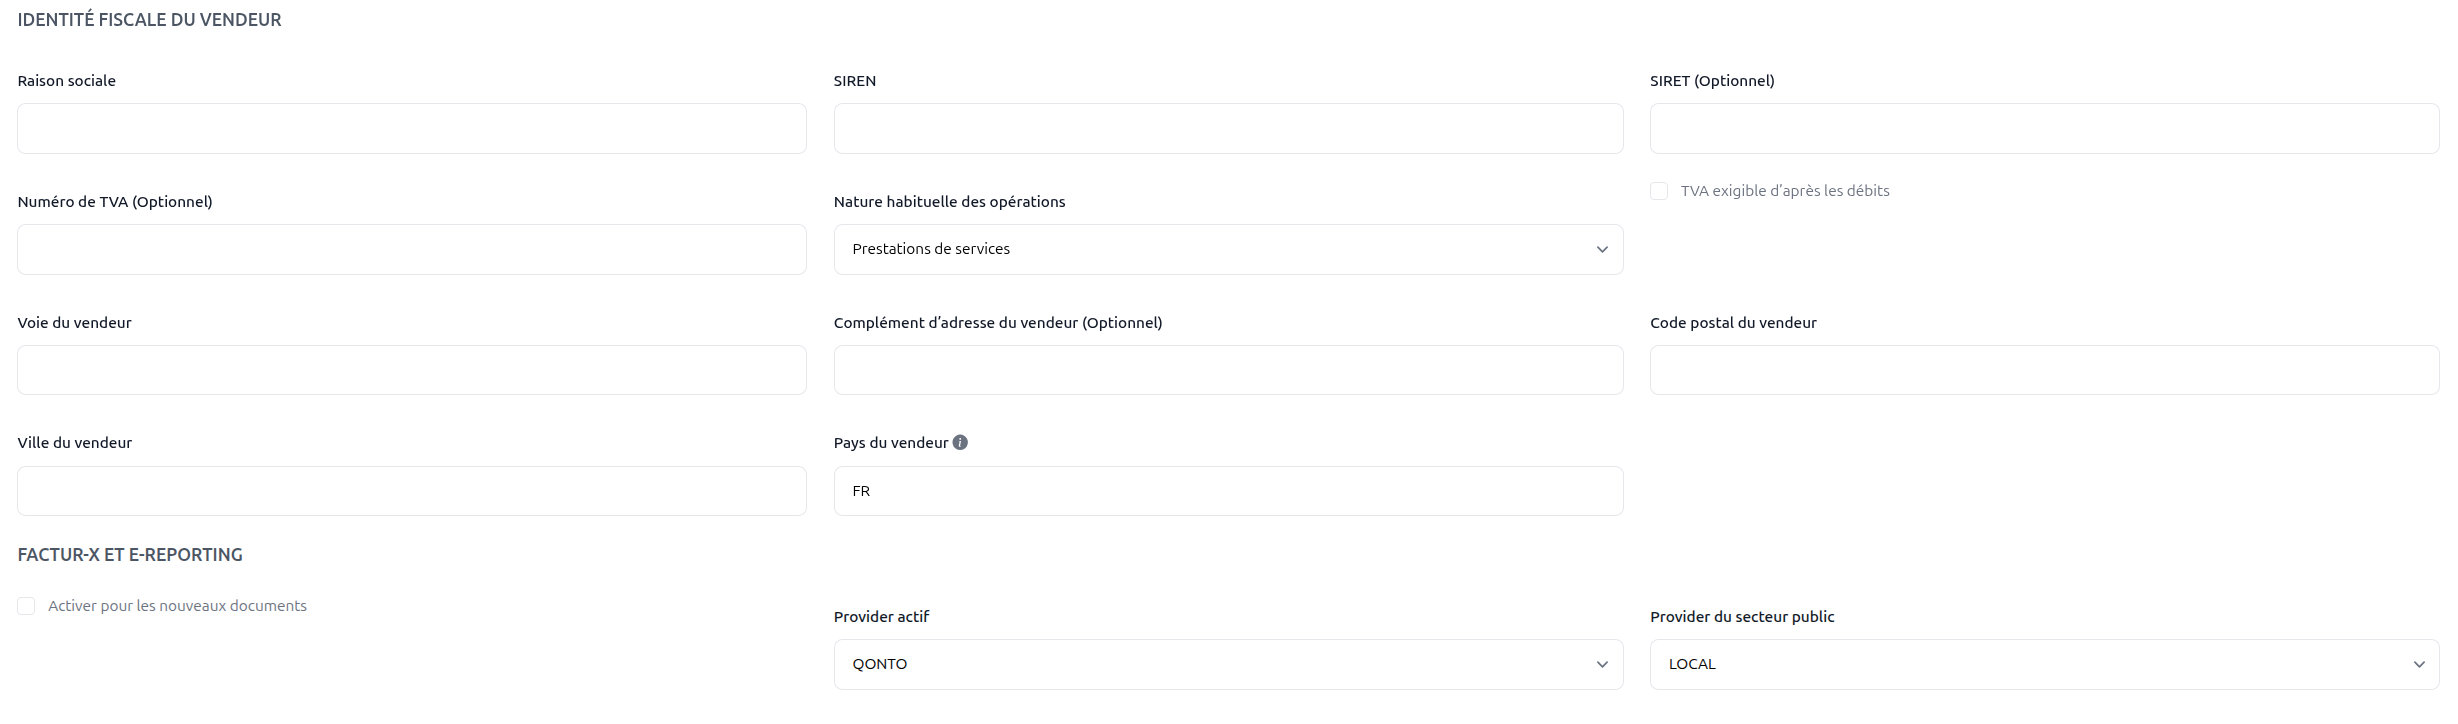
The LOCAL provider generates and stores the documents in ClientXCMS without sending them through Qonto.