Backup
This extension allows you to create complete backups of your ClientXCMS installation, including files and database, and store them on various storage providers.
Extension Configuration
After installing the extension, you can configure backup providers in the admin panel under Settings > Security > Backup Providers.
You can add multiple providers by clicking the Create button. Select the desired provider type (Local, FTP/SFTP, S3, Google Drive) and fill in the required information according to the chosen type.
You can also define a frequency in hours for automatic backups and the maximum number of backups to keep per provider.
Backup Details by Provider
You can view backups made for each provider by clicking the View button next to each provider in the list. This will display the provider configuration as well as the list of stored backups and any errors during backup attempts.

Backup Management
You can manage backups in the admin panel under Settings > Security > Backups.

Here, you can see all backups made, their size, creation date, and the provider used. You can also download or delete individual backups.
Restoring a Backup
To restore a backup, click the Restore button next to the desired backup. Confirm the action and the restoration will begin. Note that restoration will overwrite current data, so it is recommended to make a backup before proceeding.
Running a Backup Manually
You can run a backup manually by clicking the Run Backup button at the bottom right of the backups page. This will create a new backup immediately and send it to the selected provider.
Backup Formats
Backups are created in compressed .zip format, including the database dump as well as files in the storage directory.
A backup.json file is included in the archive, containing backup metadata:
{
    "uuid": "efa5e9ac-d0db-4c02-81f1-d6f41f9a4902",
    "type": "full",
    "created_at": "2025-12-20T19:51:51+01:00",
    "app_key": "app_XXXXXXXXXXXXXXXX", # used for backup restoration
    "app_url": "test",
    "includes_database": true,
    "includes_storage": true,
    "database_connection": "mysql",
    "filename": "backup-efa5e9ac-d0db-4c02-81f1-d6f41f9a4902.zip"
}
Backup Verification
The addon also adds a widget to the admin dashboard to check the backup status. It displays the date of the last successful backup and alerts if a backup is overdue based on the configured frequency.

Commands
You can execute the backup task with the command:
php artisan backup:run --force
The force option allows forcing execution even if the time between two backups has not yet elapsed.
Backup Provider Configuration
Important Concepts: Root vs Sub-folder
Before configuring a provider, it is crucial to understand the difference between these two settings:
- Root Path: This is the base folder on your remote server (e.g.,
/or/var/backups). - Sub-folder: This is the subfolder inside the root where files will be stored. By default, it is set to
backups.- Tip: If you want to backup exactly to the location defined by the "Root Path", leave the "Sub-folder" empty.
- Local
- FTP / SFTP
- S3 (Amazon S3, Minio, DigitalOcean Spaces)
- Google Drive
Local (Storage on Current Server)
Useful for temporary backups or if you then manually synchronize the folder.
- Root Path: The absolute path on your server (e.g.,
/var/www/clientxcms/storage/backups). Default:storage/backups. - Sub-folder: The subfolder in this path (e.g.,
storage).
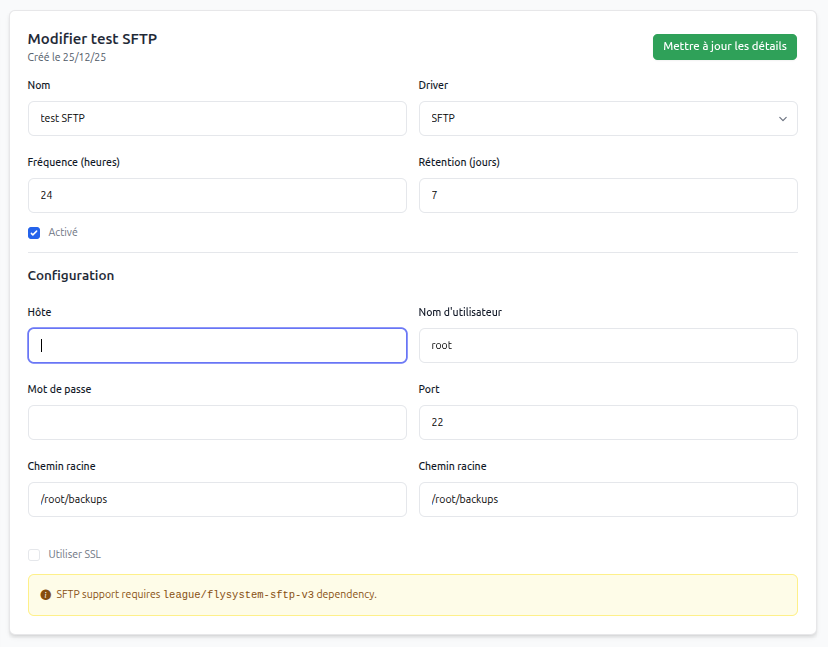
FTP / SFTP (Storage on Remote Server)
For sending your backups to an external server.
- Host: The IP address or domain name of the server.
- Username / Password: Your login credentials.
- Port: 21 for FTP, 22 for SFTP.
- Root Path: The starting folder on the remote server (e.g.,
/backups). - SSL: Check for explicit FTP (FTPS).
- Sub-folder: The subfolder used to organize files.
SFTP requires installation of the league/flysystem-sftp-v3 package.
S3 (Amazon S3, Minio, DigitalOcean Spaces)
For S3-compatible cloud object storage.
- Access Key: Your API identifier.
- Secret Key: Your API secret key.
- Region: Your bucket region (e.g.,
us-east-1,fr-par). - Bucket: Your bucket name.
- Endpoint (Optional): Fill in if you are not using Amazon (e.g.,
https://s3.fr-par.scw.cloudfor Scaleway). - Sub-folder: The prefix (folder) in the S3 bucket.
Google Drive
For backing up to your personal or shared Google Drive space.
- Client ID / Client Secret: Obtained via the Google Cloud Console.
- Refresh Token: Token allowing long-term access without reconnection.
- Folder ID (Optional): The ID of the Google Drive folder where to store files (visible in the folder URL on Drive).
This driver requires the
masbug/flysystem-google-drive-extandgoogle/apiclientpackages.
Obtaining Google Drive Credentials
Step 1 — Create a Google Cloud Project
- Go to the Google Cloud Console https://console.cloud.google.com/
- Click Select a project → New project
- Give it an explicit name (e.g.,
backup-drive-prod) - Validate the creation
Step 2 — Enable the Google Drive API
- In the APIs & Services menu → Library
- Search for Google Drive API
- Click Enable
Step 3 — Configure the OAuth Consent Screen
-
Menu APIs & Services → OAuth consent screen
-
User type: External
-
Fill in at minimum:
- Application name
- Support email address
-
Scopes:
- Add only:
https://www.googleapis.com/auth/drive.file
- Add only:
-
Save
Step 4 — Create OAuth 2.0 Credentials
-
Menu Credentials → Create credentials
-
Type: OAuth client ID
-
Application type: Web application
-
Authorized redirect URI:
http://localhost -
Validate and copy:
- Client ID
- Client Secret
Step 5 — Obtain the Refresh Token with OAuth 2.0 Playground
-
Click Settings
-
Check: Use your own OAuth credentials
-
Enter:
- Client ID
- Client Secret
-
In the scopes list, select:
https://www.googleapis.com/auth/drive.file -
Click Authorize APIs
-
Authorize access to your Google account
-
Click Exchange authorization code for tokens
-
Copy the Refresh Token