SocialAuth+
The SocialAuth+ extension makes it easy to connect with OAuth2 for the following platforms: Google, Discord, GitHub, Facebook, Microsoft, Minecraft, Twitch and ClientXCMS.
Make it easier for your potential customers to access your platform with SocialAuth+. This solution uses OAuth+ technology for fast and secure login. Your users can register and log in with one click via their accounts, without worrying about losing their password. Simplify their user experience and increase your conversion rate with this advanced authentication extension.
Configuration in ClientXCMS
The SocialAuth+ extension is available for free, and can be enabled from the "Customization" tab of your ClientXCMS site administration area.
Enabling the Extension
To enable the SocialAuth+ extension for free, proceed as follows:
- Log in to the ClientXCMS administration area.
- Click on the "Settings" button on the navigation bar at the top.
- In the "Customization" section, click on the "Extensions" page.
- Search for the "Social Auth+" extension in the list of available extensions.
- Click on the "Enable" button below it to set it up for free.
Configuring OAuth Credentials on ClientXCMS
Once the SocialAuth+ extension is enabled from your ClientXCMS administration area, re-access the "Settings" tab.
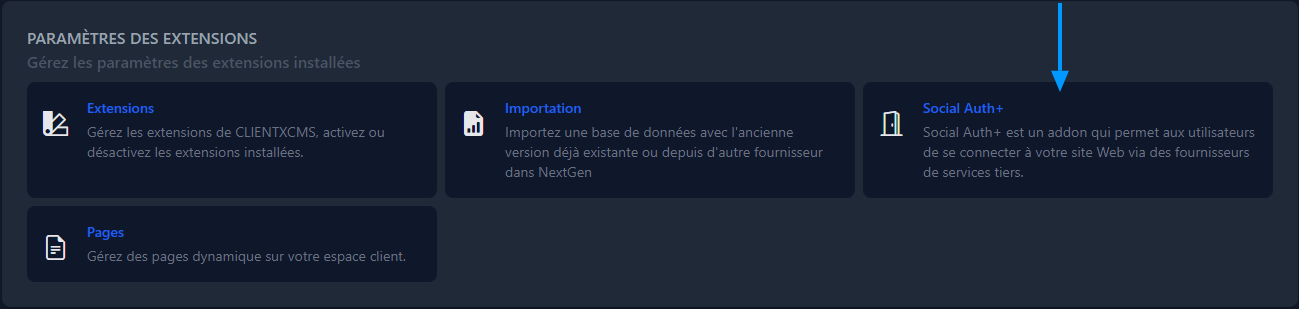
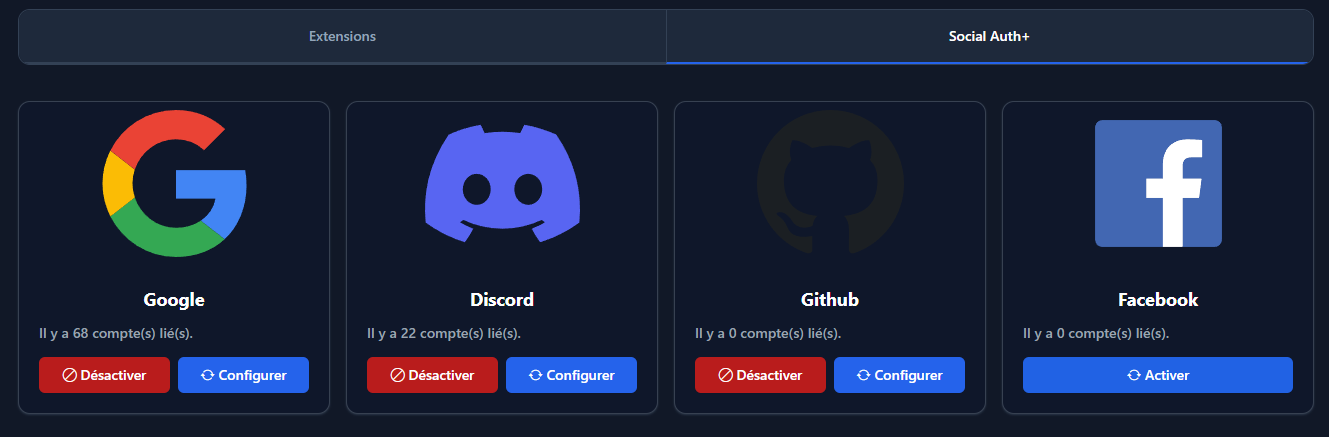
On this page, you can manage the different authentication methods depending on the platforms you want to integrate. To configure one, click on the "Configure" button below the platform logo or on the purple settings gear at the top.
OAuth2 Configuration Example
Here is what the OAuth configuration of an authentication platform on ClientXCMS looks like, you just need to have the Client ID and Client Secret generated and provided by the platform. Follow the rest of this documentation to learn how to proceed depending on the platforms to obtain these famous OAuth2 authentication keys:
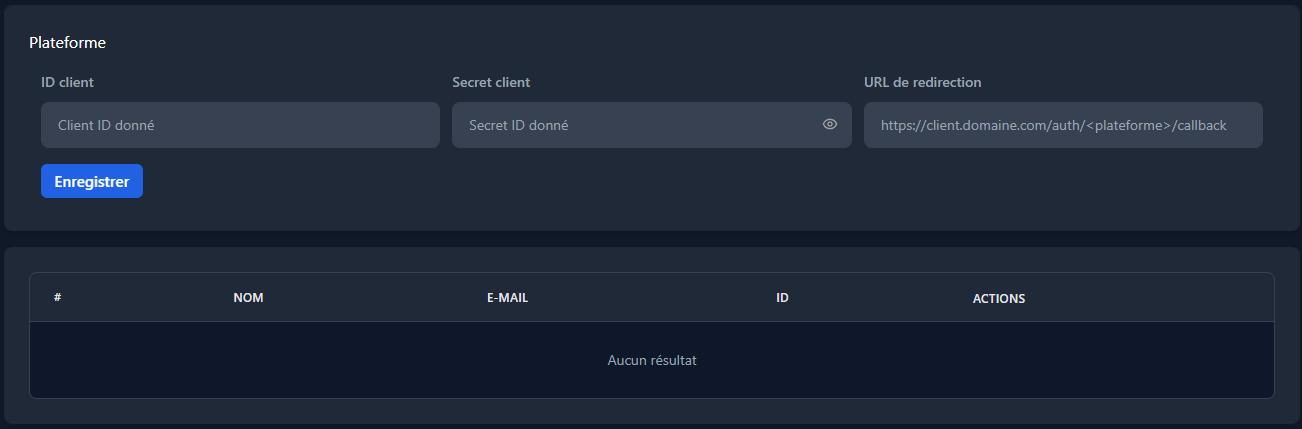
Redirect URI
Make sure to copy the (unique) Redirect URL given by ClientXCMS. For EACH platform, the redirect URL will be different. It is important because it redirects the user to your site after authentication on the target platform, to finalize the authentication. It ensures that the user can log in if they already have an account on your site, or register if they don't have an account yet.
It is generally formatted like this: https://your.domain.com/auth/<platform_name>/callback where <platform_name> corresponds to one of these values:
- discord
- github
- microsoft
- minecraft
- twitch
- clientxcms
Obtaining OAuth2 Authentication Keys
To use this extension, you must obtain OAuth2 authentication keys for each platform you want to support.
Here is how to proceed for each platform:
Google
1. Go to the Google developer console and log in to your Google account.
2. Create a new project by clicking on the "Select a project" button.

3. Give your project a name and follow the configuration steps.
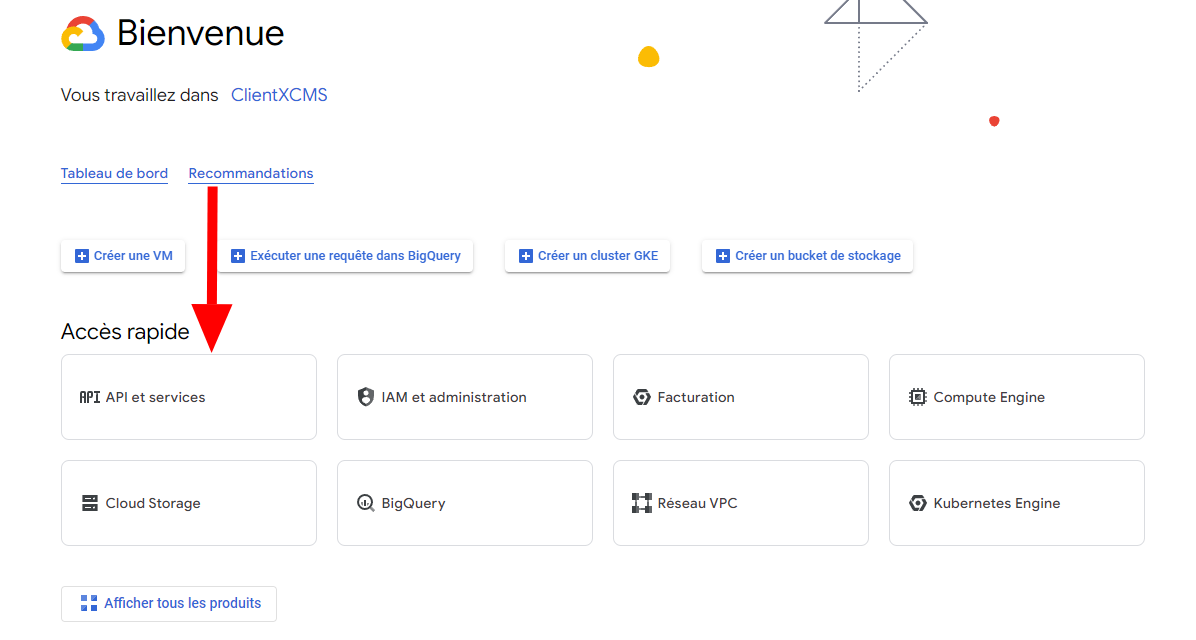
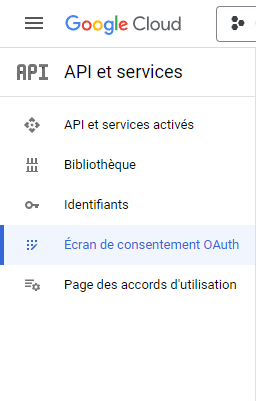
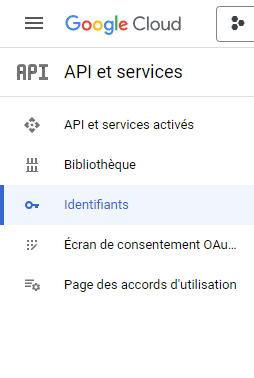
4. Once your project is created, click on the quick access shortcut "APIs & Services"
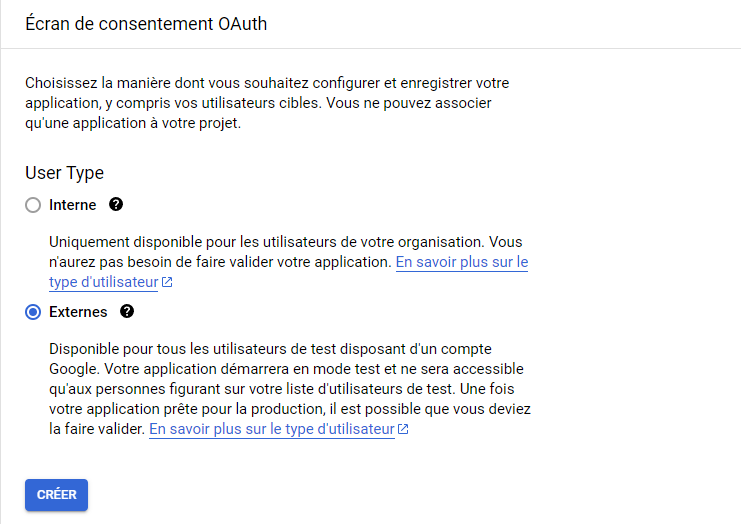
5. Access the "OAuth consent screen" section in the left column.
6. Select the "External" option, then click on the "Create" button.
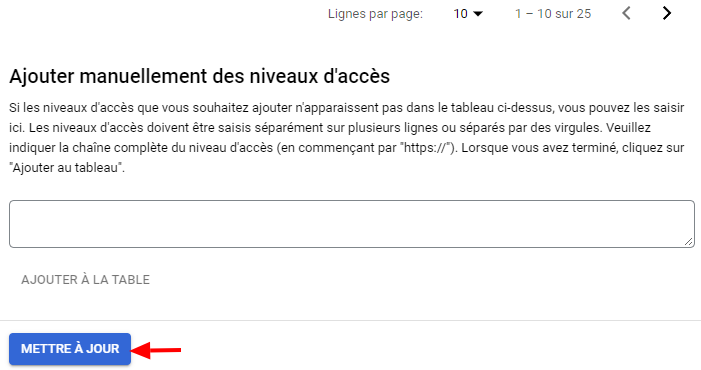
7. Manage the OAuth consent access levels for the application. Click on the "Add or Remove Scopes" button
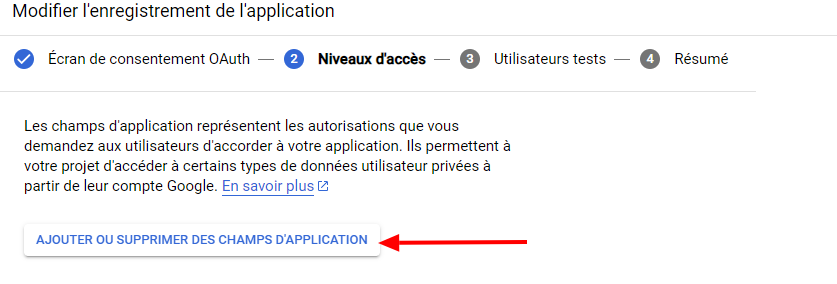
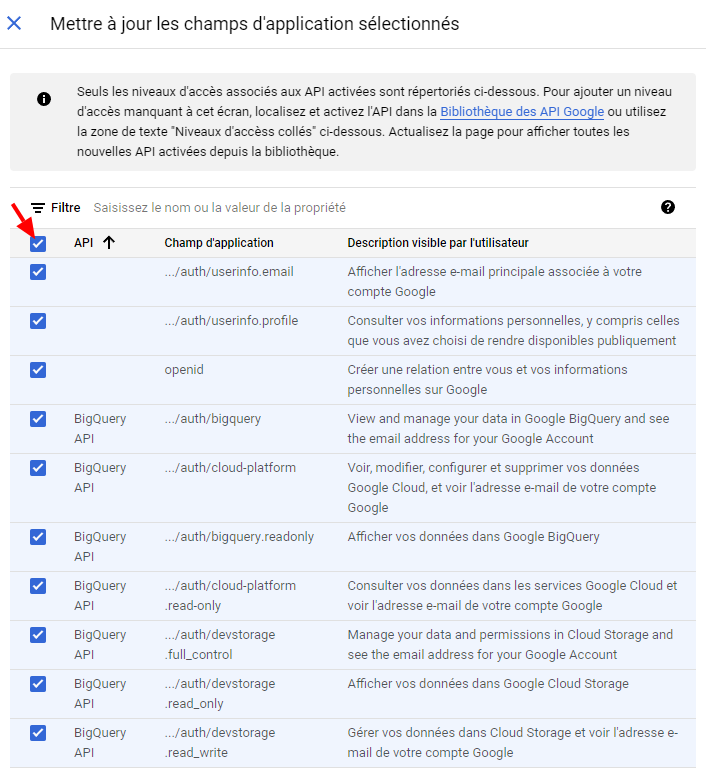
Select all fields and click on the blue "Update" button below.
8. Fill in the required information for OAuth consent, make sure to define the authorized domain as your ClientXCMS site domain (top-level domain, no subdomain required, the domain will suffice)

9. Access the "Credentials" section in the left column.
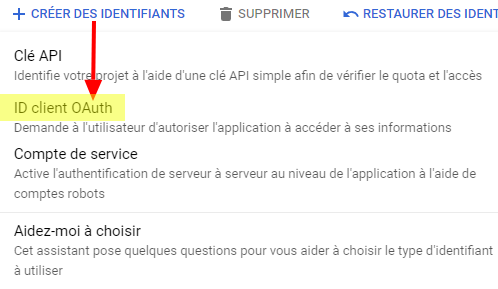
10. Click on "Create Credentials" and choose "OAuth client ID".
11. Select the appropriate application type (here: Web Application) and set the name of your application

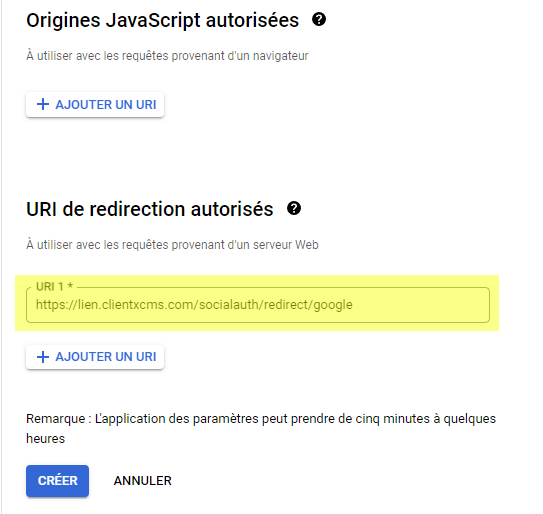
12. Below, in "Authorized redirect URIs", click on the "Add URI" button and set the redirect URI given by ClientXCMS in the configuration page in the "URI 1" field, then click on the blue "Create" button.
13. Once you have created the OAuth application, you will get the necessary OAuth2 authentication keys.
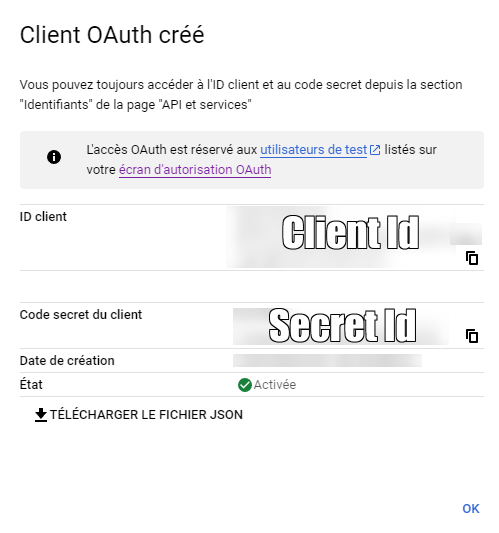
14. Insert them in the platform OAuth configuration on ClientXCMS.
Discord
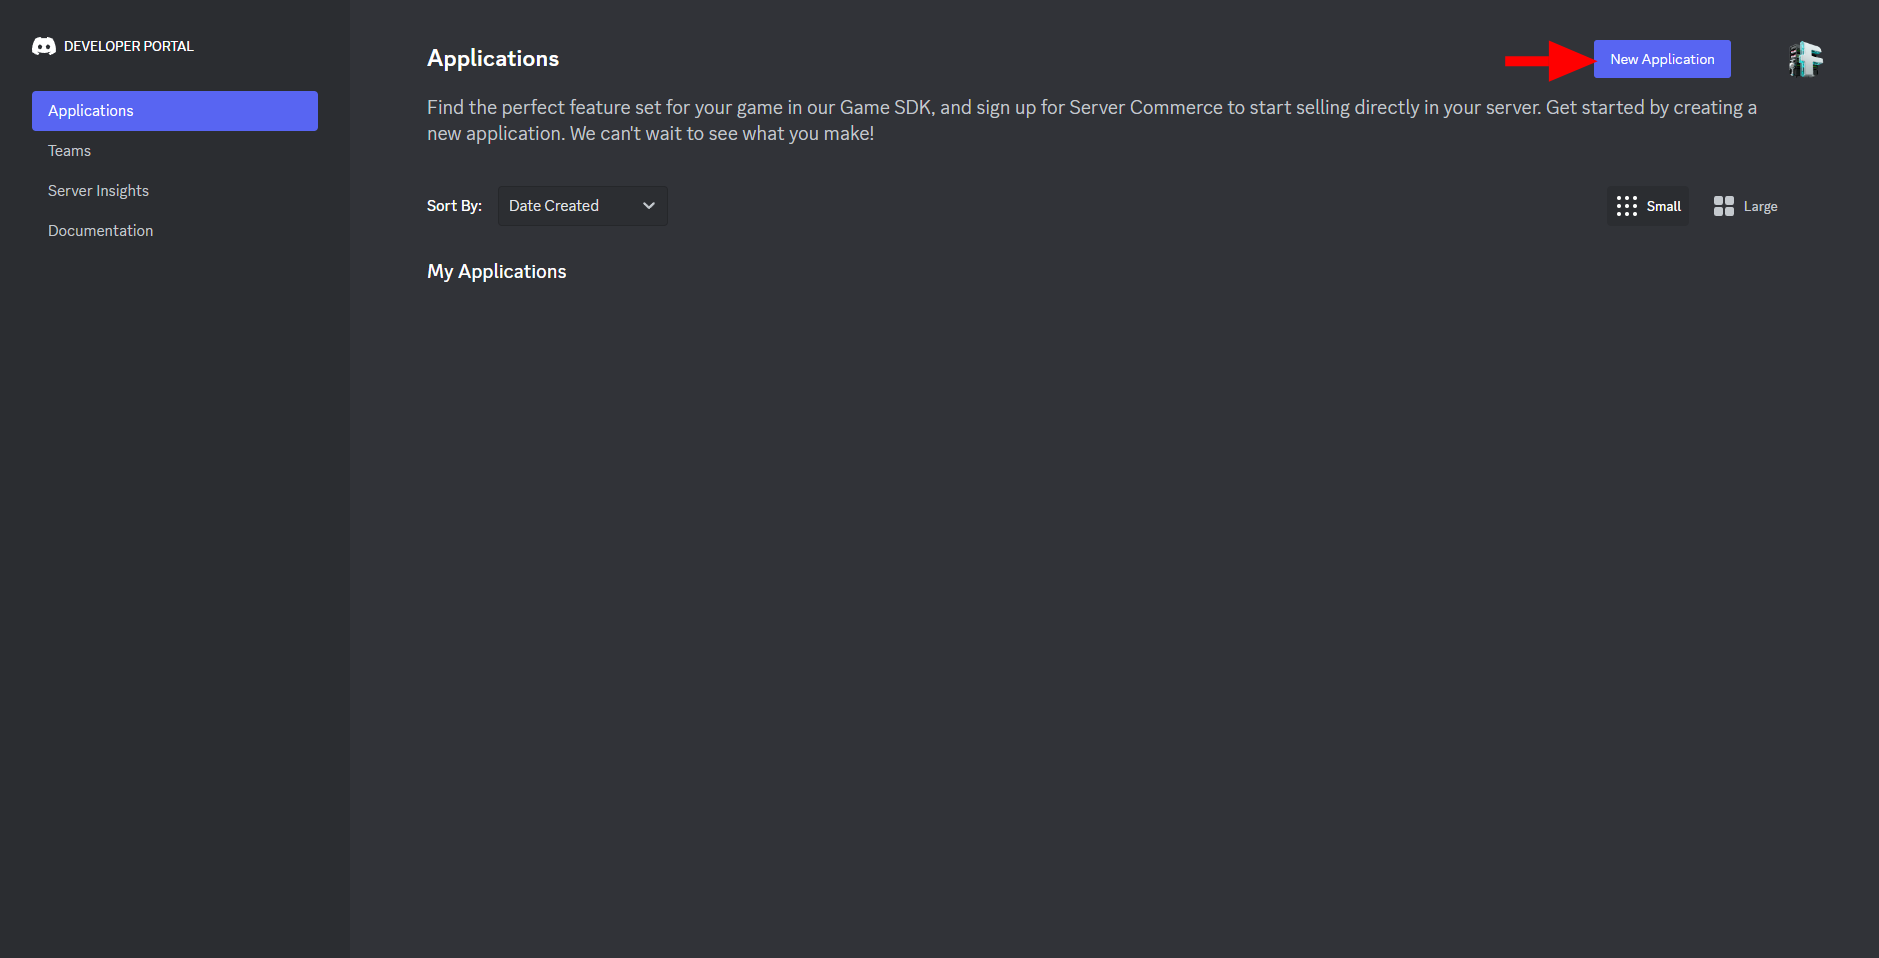
1. Go to the Discord developer portal and log in to your Discord account.
2. Click on the blue "New Application" button at the top right to create a new application.
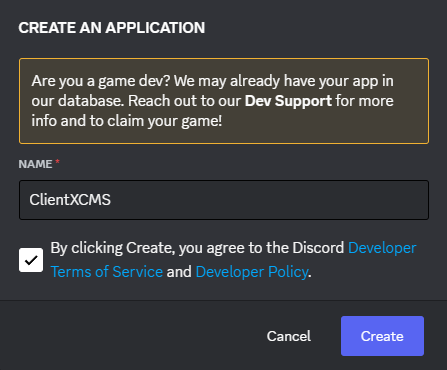
3. Give your application a name, check to approve Discord's terms of service and developer policies. Then click on the "Create" button at the bottom right to save the new application.
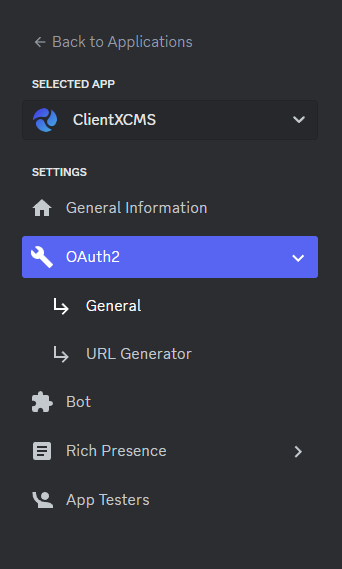
4. Go to the "OAuth2" section in the left navigation menu.
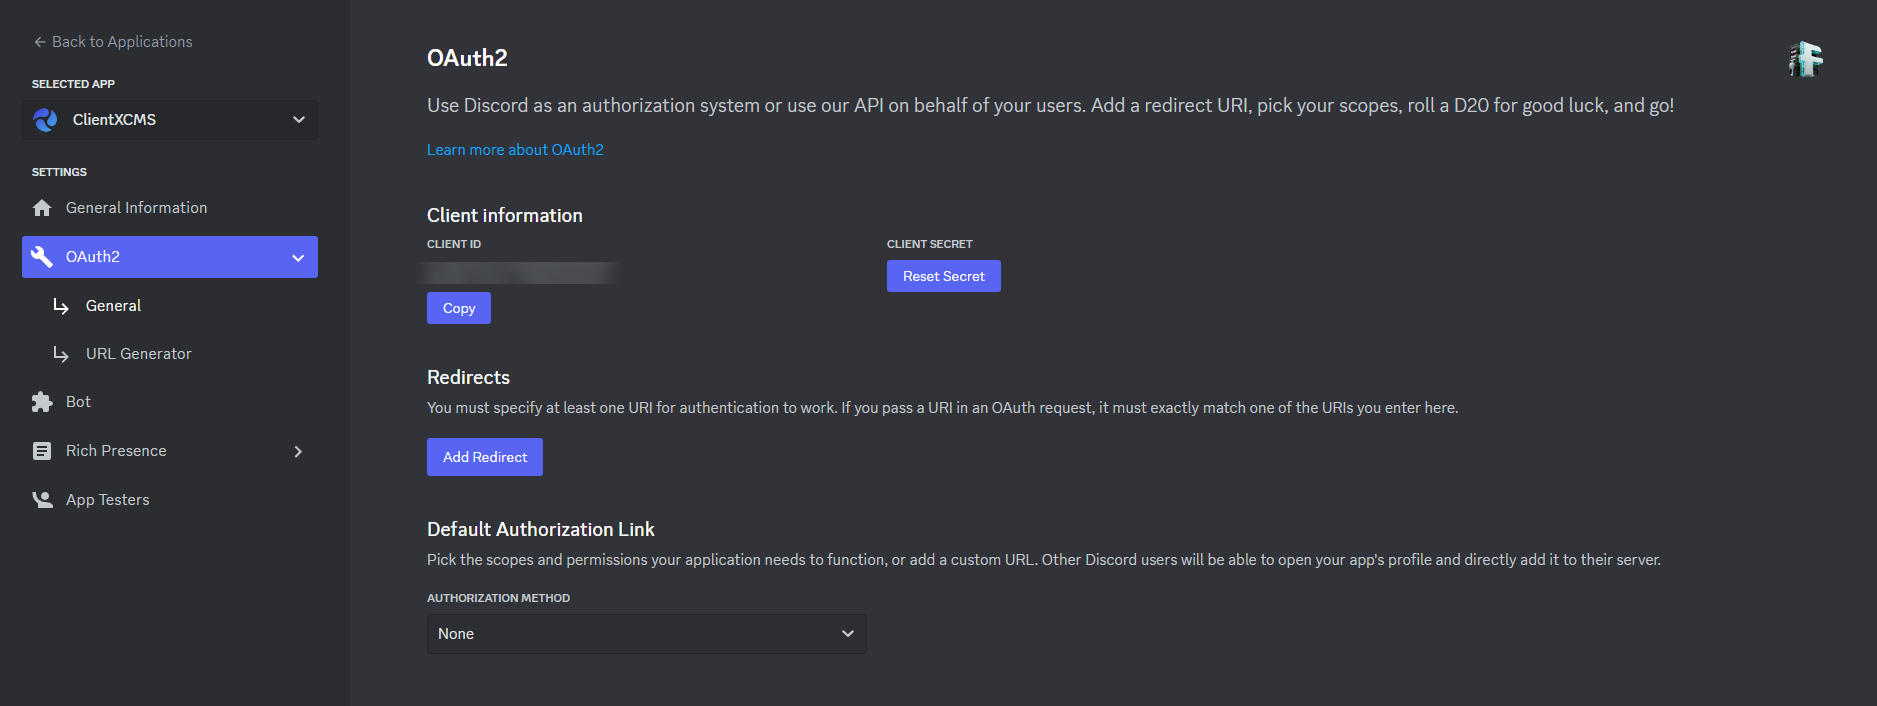
5. Reveal the "Client Secret" by clicking on the blue "Reset Secret" button, if you have enabled 2FA (Two-Factor Authentication) on your Discord account, use your 6-digit code generation app to confirm the action.

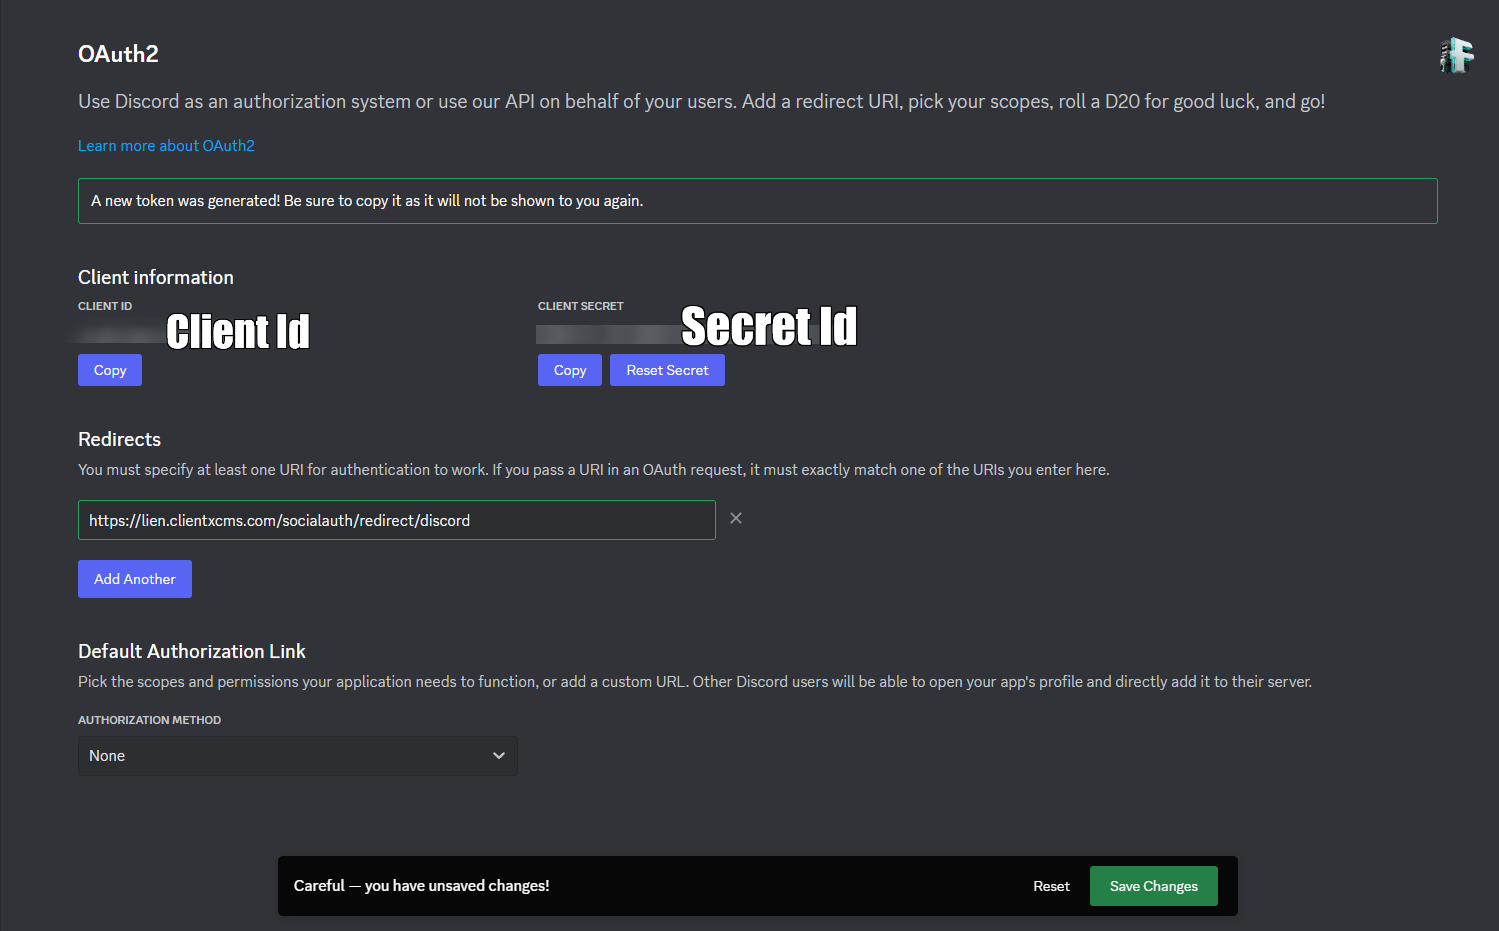
6. Below, in "Redirects", click on the "Add Redirect" button to add the redirect URI and set the redirect URI given by ClientXCMS in the configuration page in the "URI 1" field, then click on the blue "Create" button.

7. Click on the "Save Changes" button at the bottom to save the changes. Copy the "Client ID" and "Client Secret" keys.
8. Insert them in the platform OAuth configuration on ClientXCMS.
GitHub
1. Log in to your GitHub account.
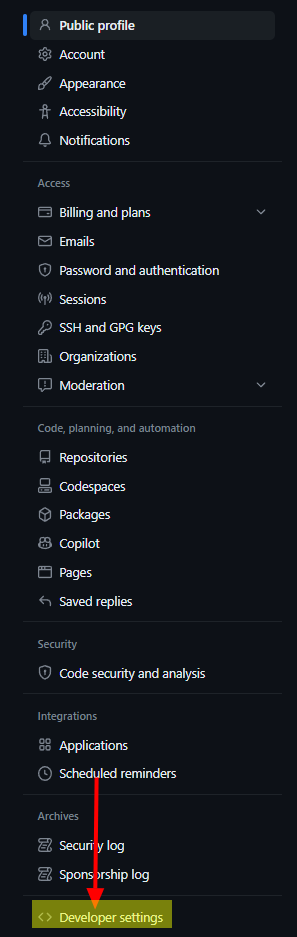
2. Access your profile "Settings" page.
3. In the left menu, click on "[Developer settings](
https://github.com/settings/apps)".
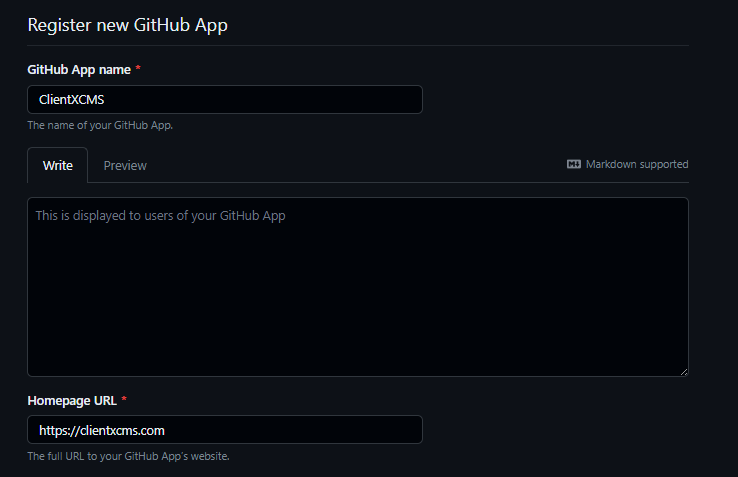
4. Click on the "New GitHub App" button to register a new application.

5. Fill in the basic information for your application.
6. Below, in the "Callback URL" field, set the redirect URI given by ClientXCMS in the configuration page and check the "Request user authorization (OAuth) during installation" option to request OAuth2 usage during installation.
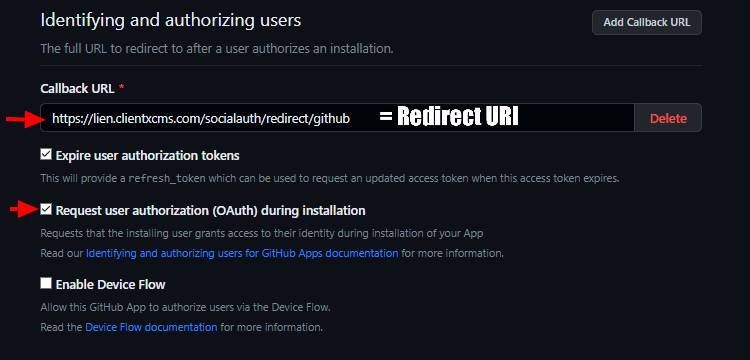
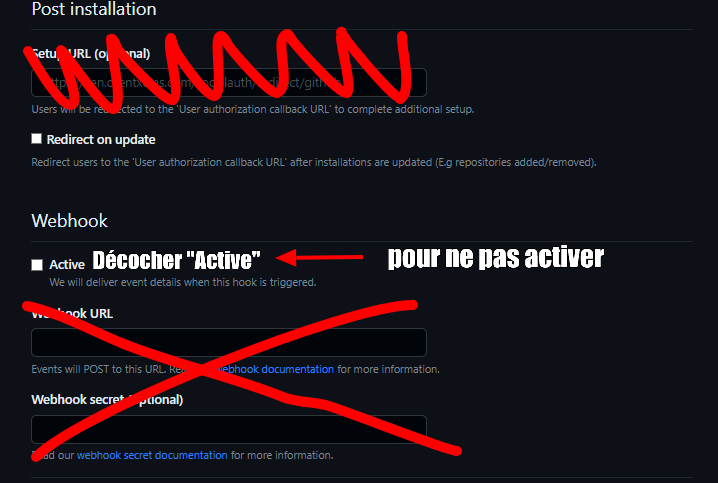
7. Further below, uncheck the "Active" box in the "Webhook" section, because for our use, we won't need it. By unchecking this box, the "Webhook URL" field will become optional and not required. Also for the "Permissions" section, it will be unnecessary to grant permissions. GitHub already provides all the information that ClientXCMS needs to create the account or log in. Adding required privileges for your application may deter some users from registering on your site.

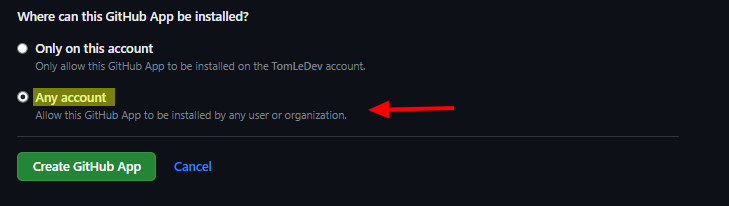
8. At the very end of the GitHub application creation form, make sure to select "Any account" to allow all accounts to install your application, which will allow your users to authenticate with GitHub. Then save the application with the green button below "Create GitHub App".
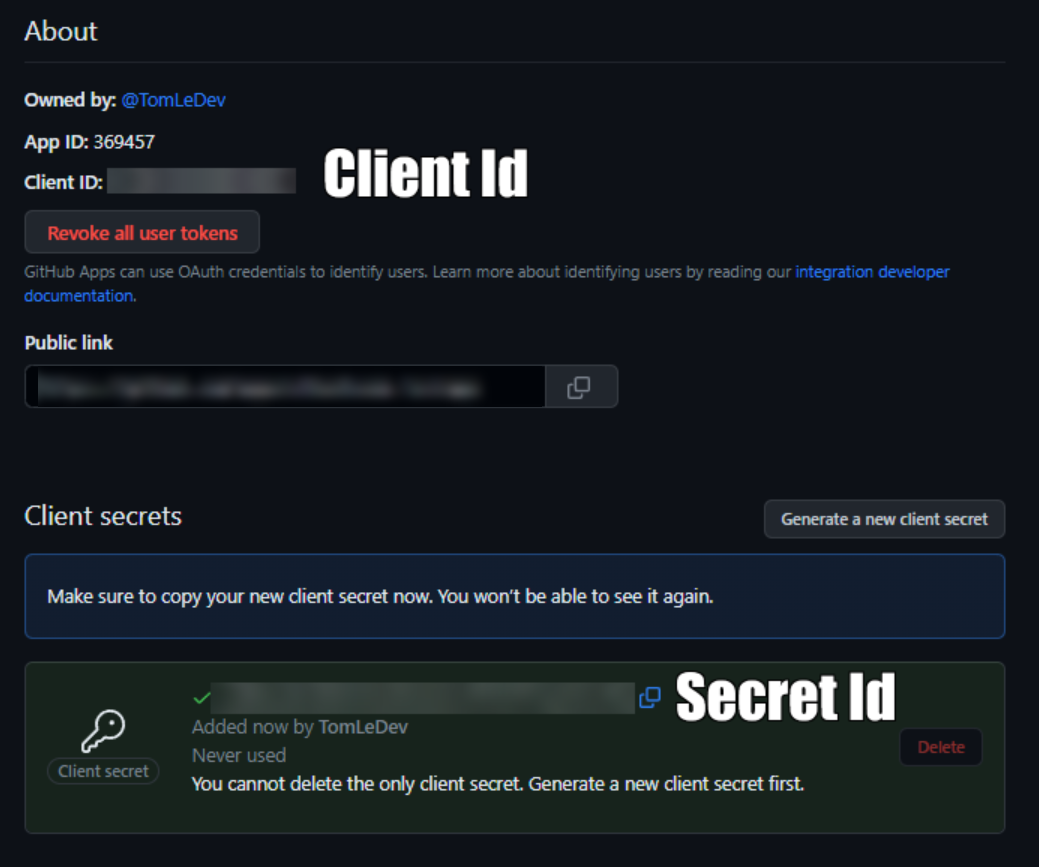
9. Find Client ID and Secret ID
Here is the management page for your OAuth2 application to which you were automatically redirected after creating the GitHub application.
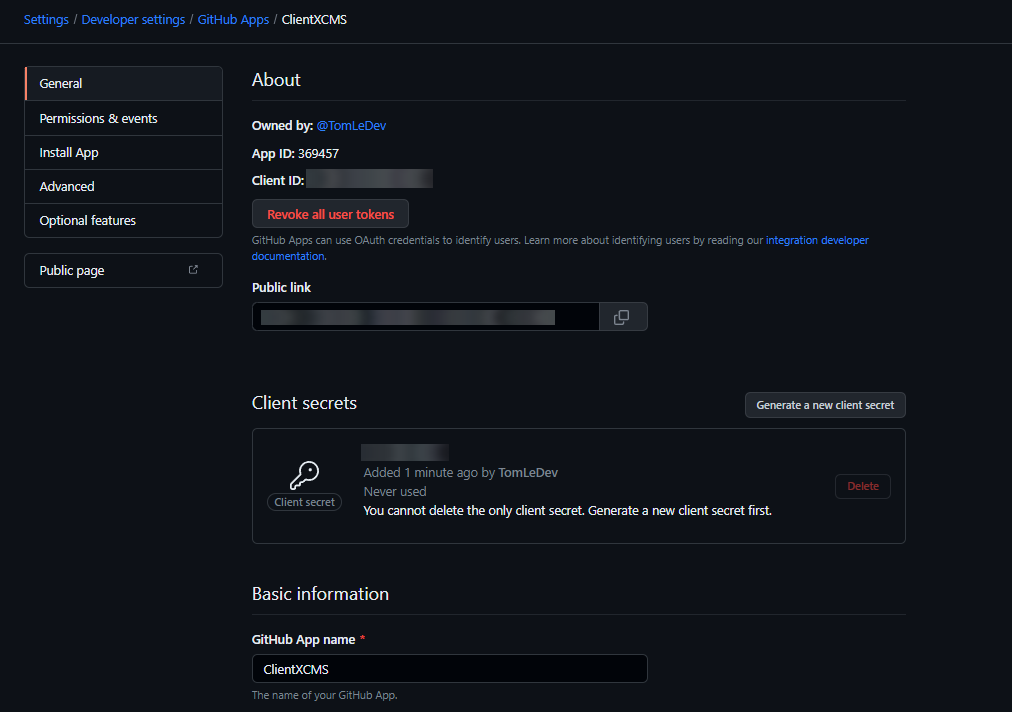
- Client Secret: You can find the Client Secret in the "Client secrets" section of the GitHub application management page. Click on the "Generate a client secret" button to generate a Secret ID key.

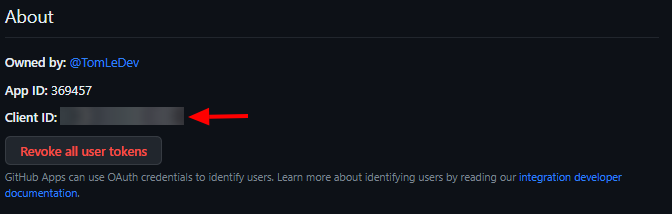
- Client ID: You can easily find the Client ID at the top of the application management page, in the "About" section.
10. You will then have the "Client ID" and "Client Secret" keys for your application that you must specify in the platform OAuth configuration on ClientXCMS.
Facebook
1. Go to the Facebook developer portal and log in or sign up to create a Meta developer account. Enter your personal information.
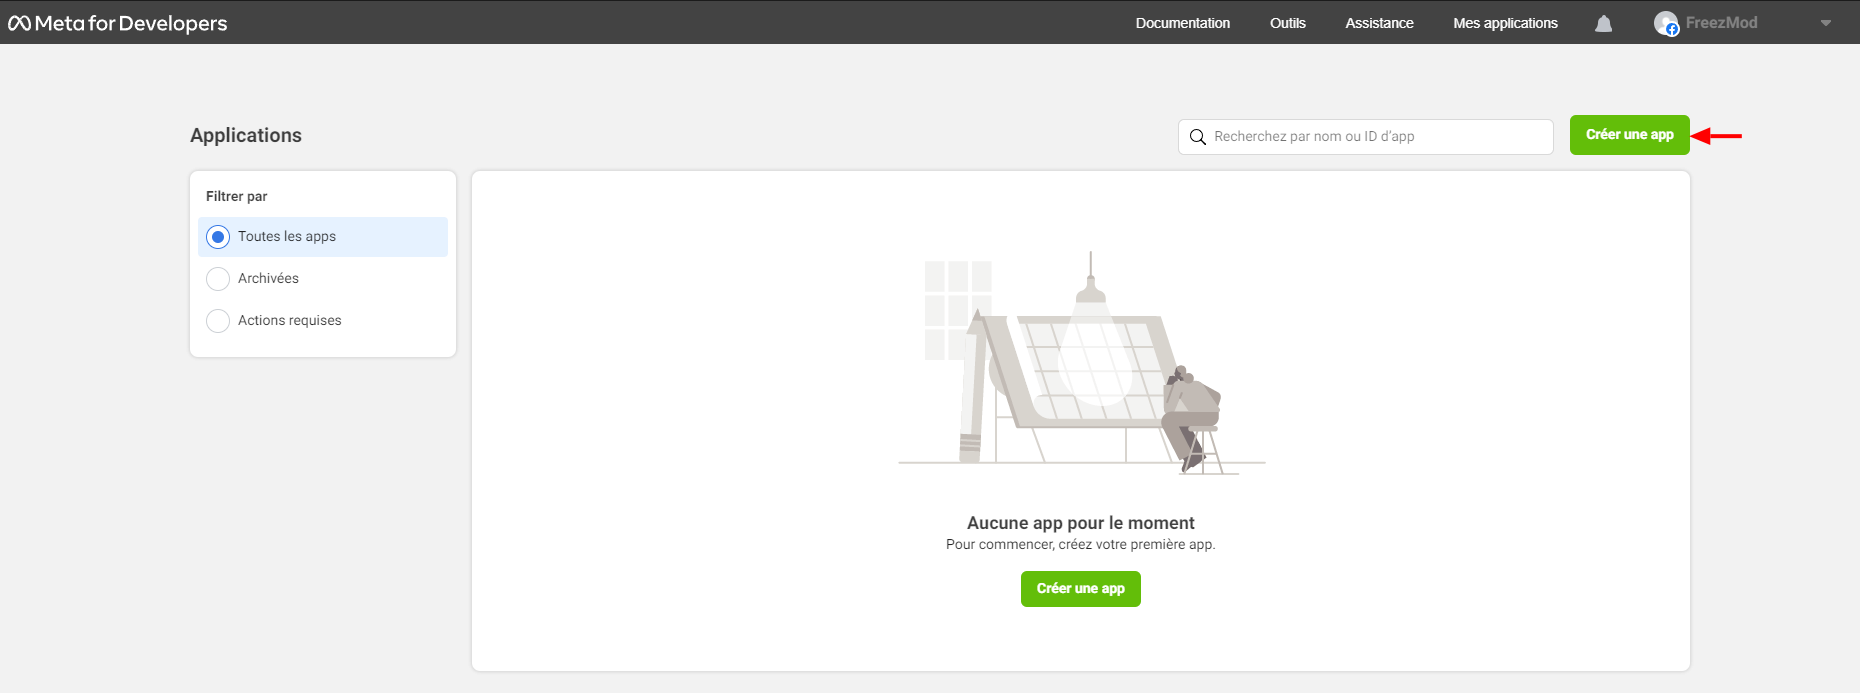
2. Create a new application by clicking on the green button at the top right "Create an app".
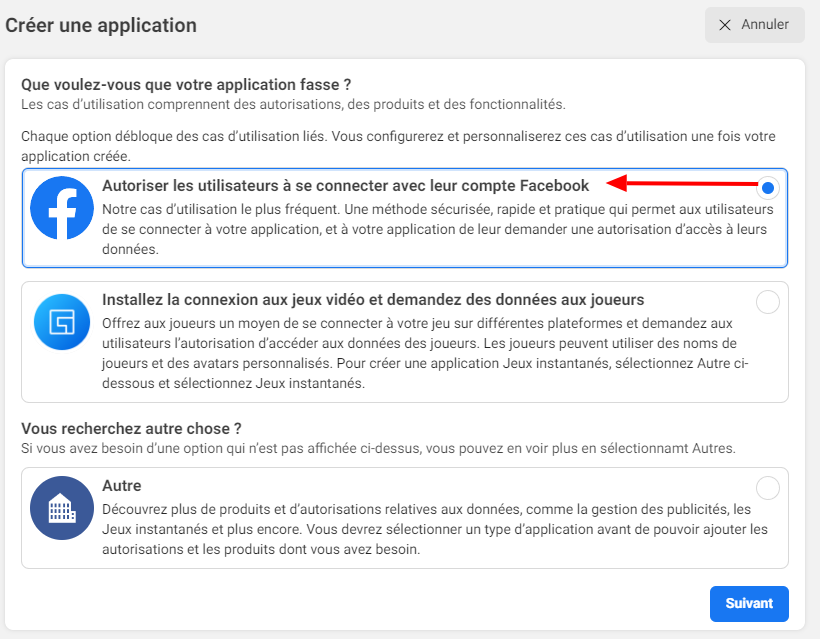
3. Select the "Allow users to log in with their Facebook account" option, then click on the blue "Next" button below.
4. Specify the application-related information, such as its name and contact email. Click on the green "Create an application" button below to save the application.

5. Once the application is created, you will be automatically redirected to the application management panel.
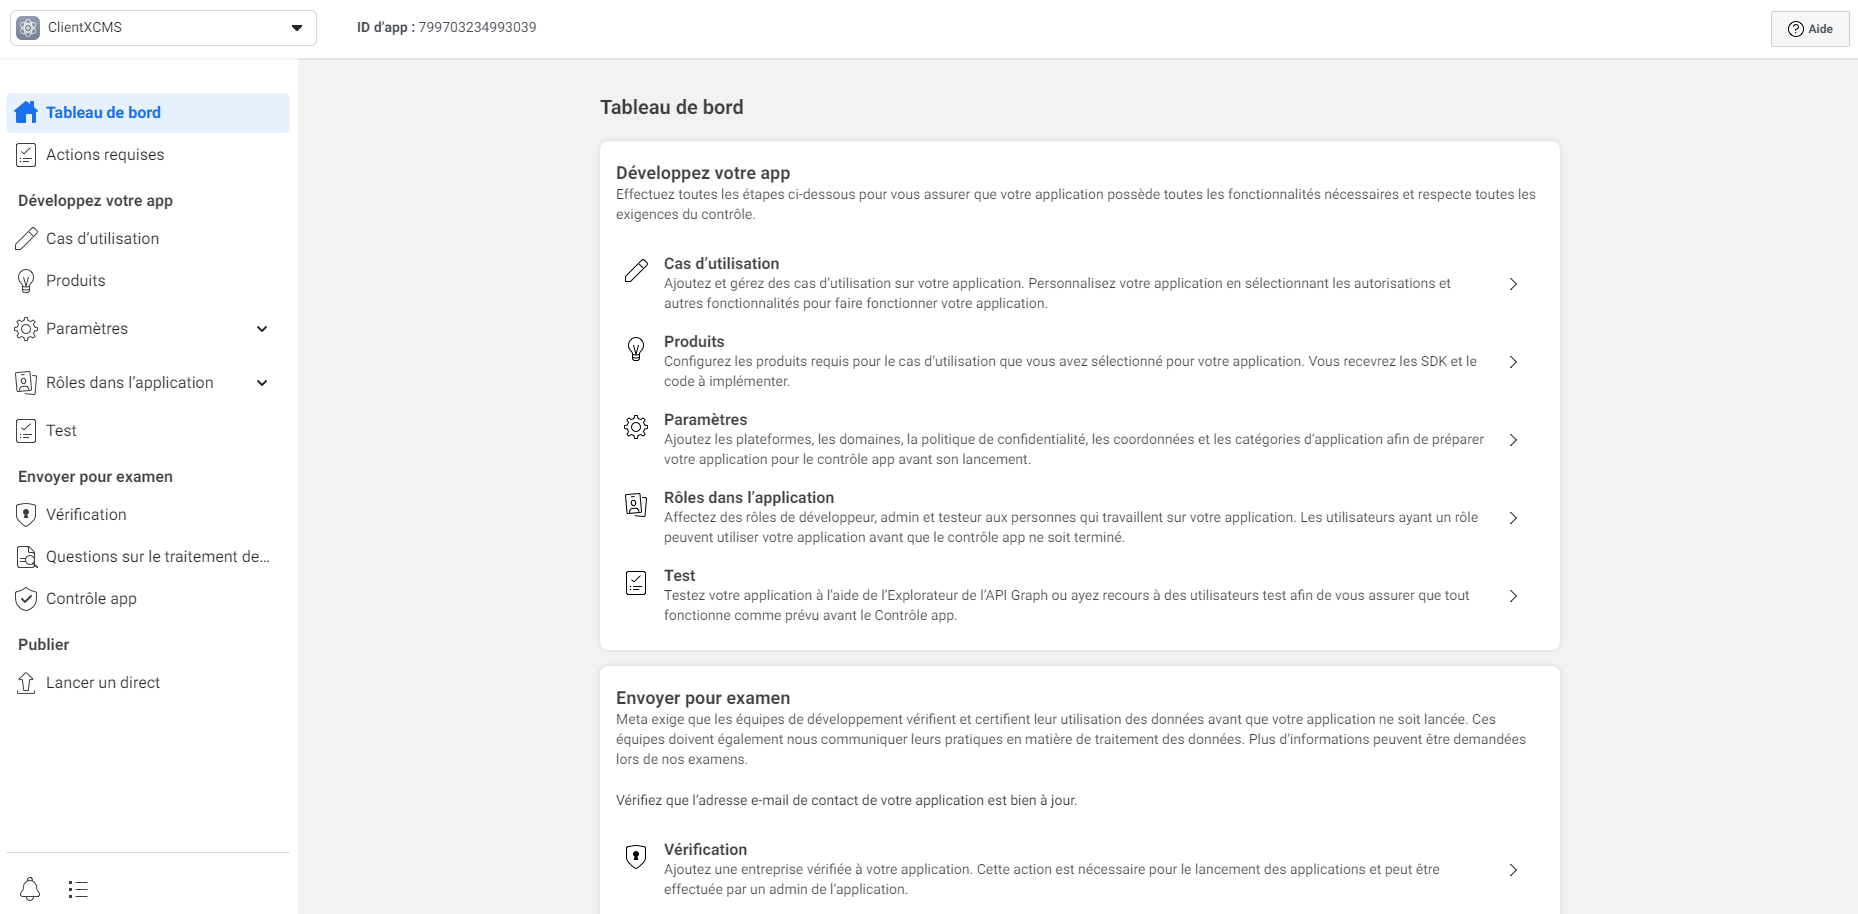
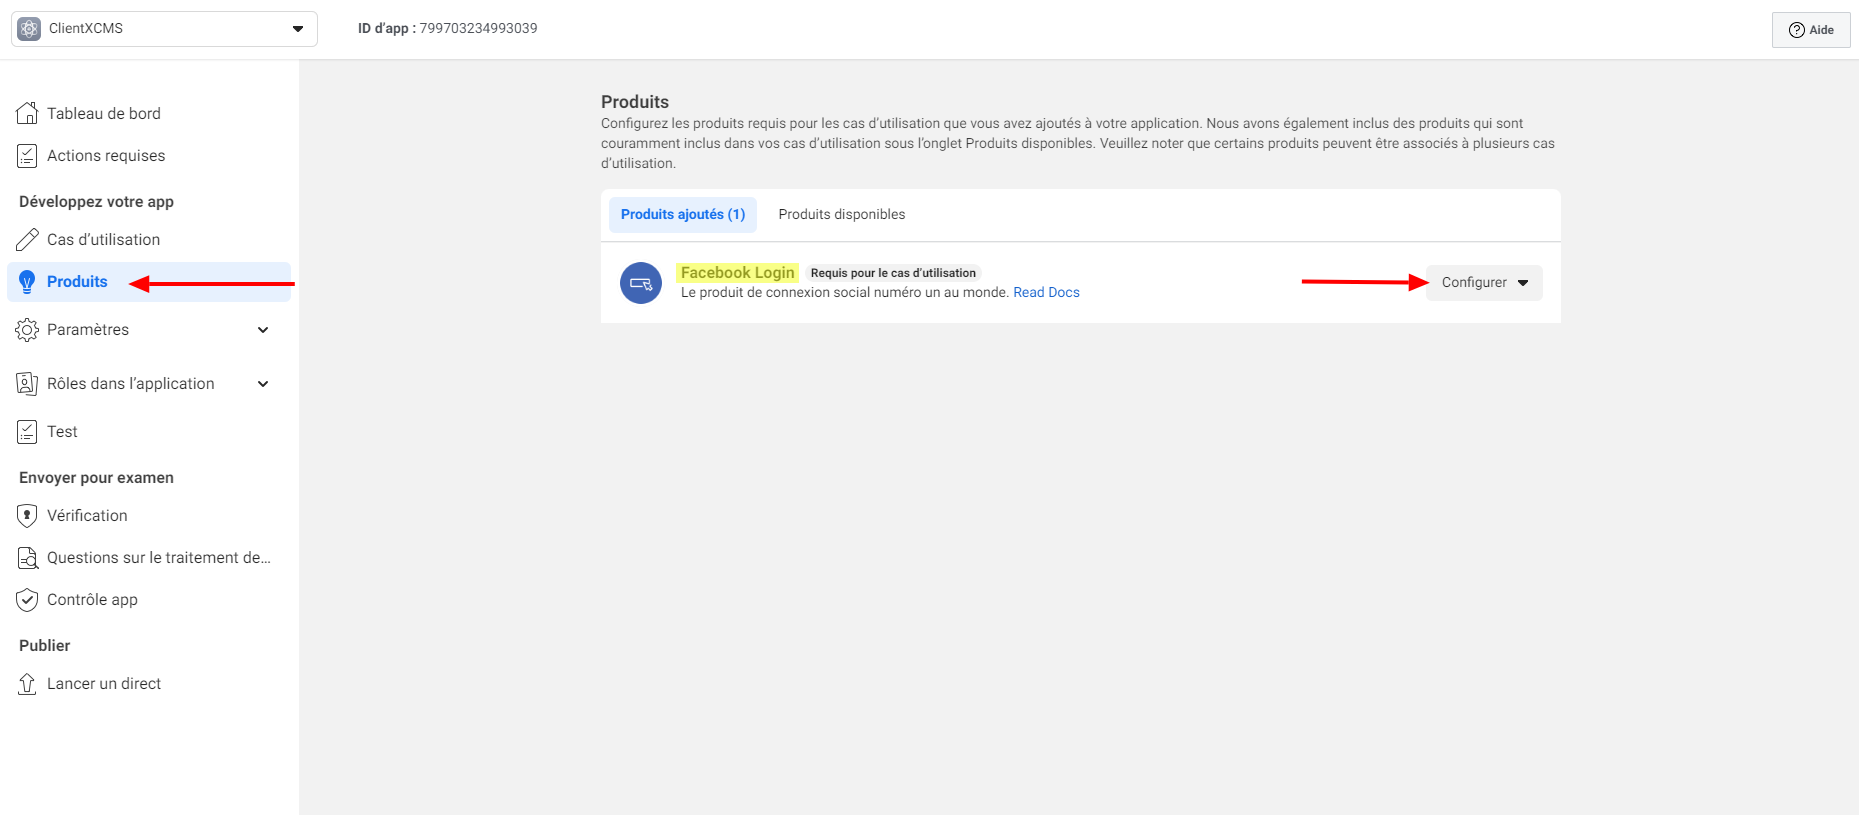
6. In the "Products" section of your application dashboard, select "Facebook Login" and configure the required settings using the "Configure" button.
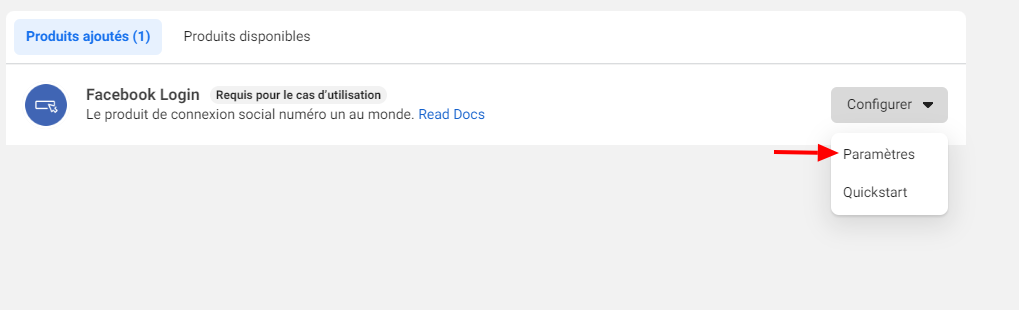
 In the small dropdown menu of the "Configure" button, select "Settings".
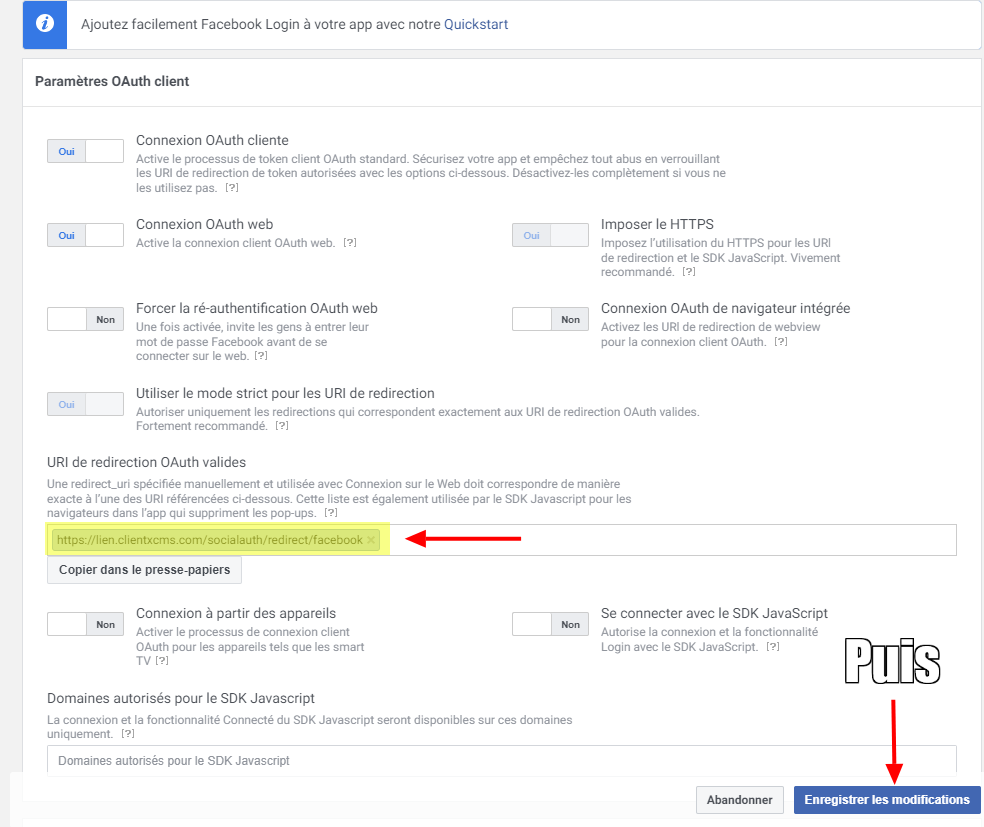
7. In the "Valid OAuth Redirect URIs" section, specify the value of the redirect URI given by ClientXCMS in the configuration page, then click on the blue "Save Changes" button at the bottom right.
9. In the application panel navigation menu, go to "Settings" then to the "Basic" subcategory. On the first line, you will find the application identifier (Client ID) and the secret key (Secret ID), click on the "Show" button to copy the generated key.
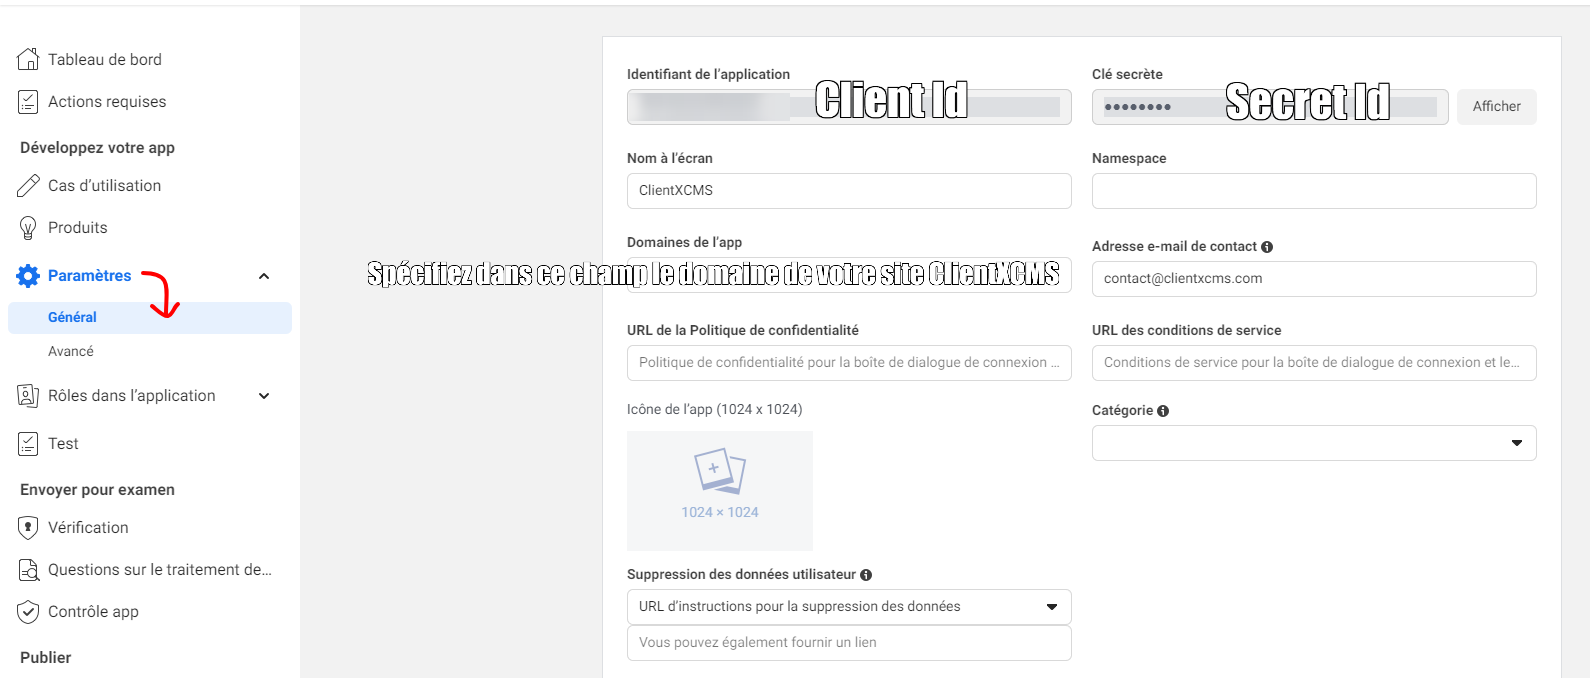 You will then have the "Client ID" and "Client Secret" keys for your application that you must specify in the platform OAuth configuration on ClientXCMS.
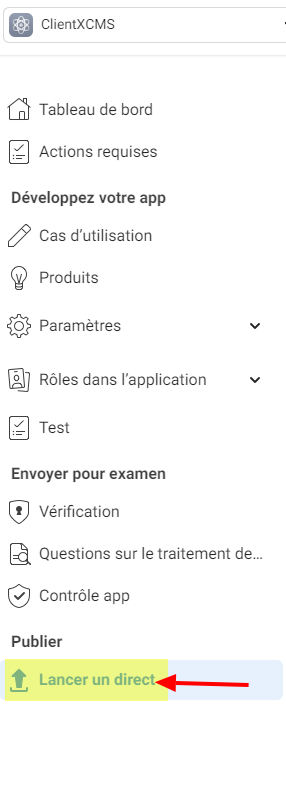
10. Publish the application to make it public: In the Facebook application management panel menu, in the "Publish" category, click on the "Go live" button to launch the OAuth2 application in production mode so that it can be used by your users.
Microsoft
1. Go to the Microsoft Entra admin center and sign in with your Microsoft account.
2. In the left navigation menu, go to Identity > Applications > App registrations.
3. Click on "+ New registration" at the top.
4. Fill in the required information:
- Name: Enter a display name for your application (e.g., the name of your site).
- Supported account types: Select "Accounts in any organizational directory and personal Microsoft accounts" to allow all Microsoft users to authenticate.
- Redirect URI: Select "Web" as the platform, then enter the redirect URI given by ClientXCMS in the configuration page.
5. Click on the "Register" button to create the application.
6. You will be redirected to the Overview page of your application. Copy the "Application (client) ID" — this is your Client ID.
7. In the left menu, click on "Certificates & secrets".
8. Under the "Client secrets" tab, click on "+ New client secret".
9. Enter a description (e.g., "ClientXCMS OAuth") and select an expiration duration, then click "Add".
10. Important: The secret Value is displayed only once. Copy it immediately — this is your Client Secret. If you lose it, you will need to generate a new one.
11. Insert both the Client ID and Client Secret in the platform OAuth configuration on ClientXCMS.
Minecraft
Minecraft authentication uses Microsoft OAuth2 (since Minecraft accounts have migrated to Microsoft accounts). The setup is the same as for Microsoft.
1. Follow steps 1 to 10 of the Microsoft section above to register an application in the Microsoft Entra admin center and obtain your Client ID and Client Secret.
2. During registration, make sure to use the Minecraft-specific redirect URI given by ClientXCMS in the configuration page (the Minecraft redirect URI is different from the Microsoft one).
3. In your application's API Permissions section, click "+ Add a permission", then select "Xbox Live" and add the XboxLive.signin scope. This permission is required for Minecraft authentication through Xbox Live services.
4. Click "Grant admin consent" to approve the permission.
5. Insert the Client ID and Client Secret in the platform OAuth configuration on ClientXCMS.
Twitch
1. Make sure Two-Factor Authentication (2FA) is enabled on your Twitch account. This is required to register applications on the Twitch Developer Console.
2. Go to the Twitch Developer Console and log in with your Twitch account.
3. Click on the "Applications" tab in the top navigation.
4. Click on the "+ Register Your Application" button.
5. Fill in the required information:
- Name: Give your application a unique name (do not include "Twitch" in the name).
- OAuth Redirect URLs: Enter the redirect URI given by ClientXCMS in the configuration page and click "Add".
- Category: Select the category that best describes your application (e.g., "Website Integration").
6. Complete the CAPTCHA verification and click "Create" to register the application.
7. Back on the Applications tab, find your newly created application and click the "Manage" button.
8. Copy the Client ID displayed on the management page.
9. Click the "New Secret" button to generate a Client Secret. Important: The secret is displayed only once — copy it immediately and store it securely.
10. Insert both the Client ID and Client Secret in the platform OAuth configuration on ClientXCMS.
ClientXCMS
ClientXCMS can also be used as an OAuth2 provider, which allows your users to log in using their ClientXCMS account.
Access to the ClientXCMS OAuth2 provider is not available by default. You must open a support ticket on the ClientXCMS platform to request access to the OAuth2 provider feature. The ClientXCMS team will provide you with the necessary credentials.
1. Open a support ticket on the ClientXCMS platform requesting access to the OAuth2 provider.
2. The ClientXCMS team will review your request and provide you with a Client ID and Client Secret.
3. Once you have received the credentials, insert them in the platform OAuth configuration on ClientXCMS.
4. Make sure to set the redirect URI given by ClientXCMS in the configuration page when communicating with the support team.
Error 403 Problem
To fix this problem, go to your Plesk management panel, then Web Application Firewall. In the firewall mode change to "Detection only". It should initially be at "On".
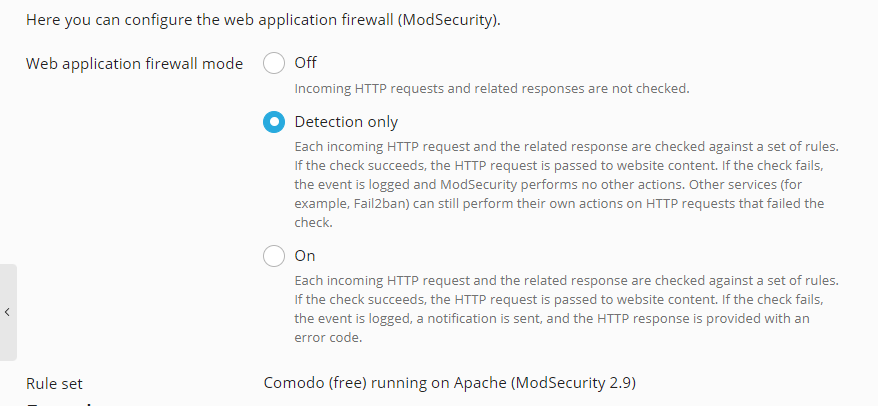
Re-test the connection via Google.
Congratulations
You have now configured the SocialAuth+ extension with OAuth2 authentication keys. Your customers will now be able to log in and register more easily, faster, and securely on your client area!