Groups
In CLIENTXCMS, a group corresponds to a logical category of products that you offer in your store.
The objective is simple: organize your services and improve the purchasing process so your customers can navigate easily and buy quickly. Good grouping improves the user experience, guides purchasing decisions, and gives your store a structured and professional appearance.
Each group can be fully customized: name, description, visibility, etc.
You can manage groups from:
Settings > Store Settings > Groups
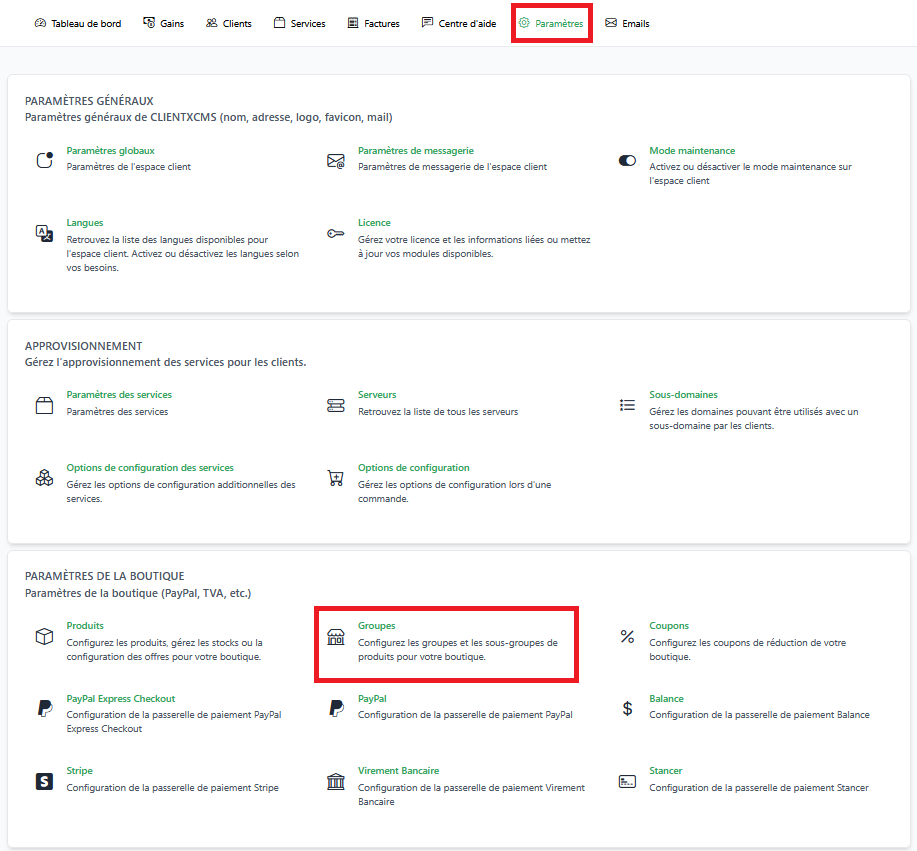
A product must always belong to a group to appear in the store. Take a moment to structure your groups before adding new services.
Why use groups?
Imagine you sell pterodactyl hosting services, VPS, and domain names. Creating a distinct group for each of these product types allows your customers to:
- See everything related to the same service in one place
- Quickly understand the differences between offers
- Save time for your customers in their purchasing journey
It's a bit like organizing store aisles 🛒 — the clearer it is, the more effective it is.
User Interfaces
Store-side View
The store is available from the URL: /store
Each group is accessible via a structured URL as follows:
https://demo.clientxcms.com/store/groupname
For example, for a group named VPS: https://demo.clientxcms.com/store/vps
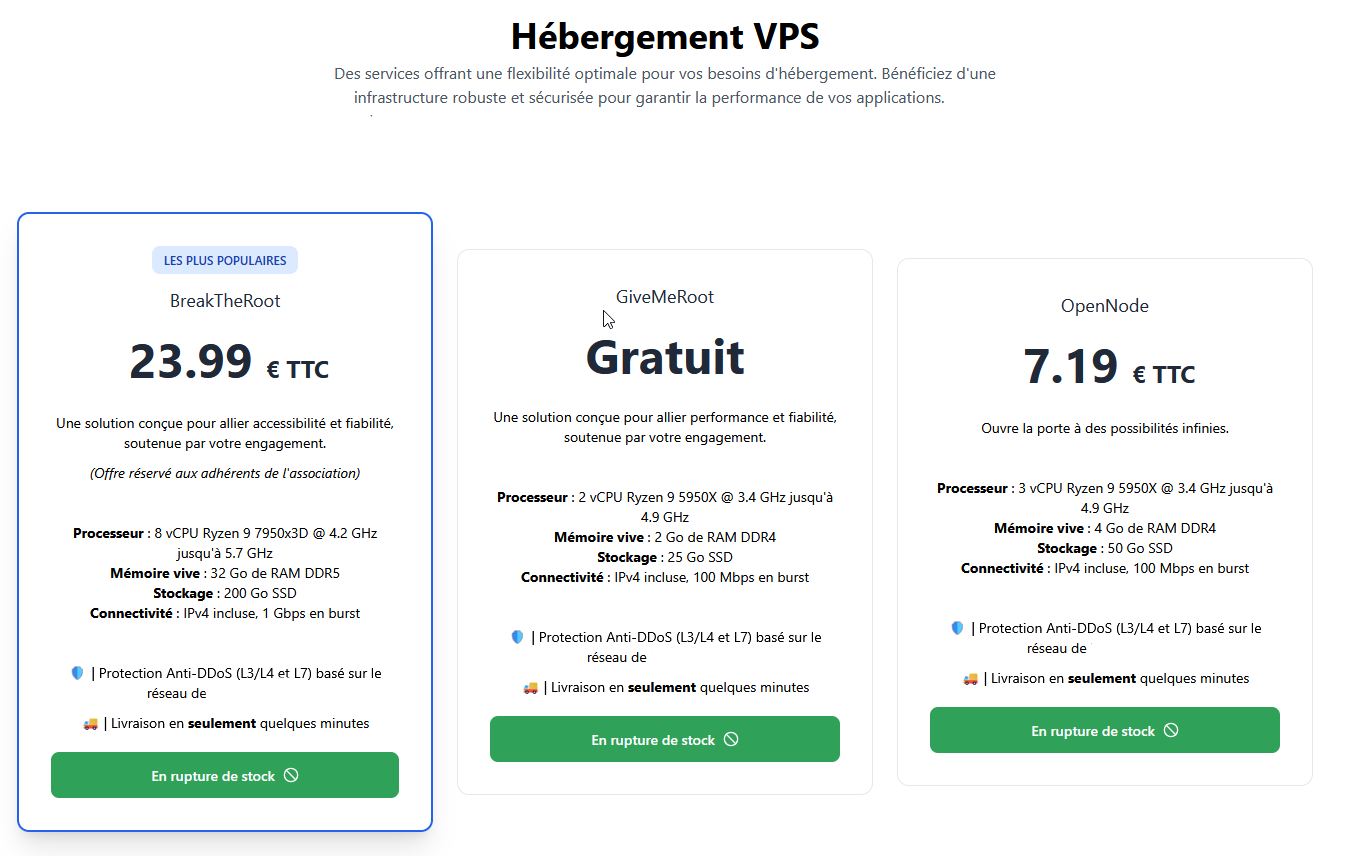
This allows you to organize your offers by service type, such as:
- Minecraft Hosting
- KVM VPS
- LXC VPS
- ClientXCMS Licenses
- Hosting Starter Pack
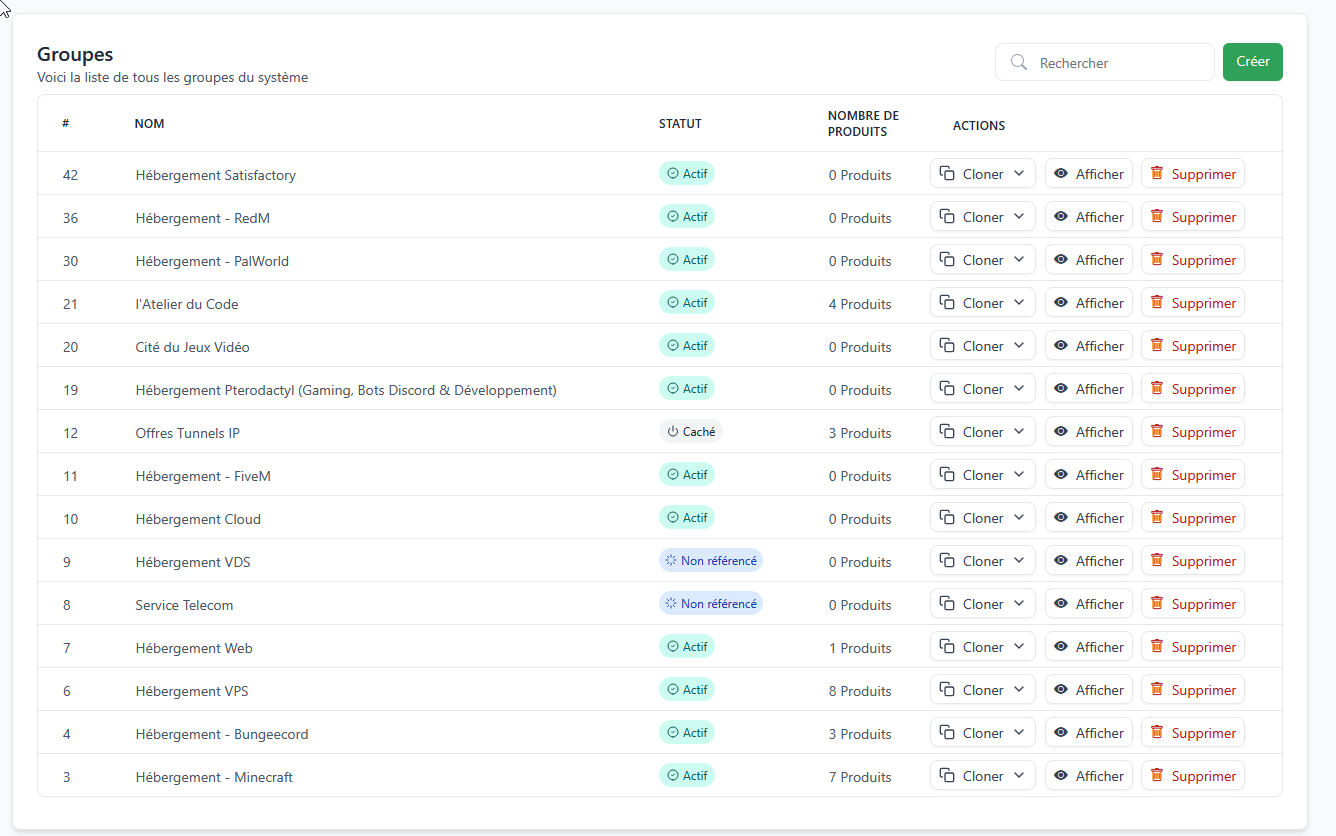
Administrator View
In the administration interface, you have a complete list of created groups. You can:
- Search for a group by name
- Perform actions like view, edit, duplicate, or delete a product
Managing Product Groups
Creating a New Group
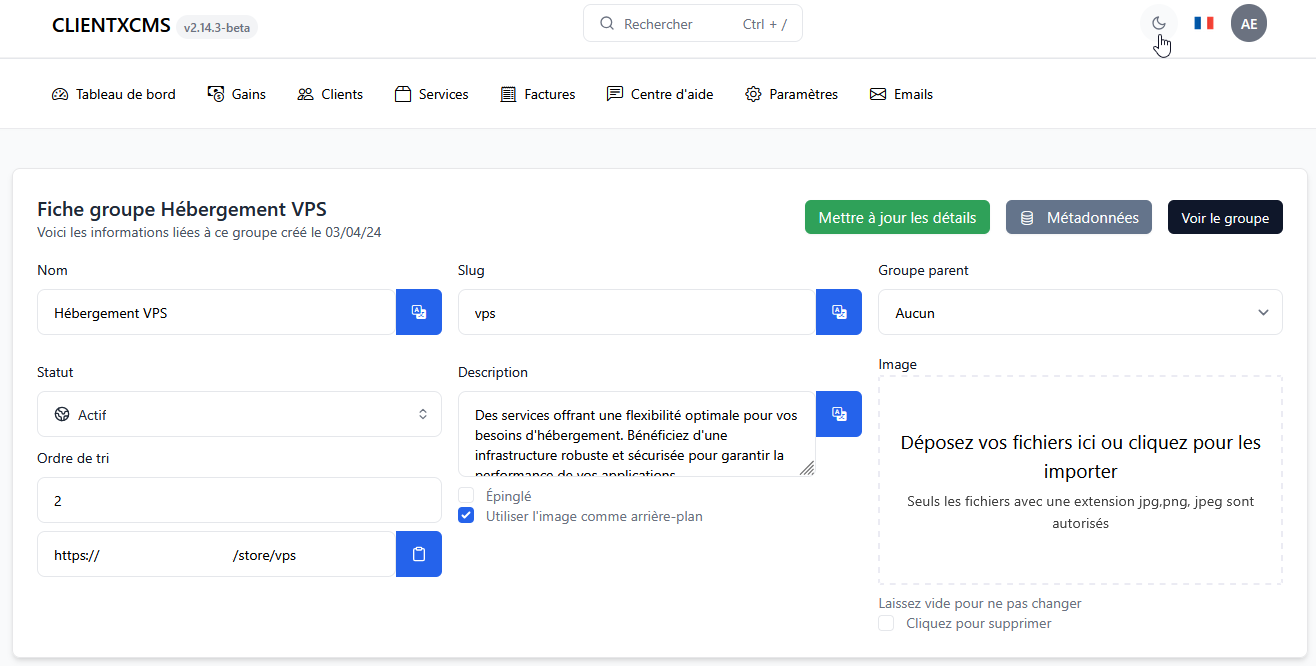
Creating a group allows you to organize your products logically and visually in the store. Here are the fields to fill in when creating:
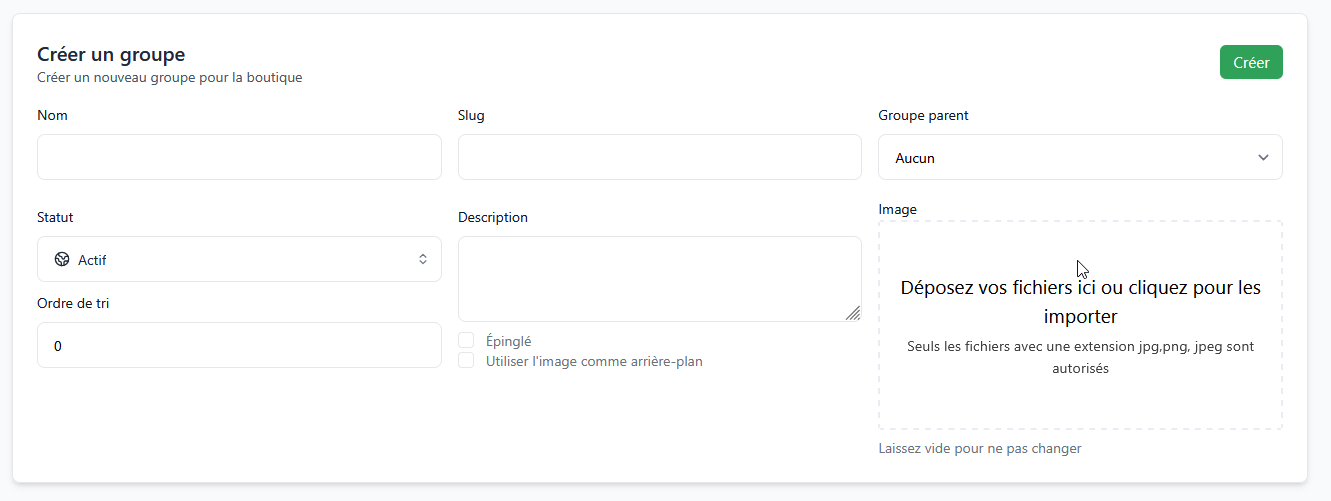
Name | (text)
The group name as it will appear in the store.
Slug | (text)
The custom URL ending, allowing direct access to the group page.
(example: vps-linux will give a URL like: clientxcms.com/store/vps-linux)
Parent Group | (dropdown menu)
If this group belongs to a higher category, you can attach it here. Useful for creating hierarchies (e.g.: VPS > VPS Linux).
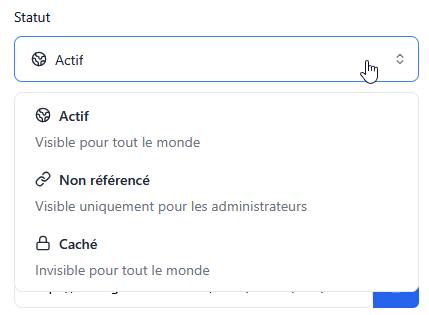
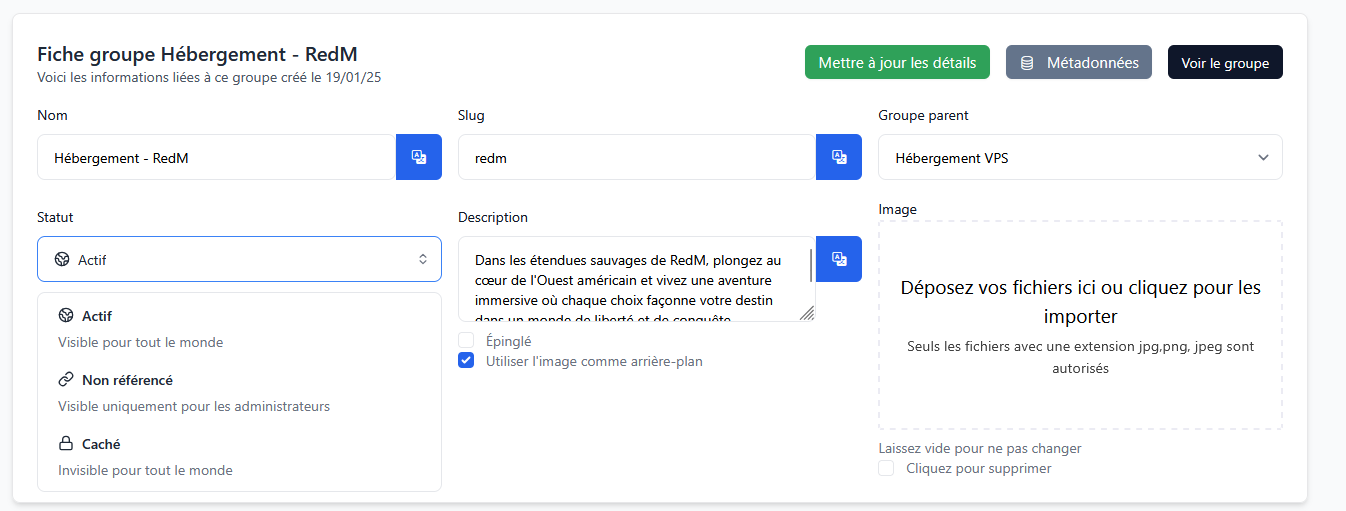
Status | (dropdown menu)
Defines the group's visibility in the store:
- Active: Available for purchase
- Unlisted: Accessible only via direct link
- Hidden: Unavailable for purchase
Description | (text area)
A short explanatory text that will be visible on the group page, to help customers understand the overall offer.
Image | (files)
Illustration displayed on the store. This makes the interface more visual and attractive.
Sort Order | (numeric field)
Controls the group's position in the displayed list. The lower the number, the higher the group appears in the store.
Pinned | (checkbox)
Enable this option to highlight the group — it will be displayed at the top of the list in your store.
Use Image as Background | (checkbox)
Allows you to apply the selected image as the group's background on the store page. Ideal for creating an ambiance or strong visual landmark.
Take the time to write a clear and engaging name and description. This is often the first thing your customers will read before discovering your products, and it will improve your SEO.
Cloning a Group
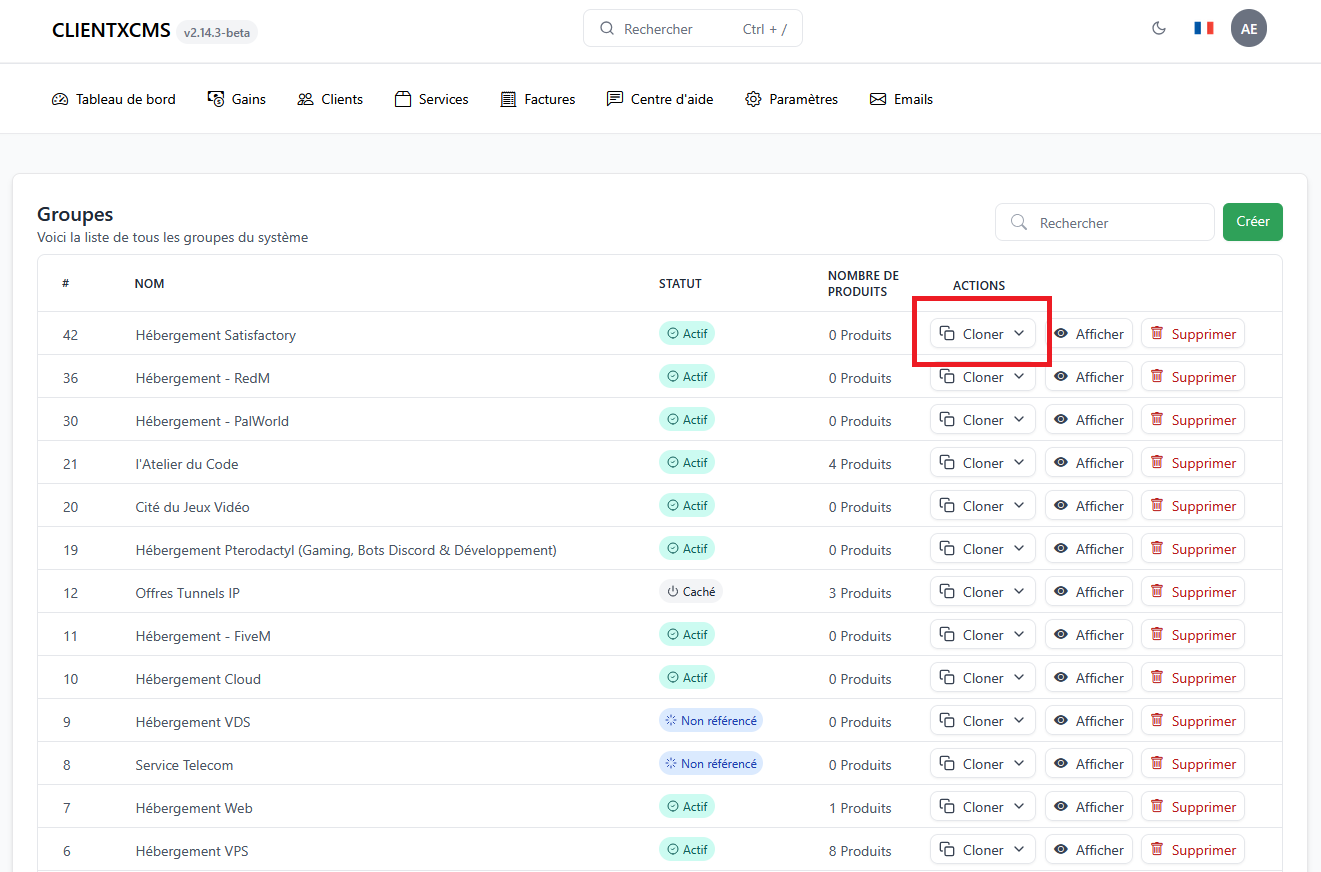
You can clone an existing group from the administration interface by clicking the "Clone" button located to the right of the group in question, in your groups list.
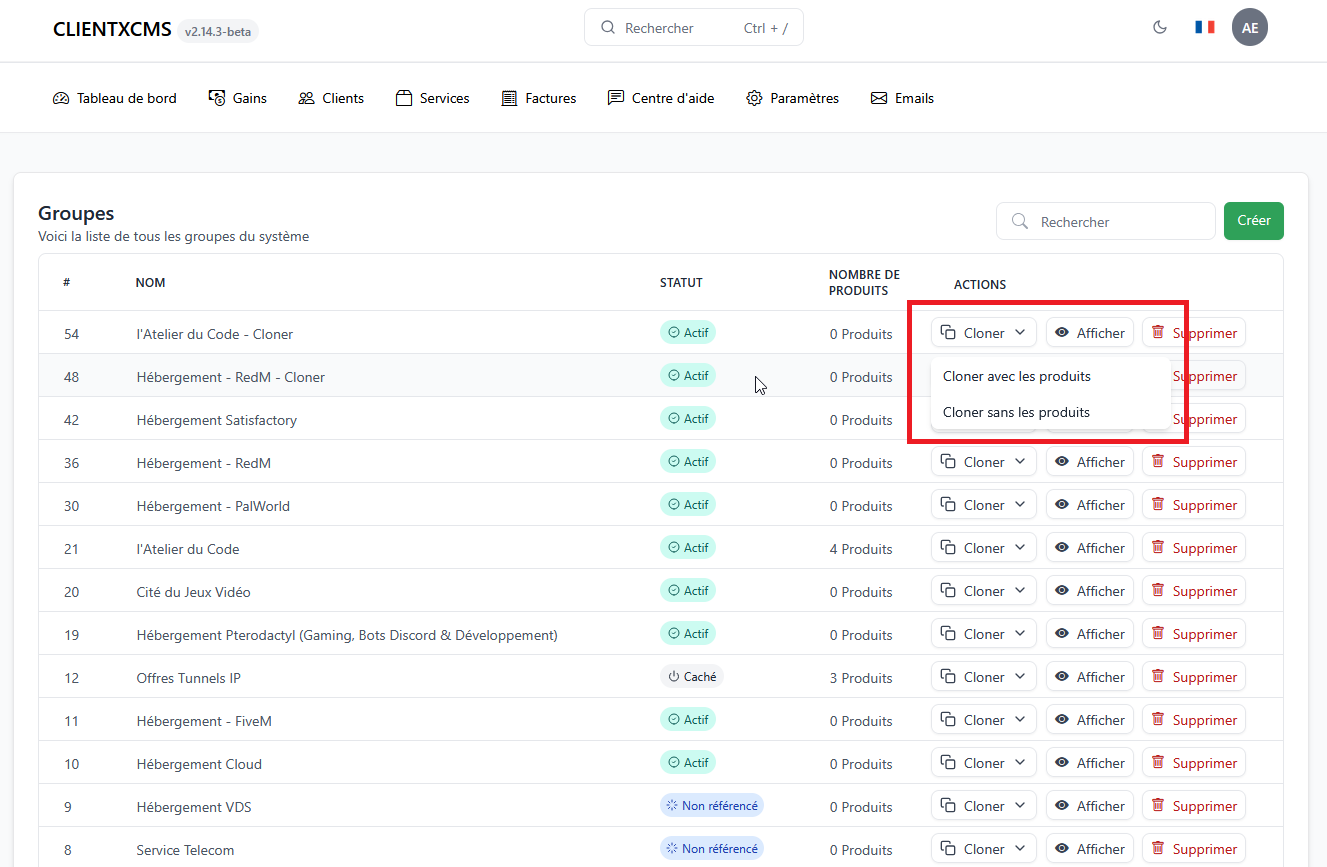
Once this action is initiated, two choices are available:
-
Clone with products: This option duplicates not only the group settings (name, description, visibility...), but also all the products it contains. The cloned products will have the same settings as the originals, saving you time if you want to offer a similar offer in another category.
-
Clone without products: Here, only the group is duplicated, without any products. This is ideal if you want to start from a group template without duplicating its content.
Screenshots:
-
Group list with the "Clone" button visible
-
Modal window with the two options "With products" / "Without products"
- Final result: preview of the cloned group with or without products depending on the chosen option

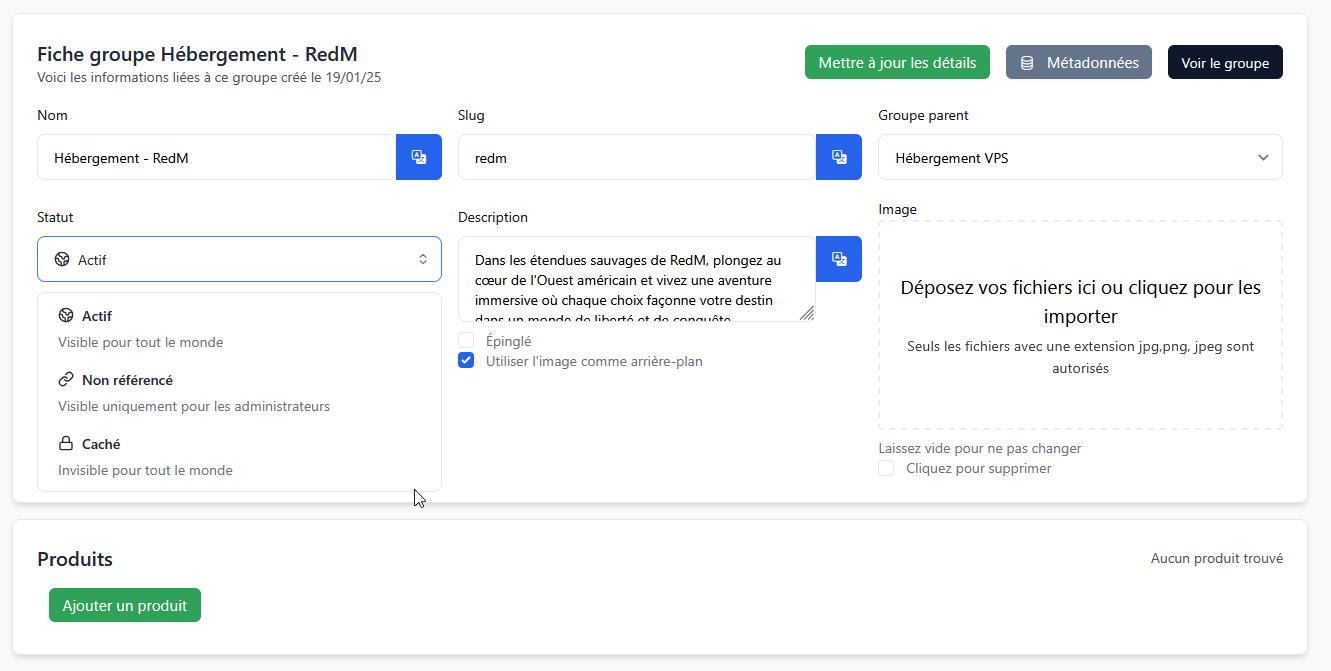
Editing a Group
To edit a group, click the "View" button in your groups list on the administration interface.
Modify the necessary information for the initiated edit, then save your changes with the "Update details" button.
Group Status
The status determines the product's visibility and accessibility:
| Status | Visibility |
|---|---|
| Active | Available for purchase |
| Unlisted | Accessible only via direct link |
| Hidden | Unavailable for purchase |
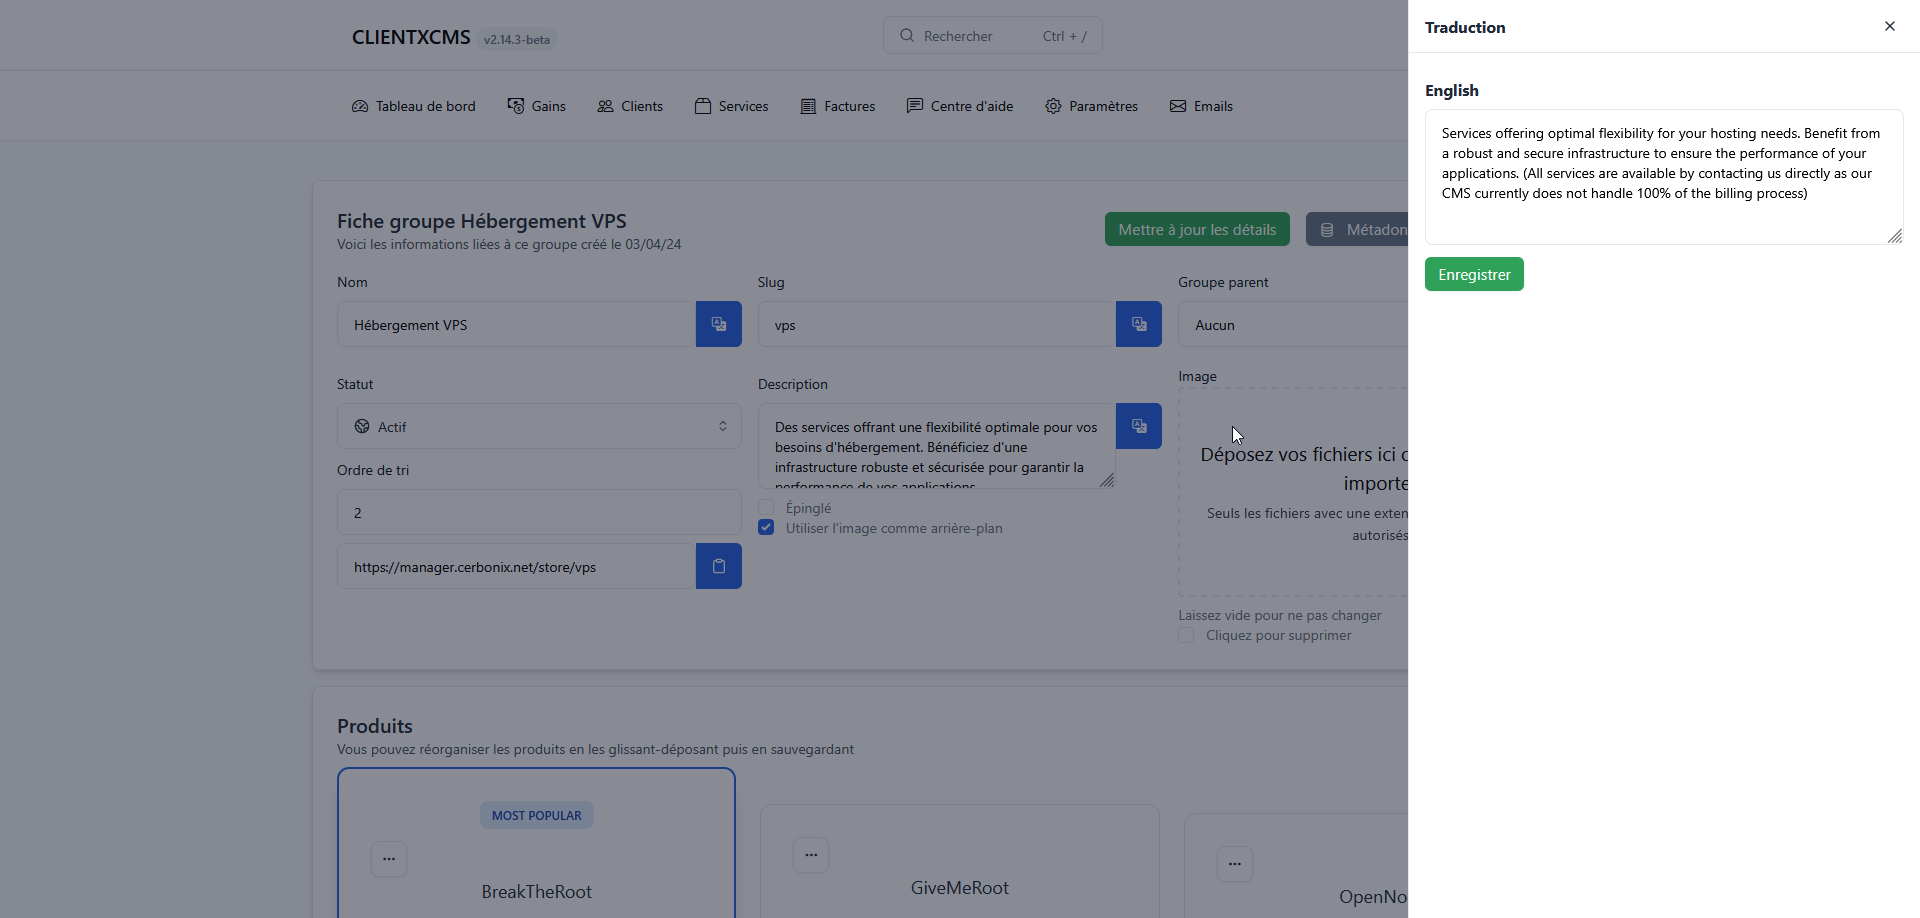
Translating a Group
CLIENTXCMS integrates a complete translation system allowing you to adapt each group to different languages, without compromising precision or user experience.
Each field (name, description, slug, etc.) is fully customizable according to the selected language. You can therefore refine each translation manually to ensure perfect consistency with your offer.
Please refer to the section on translations for more information on this subject.
The quality of your translations can greatly improve the perception of your store by international users — take the time to adapt them carefully.
Deleting a Group
Group deletion is only possible if it contains no products.
This restriction prevents accidental deletion of services visible in the store.
✅ Steps to follow:
- Make sure the group in question contains no active products.
- Once this condition is met, you can delete it from the group management page in your administration area.
- Click this button: a confirmation request will appear to validate your action.
- After confirmation, the group will be permanently deleted.
Deletion is permanent: the group cannot be restored once deleted. Make sure you have properly removed or moved linked products before proceeding, otherwise you will not be able to perform any group deletion action.
Hiding a Group
This option allows you to make a group invisible in the store with a single click.
When this box is checked:
- The group no longer appears in the public interface,
- And none of the associated products will be visible or available for purchase.
This is an ideal solution if you want to temporarily disable a range of services without deleting it.
✅ How to do it?
Simply change the Status of your group in the dropdown menu located within your group edit.
You can reactivate the group display at any time by selecting "Active". This is a flexible way to manage seasonal products, offers under maintenance, or delayed launches.
Advanced Management
Available Metadata
| Key | Value | Description |
|---|---|---|
use_image_as_background | true | Link to add the product to cart |
pinned_label | Text | Product made on demand |
group_url | Text | Add to cart button title |
Use metadata to refine product behavior without modifying its code or source module.