Servers
Each of your customers' products/services is linked to a CLIENTXCMS server that bridges your CLIENTXCMS instance with your server and application (Proxmox, Plesk, Pterodactyl). To access this, go to the Settings menu, then to the Provisioning section, and finally to Servers.
Server List
You can view available servers on the main page.
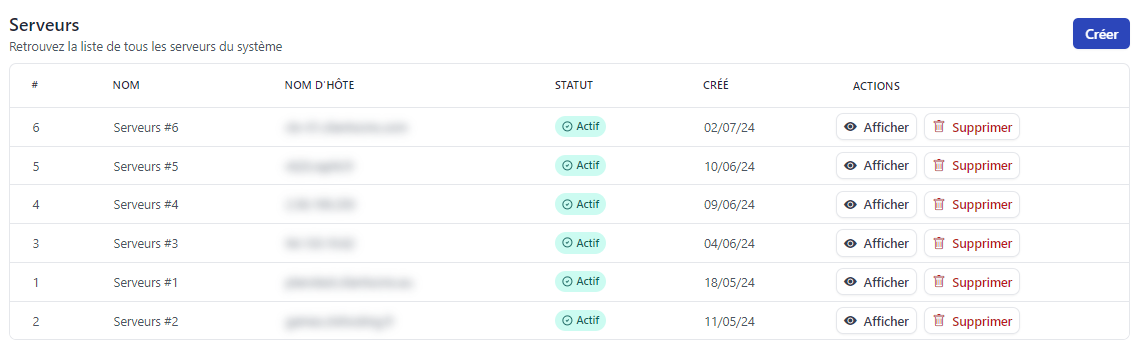
Actions
-
View: Allows you to see the product details and modify it
-
Delete: Allows you to delete a product
Deleting a server can cause problems in the system.
Creation
To add a server, click the "Create" button at the top left of the page.
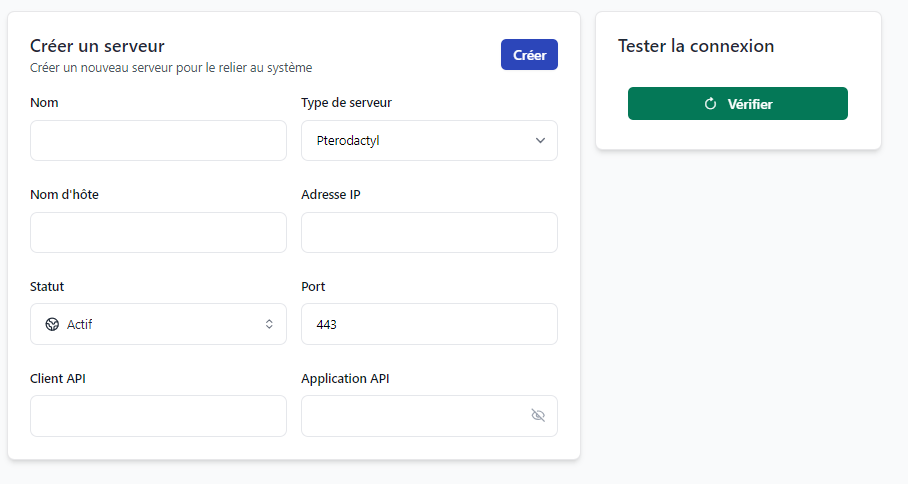
Name: Name that will be displayed for informational purposes.
Server Type: Server type. Will be used to test the connection and connect to your server. (If empty, please add a delivery extension)
Hostname: Hostname of your server
IP Address: IP address that will be used to connect to your server.
Status: Server status (See here for more information)
Port: Port used to connect to your server
Username: Username that will be used to connect to your server
Password: Password that will be used to connect to your server
Status
Statuses allow you to define the server state.
- Available: Visible and available for service installation
- Unlisted: Visible only to administrators
- Hidden: Invisible
Port Management
You have the choice of which port to use to connect to your server. Here is a list of recommended ports for each extension.
| Module | Port without SSL | Port with SSL |
|---|---|---|
| Proxmox | 8806 | 443 |
| Wisp | 80 | 443 |
| Pterodactyl | 80 | 443 |
| cPanel | 2083 | x |
| Plesk | 8443 | x |
| Virtualizor | 4083 | x |
Deletion
You can delete a server by clicking the red button in the "Actions" column. A confirmation will be requested, after which it will delete the server.
We recommend setting it to hidden status if you no longer wish to use it.
Deleting a server can cause problems in the system, especially if there are products/services already configured on the server.
Editing
To edit a server, click the "View" button in the "Actions" column. You can modify the server information.
Connection Test
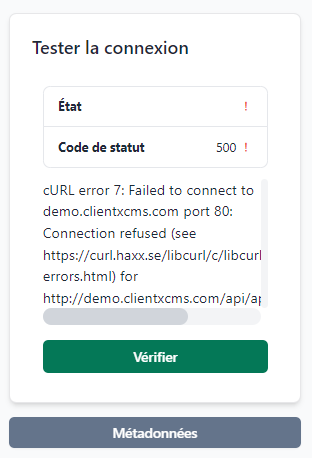
To verify that CLIENTXCMS can connect to your remote server's API, a button is available to test the connection and give you feedback. On success, you will see a success message. On failure, check the server settings you entered. After testing the connection, you can save the changes or create your server.
Example of success and error messages:

Metadata
| Key | Value | Description |
|---|---|---|
proxmox_backup_storage | string | PBS storage name |
virtualizor_cloud_url | https://example.com:4083/ | Reseller connection URL |
proxmox_backup_node | pbs | Name of the node containing backups |