Cloud
This page will guide you through the installation of ClientXCMS Next Gen for cloud versions on CLIENTXCMS servers. Cloud offerings are automatically installed on CLIENTXCMS servers. This allows you to benefit from an optimized installation and automatic updates. This method is available for all Premium and Enterprise licenses.
Domain
When ordering your license, you had to provide a domain name. This domain name will be used for the client area installation. If you haven't ordered a license yet, go to this page to order one.
If you want to install the client area on a subdomain, you can do so by entering the subdomain in the "Change Domain" section of your client area.
Installation
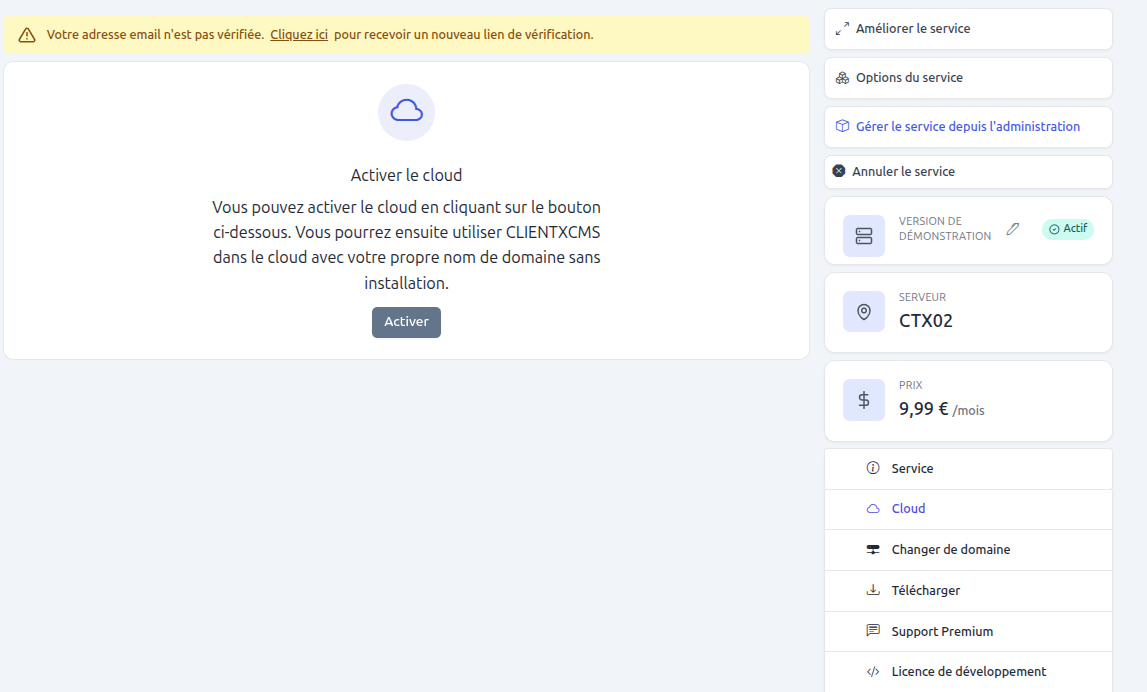
The first step is to activate the cloud offering from your client area. To do this, go to the "My Services" page and click on the "Cloud" button in the navigation tabs.
After this, the system will indicate the server on which your client area will be installed. You simply need to link your domain to CLIENTXCMS servers. To do this, retrieve the CNAME record provided by the system and add it to your domain.

For more information on adding the CNAME, a dedicated page is available here.
To verify that your domain is properly linked to CLIENTXCMS servers, you can use the CheckHost website and enter your domain. It should indicate that the CNAME record is properly linked to the CLIENTXCMS server IP address.
Our system will then install the client area on your domain. The process may take a few minutes. Once the installation is complete, you can access your admin area by going to your domain with the credentials sent by email.
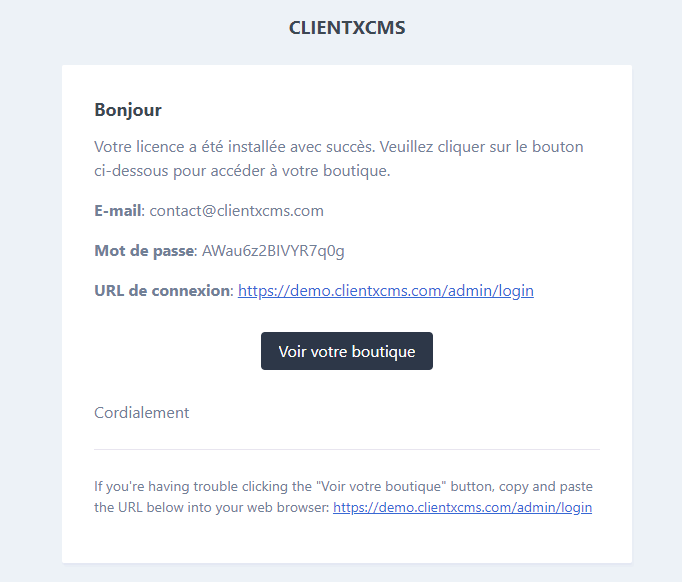
Once on your domain, you will be automatically redirected to clientxcms.com to validate your license. You can then log in to your client area with the credentials sent by email.
Cloudflare
Once you are logged into your Cloudflare account, you need to add a CNAME record for your subdomain.

-
Click the "Add a record" button and select "CNAME" from the dropdown menu.
-
Enter the subdomain you specified in the "Change Domain" section of your client area in the "Name" field and the CNAME record provided by the system in the "Target" field.
-
Click "Save" to add the record.
You must disable the proxy for the subdomain you specified.
OVH
To add a CNAME record to your OVH domain, follow these steps:
- Log in to your OVH client area and click on "Domains" in the left menu.
- Click on the domain you want to modify.
- Click on the "DNS Zone" tab in the horizontal menu.
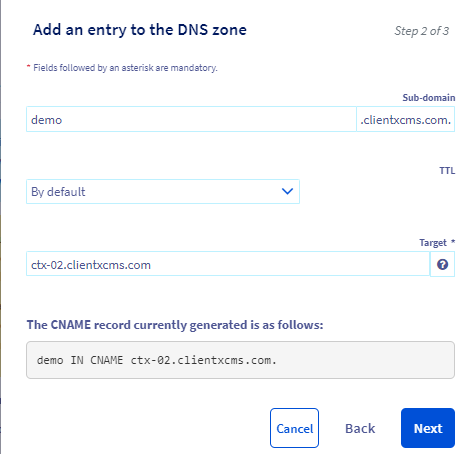
- Click the "Add a record" button and select "CNAME" from the dropdown menu.
- Enter the subdomain you specified in the "Change Domain" section of your client area in the "Name" field and the CNAME record provided by the system in the "Target" field.
- Click "Next" to add the record.
- Click "Confirm" to validate the changes.
- Wait a few minutes for the changes to take effect.
Domain Modification
You can change your client area domain at any time from your client area. To do this, go to the "Change Domain" page and enter the new domain you want to use. You will need to add a CNAME record for the new domain beforehand.
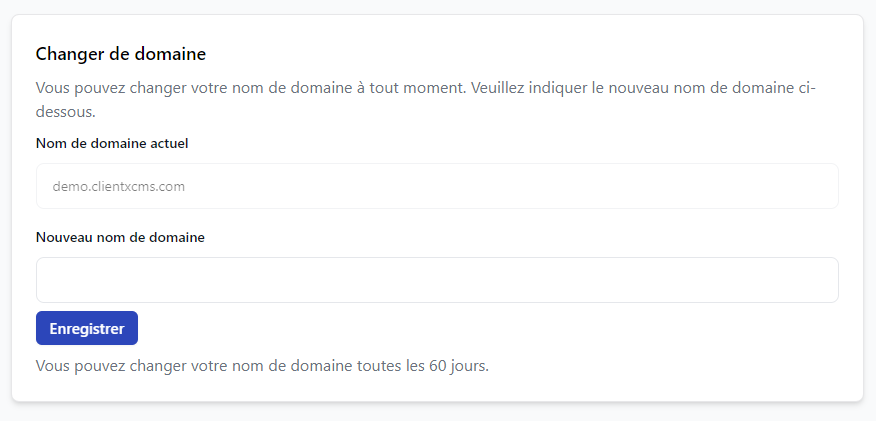
Domain modification is possible every 60 days. For subdomain changes, this is not considered a domain change.
Instance Reinstallation
If you want to reinstall your client area, you can do so from your client area. To do this, go to the "Cloud" page and click on the "Reinstall" button. You will be asked to confirm the reinstallation. Once confirmed, the system will reinstall the client area on your domain.
The login credentials will be sent to you by email once the installation is complete.
In case of a reinstallation and domain change, you must change the domain before reinstalling the instance.