Mailcow
The Mailcow module lets you sell and automatically provision managed email services from CLIENTXCMS. Each service can include one or more domains, mailboxes, aliases, quotas, and sending limits.
The Mailcow module must be enabled in CLIENTXCMS before you can create a server or a product. Learn how to enable a module.
Supported Features
- Automatic domain and domain-administrator creation after an order
- Mailbox, alias, storage, and sending limits defined by the product
- Domain management from the customer area
- DNS configuration export
- Direct access to the Mailcow administration interface and SOGo
- Automatic suspension and reactivation
- Automatic expiration and termination
- Product upgrades with the new limits applied to the service
- Secondary MX and relay-all-recipients options
Prerequisites
Before connecting Mailcow to CLIENTXCMS:
- Install Mailcow and make sure its web interface and API are reachable from the CLIENTXCMS server.
- Configure a valid hostname and TLS certificate for production use.
- Retrieve the public IP address used by the CLIENTXCMS server for outbound connections.
- Create a Mailcow API key with read-write access and authorize that IP address.
Run the following command on the CLIENTXCMS server to retrieve its public IPv4 address:
curl -4 https://ifconfig.me
Copy the returned address; it is the one to authorize in Mailcow.
Both the Hostname and IP address fields in CLIENTXCMS must contain a complete URL beginning with http:// or https://. Do not enter only mail.example.com or 192.0.2.10.
For production, use HTTPS whenever possible. Examples:
Hostname: https://mail.example.com/
IP address: https://192.0.2.10/
Port: 443
If Mailcow is deliberately exposed over HTTP on a trusted private network, use http:// in both fields and the matching port, commonly 80.
Retrieve the Mailcow API Key
Log in to Mailcow with an administrator account, then:
- Open
System>Configuration>Access>API. - Enable Read-Write API access. Read-only access is not sufficient because CLIENTXCMS must create, update, suspend, and delete domains and accounts.
- Copy the generated read-write API key and keep it secret.
- In the list of allowed API IP addresses, add the public outbound IP address of the CLIENTXCMS server.
- Save the Mailcow API configuration.
If CLIENTXCMS is behind NAT or a proxy, authorize the public IP actually seen by Mailcow, not the private address of the CLIENTXCMS machine. Do not authorize every address with a global range.
The read-write API key gives access to sensitive Mailcow operations. Never publish it, send it by email, or store it in product descriptions. Revoke and replace it immediately if it is exposed.
Create the CLIENTXCMS Server
Go to Administration Area > Settings > Provisioning > Servers > New, then select Mailcow as the server type.
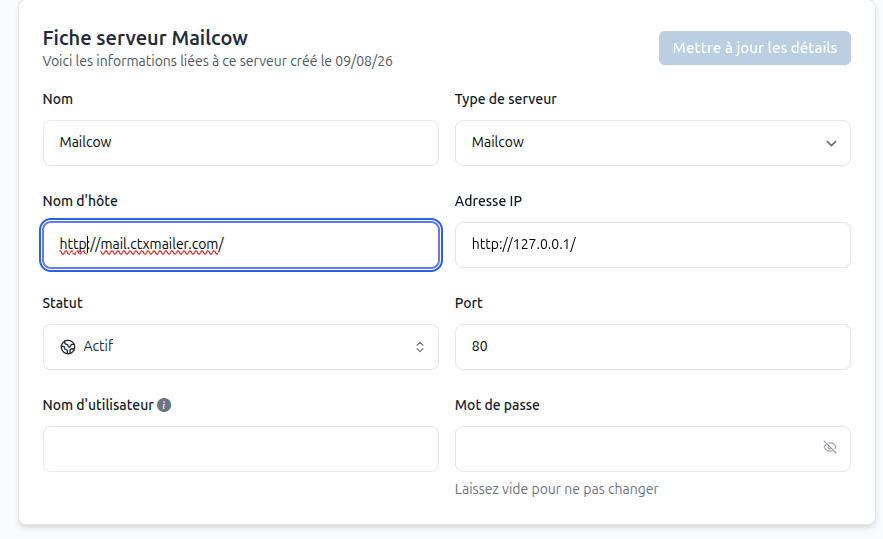
Complete the form as follows:
| Field | Configuration |
|---|---|
| Name | Internal name used to identify the Mailcow server |
| Server type | Mailcow |
| Hostname | Public Mailcow URL including http:// or https://, for example https://mail.example.com/ |
| IP address | URL used by CLIENTXCMS to reach Mailcow, also including http:// or https:// |
| Status | Active to allow provisioning on this server |
| Port | 443 for HTTPS or the port exposed by your Mailcow installation; use 80 only for HTTP |
| Username | Leave empty unless required by your installation |
| Password | Mailcow read-write API key |
Save the server and test its connection. If the test fails, verify the protocol, trailing URL, port, certificate, API key, and IP allowlist in Mailcow.
The hostname is the customer-facing Mailcow address. The IP address field can contain a private or direct URL used by CLIENTXCMS to reach the API. In both cases, include the protocol explicitly.
Create a Mailcow Product
First, create a product and select Mailcow as its type.
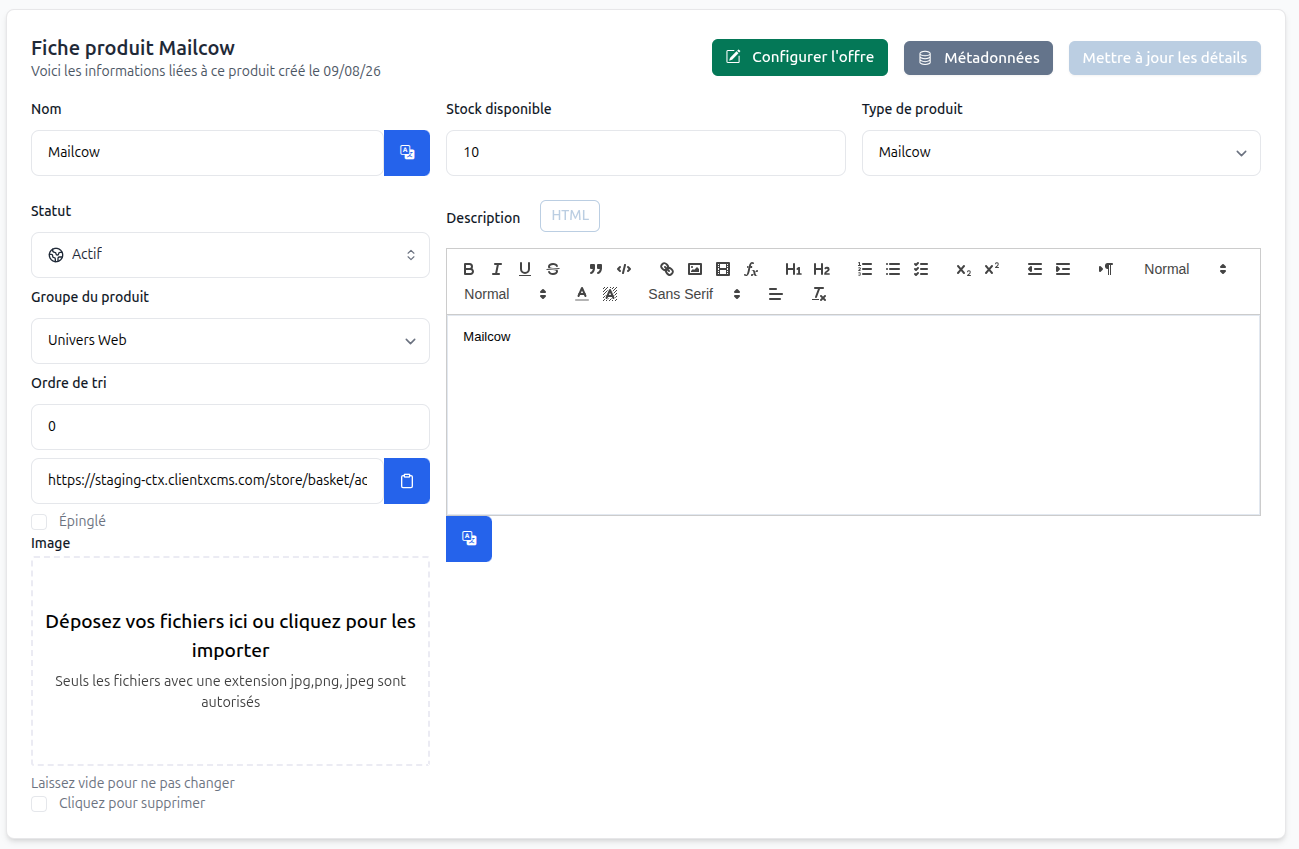
Configure its name, product group, price, stock, description, and visibility as for any other CLIENTXCMS product. Save it, then select Configure Offer.
Configure the Offer
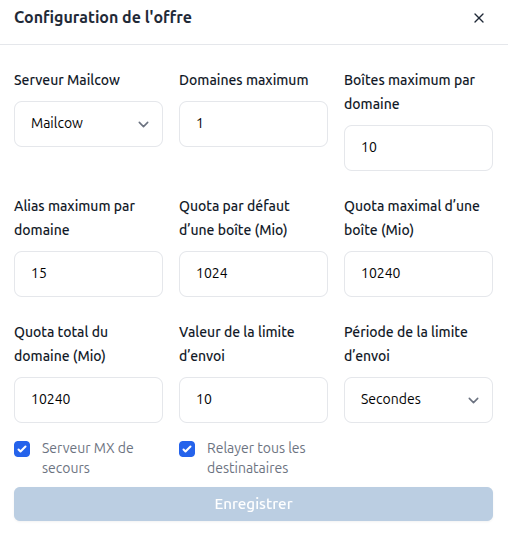
| Field | Description |
|---|---|
| Mailcow server | Server on which email services will be provisioned |
| Maximum domains | Number of domains the customer may add to the service |
| Maximum mailboxes per domain | Mailbox limit applied to each domain |
| Maximum aliases per domain | Alias limit applied to each domain |
| Default mailbox quota (MiB) | Storage initially assigned to a new mailbox |
| Maximum mailbox quota (MiB) | Highest quota that may be assigned to one mailbox |
| Total domain quota (MiB) | Total storage shared by all mailboxes in a domain |
| Sending rate value | Number of messages allowed during the selected period |
| Sending rate period | Time unit used for the sending limit |
| Secondary MX server | Configures domains for secondary MX use |
| Relay all recipients | Relays messages for all recipients; enable only when this behavior is required |
The default mailbox quota must not exceed the maximum mailbox quota, and the total domain quota must be large enough for the number of mailboxes offered. Define conservative sending limits to protect the reputation of the Mailcow server.
Do not enable Secondary MX server or Relay all recipients for a standard hosted-email offer. These options change mail routing and should be enabled only for a deliberately configured relay or backup-MX product.
Service Automation
Once the product is configured, the module follows the standard CLIENTXCMS service lifecycle:
| Event | Automated action |
|---|---|
| Creation | Creates the Mailcow domain and its administrator, generates credentials, and applies the product quotas and limits |
| Suspension | Disables access to the service while preserving its configuration for reactivation |
| Reactivation | Restores access to the existing Mailcow service |
| Upgrade | Applies the domains, mailboxes, aliases, quotas, and sending limits of the new offer |
| Expiration/termination | Removes the Mailcow resources according to the expiration workflow configured in CLIENTXCMS |
Deleting a Mailcow domain can remove its mailboxes and messages. Configure payment reminders and termination delays carefully, and maintain independent backups before deleting a service.
Customer Management
The service overview summarizes the number of configured domains, mailboxes, aliases, and the storage consumed compared with the product limits.
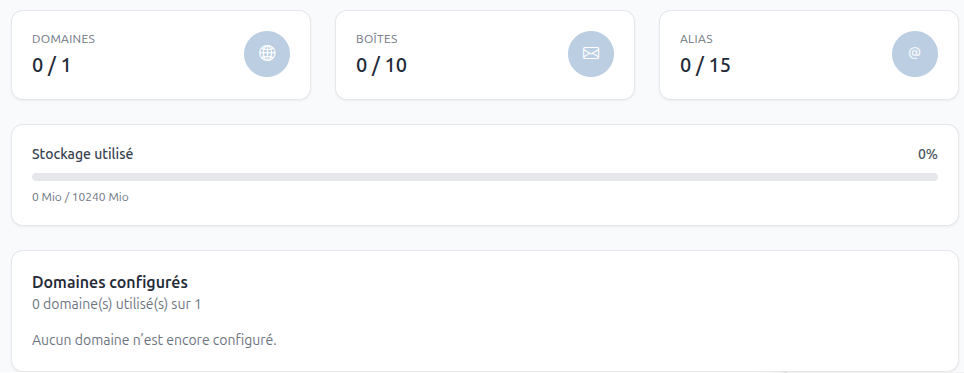
Configured Domains
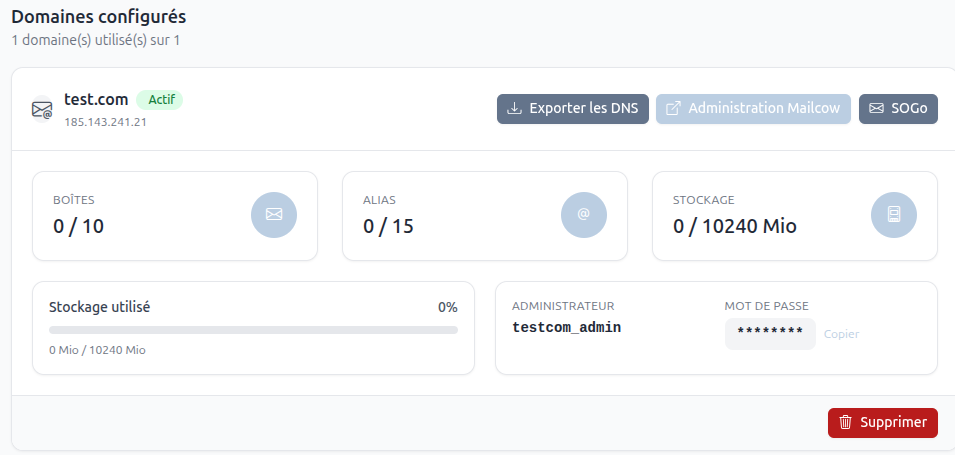
For each domain, the customer can view mailbox, alias, and storage usage. Depending on the service state, the interface also provides:
- A DNS configuration export
- Access to the Mailcow administration interface
- Access to SOGo webmail
- The generated domain-administrator credentials
- Domain deletion when allowed
Add a Domain
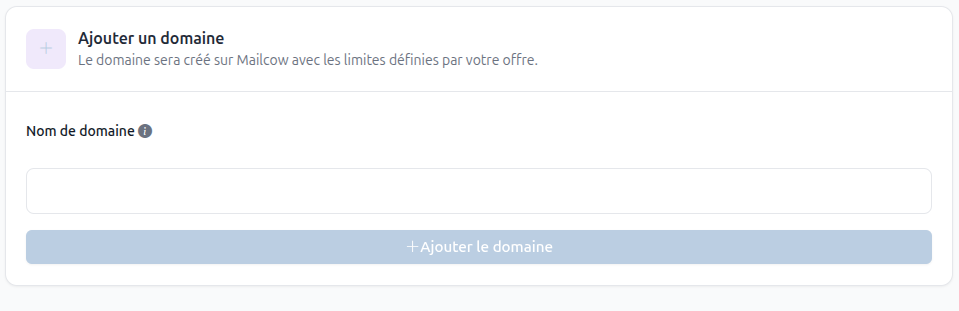
The customer enters the domain name, and CLIENTXCMS creates it in Mailcow with the limits defined by the offer. The number of configured domains cannot exceed the product limit.
After creation, the domain owner must configure the DNS records returned by the service. At minimum, verify the webmail host record, MX record, SPF, DKIM, and DMARC before using the domain in production.
Troubleshooting
- The connection test fails: verify that both URLs include
http://orhttps://, that the port matches the protocol, and that Mailcow is reachable from CLIENTXCMS. - The API returns an authorization error: use the read-write key and add the public outbound IP of CLIENTXCMS to Mailcow's API allowlist.
- TLS verification fails: use the hostname covered by the Mailcow certificate and renew or correct the certificate instead of disabling verification.
- A domain cannot be created: check product limits, existing domains in Mailcow, the read-write API key, and the Mailcow logs.
- Messages are not delivered: check MX, SPF, DKIM, DMARC, reverse DNS, Mailcow queues, and the sending-rate limit.
- An upgrade does not apply: verify that the new limits are coherent and review the CLIENTXCMS logs in
Settings>Security>History.