Pelican
The Pelican module allows you to integrate the Pelican panel directly into ClientXCMS to sell and automatically manage servers (games or applications) from your store.
It is designed for hosting providers seeking complete automation, a premium customer experience, and advanced administration-side management.
1) General Overview
With the Pelican module:
- Servers are automatically created upon order
- Customers manage their servers without leaving ClientXCMS
- The administrator maintains full control over resources, eggs, and features
- Integration relies on the official Pelican APIs
Key Features
- Automatic server provisioning
- Full customer-side management (start / stop / restart / kill)
- Controlled reinstallation (with or without egg change)
- Import and synchronization of Pelican eggs
- Advanced variable management (env vars)
- Support for paid options (RAM, CPU, disk, DB, backups...)
- Advanced administrator actions
- Cache and API call optimization
To use all the features described below, the Pelican module must be enabled in your ClientXCMS.
2) Module Activation
Once the module is installed in your ClientXCMS, you must activate it from the administration interface.
Path:
Admin → Extensions / Modules → Pelican

As long as the module is not activated, no Pelican functionality will be available.
3) Technical Requirements
ClientXCMS Side
- Up-to-date ClientXCMS
- PHP 8.1 or higher
- Administrator access
Pelican Side
- A functional Pelican panel accessible via HTTP(S)
- An Application API Key (required)
- A Client API Key (optional but recommended)
4) Creating Pelican API Keys
4.1 Application API Key
This key allows ClientXCMS to create and manage servers.
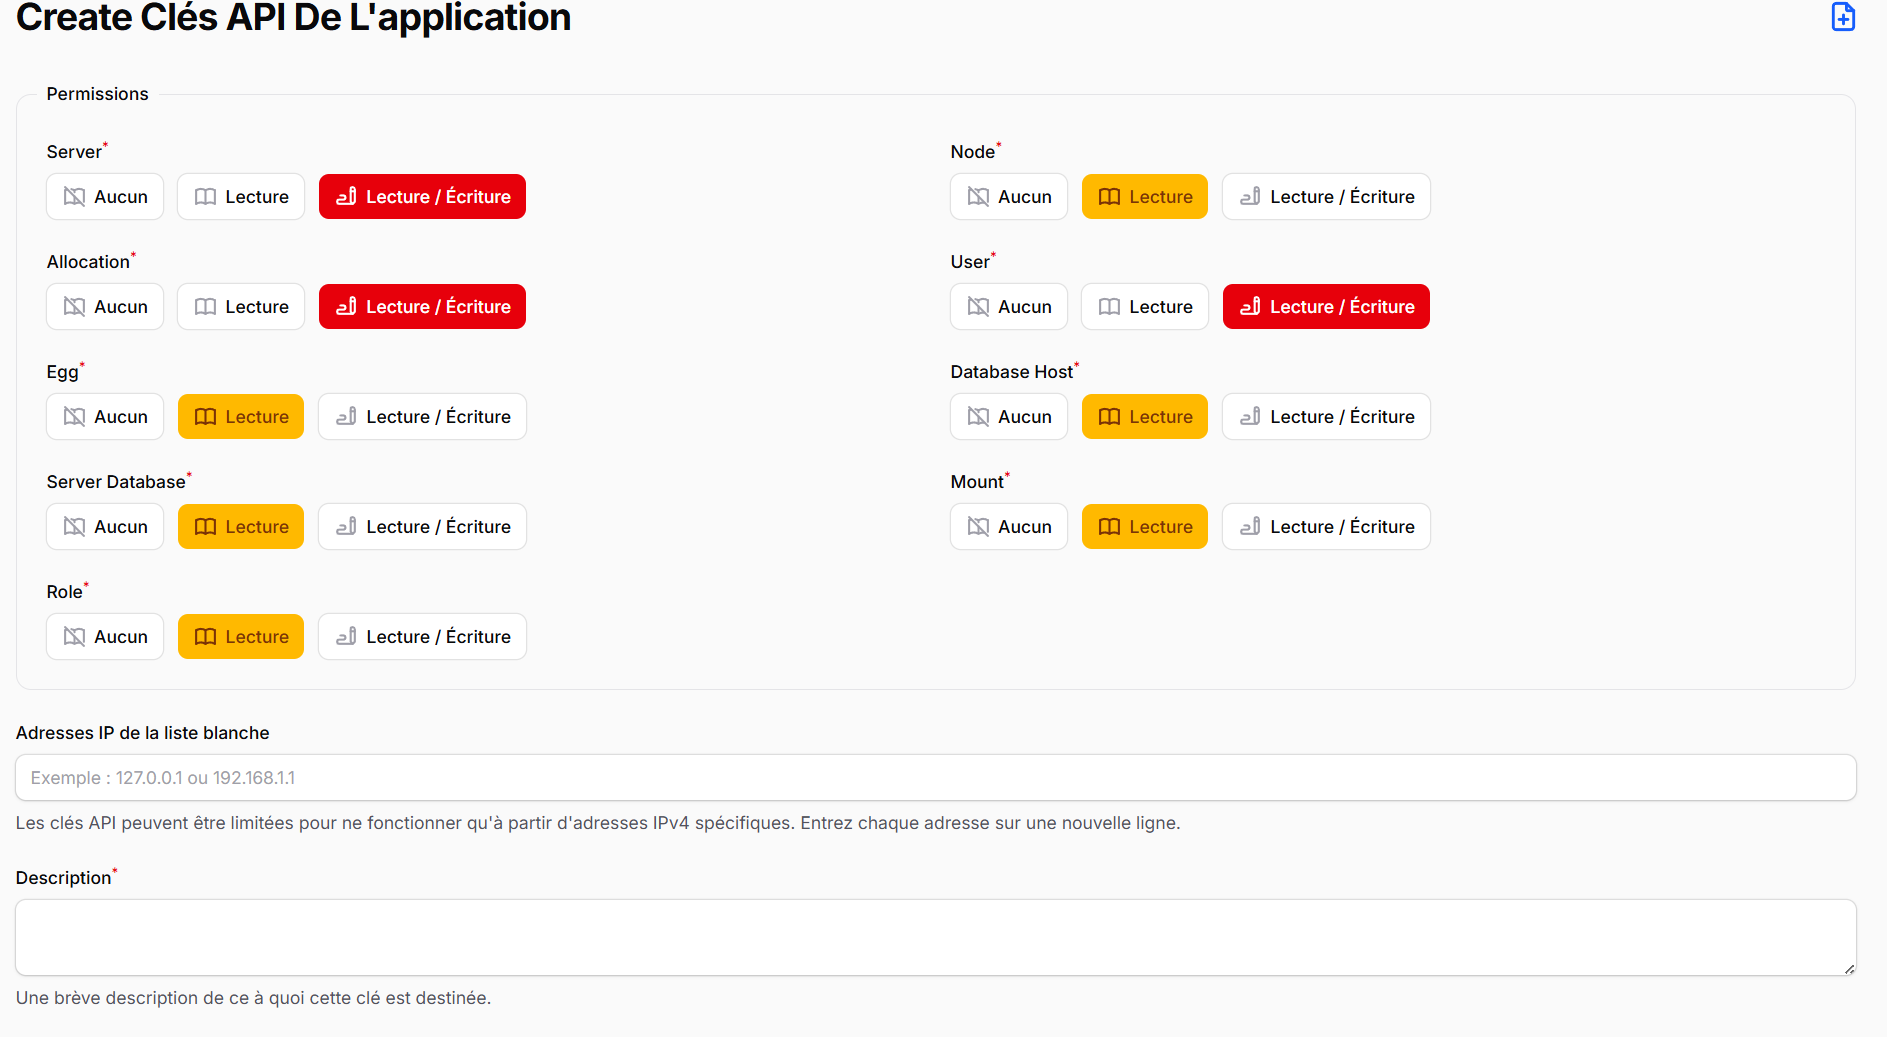
⚠️ Make sure the key has the necessary permissions (servers, users, nodes, eggs, allocations...).
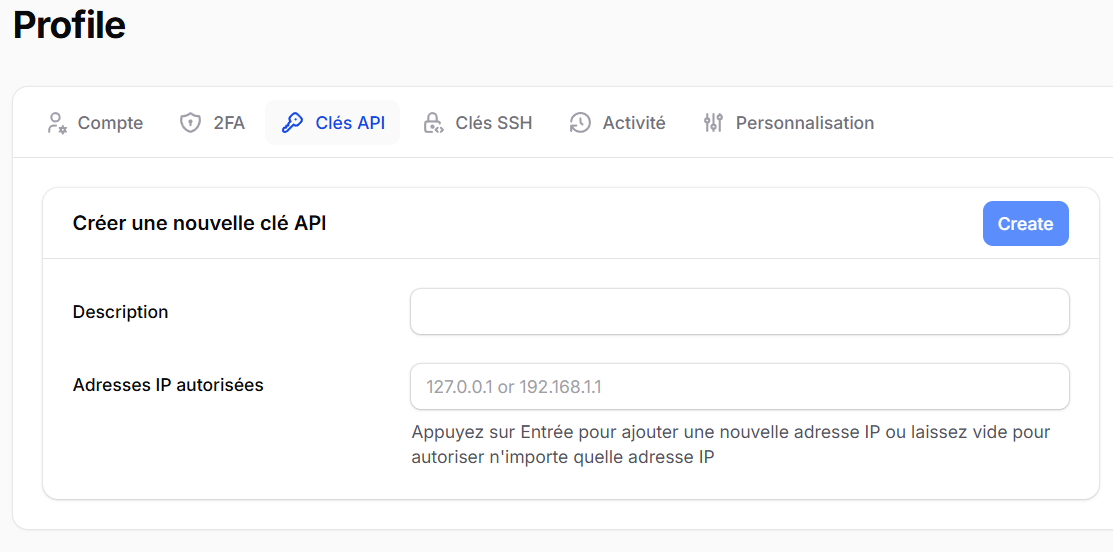
4.2 Client API Key (optional)
This key improves the customer experience (status, server actions, etc.).
5) Adding a Pelican Server in ClientXCMS
The Pelican module relies on the ClientXCMS provisioning servers system.
Path:
Admin → Settings → Provisioning → Servers → New
Server type: Pelican

Fields to Fill In
| Field | Description |
|---|---|
| Address | Full URL of the Pelican panel |
| Username | Application API Key |
| Password | Client API Key (optional) |
Once configured, use the Test Connection button to validate API access.
6) Importing and Managing Eggs
Pelican eggs must be imported to be used in products.
6.1 Importing Eggs
Path:
Admin → Extensions → Pelican → Eggs → Import

This action:
- Retrieves eggs from Pelican
- Stores them locally
- Allows their selection in products
6.2 Egg List
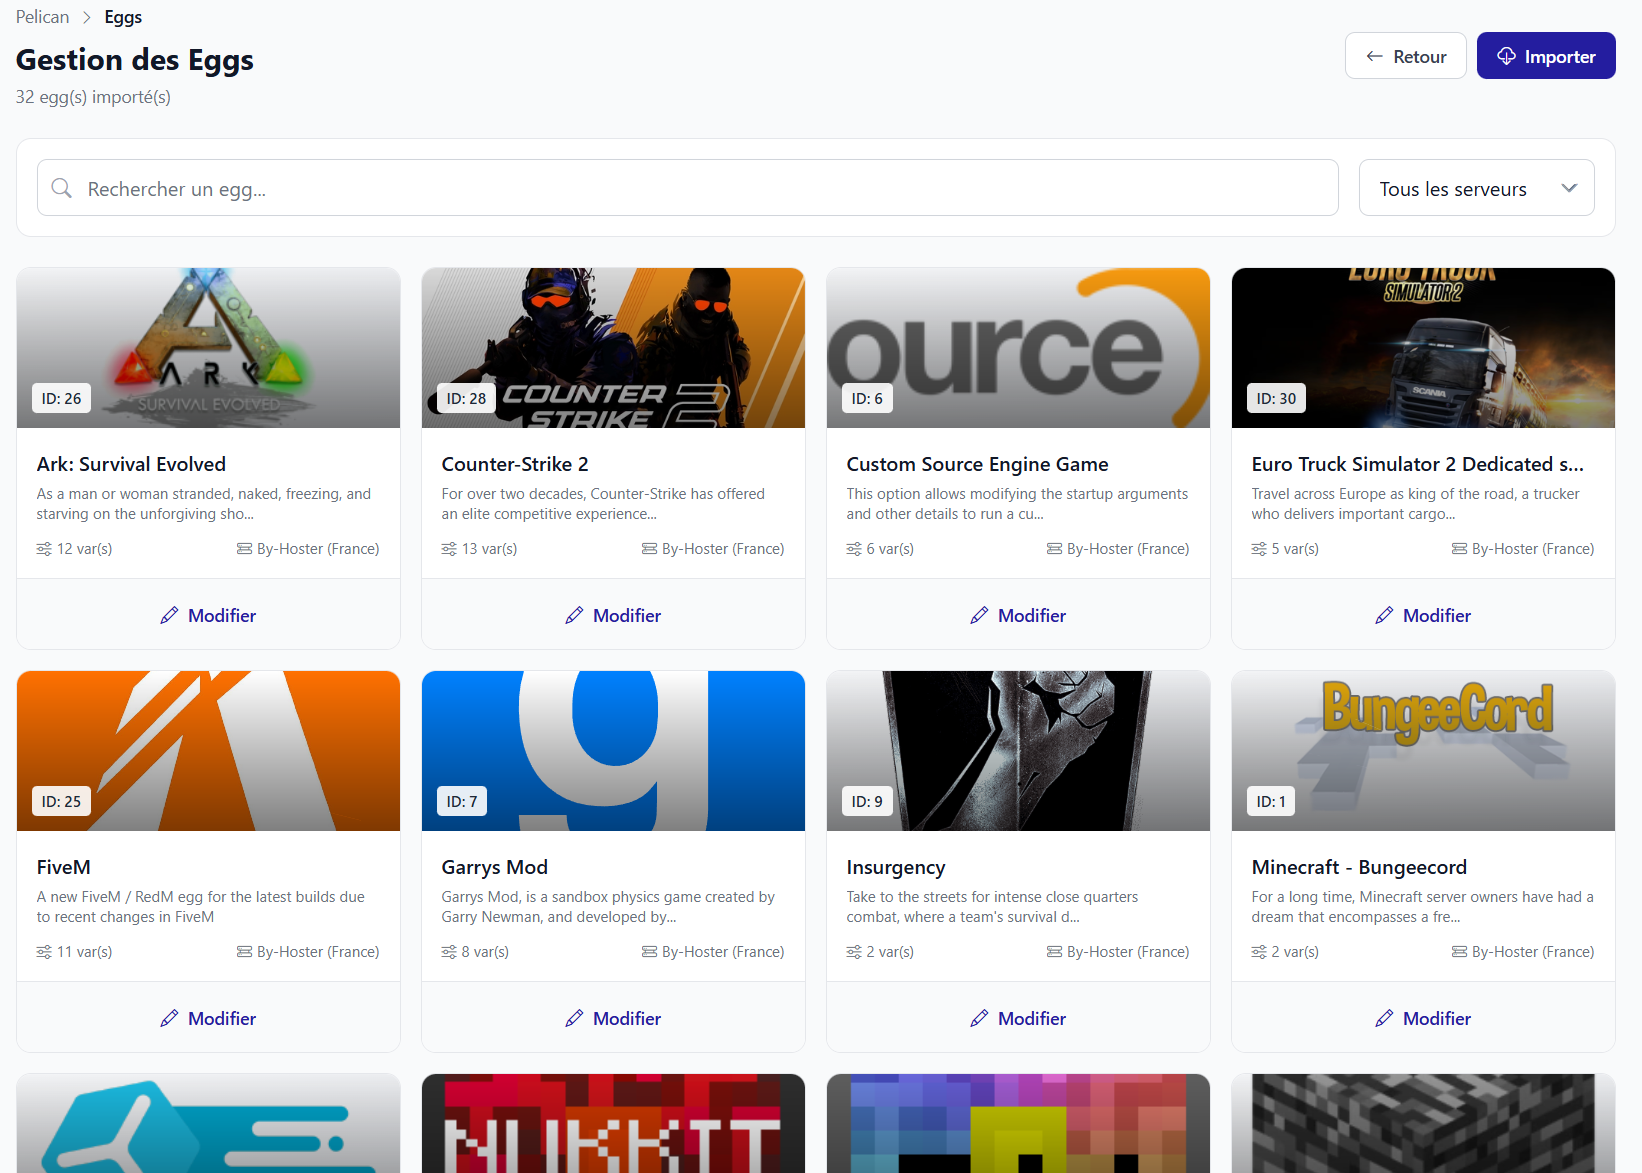
From this page, you can:
- Enable / disable an egg
- Synchronize an egg
- Access its details
6.3 Egg Details and Variables
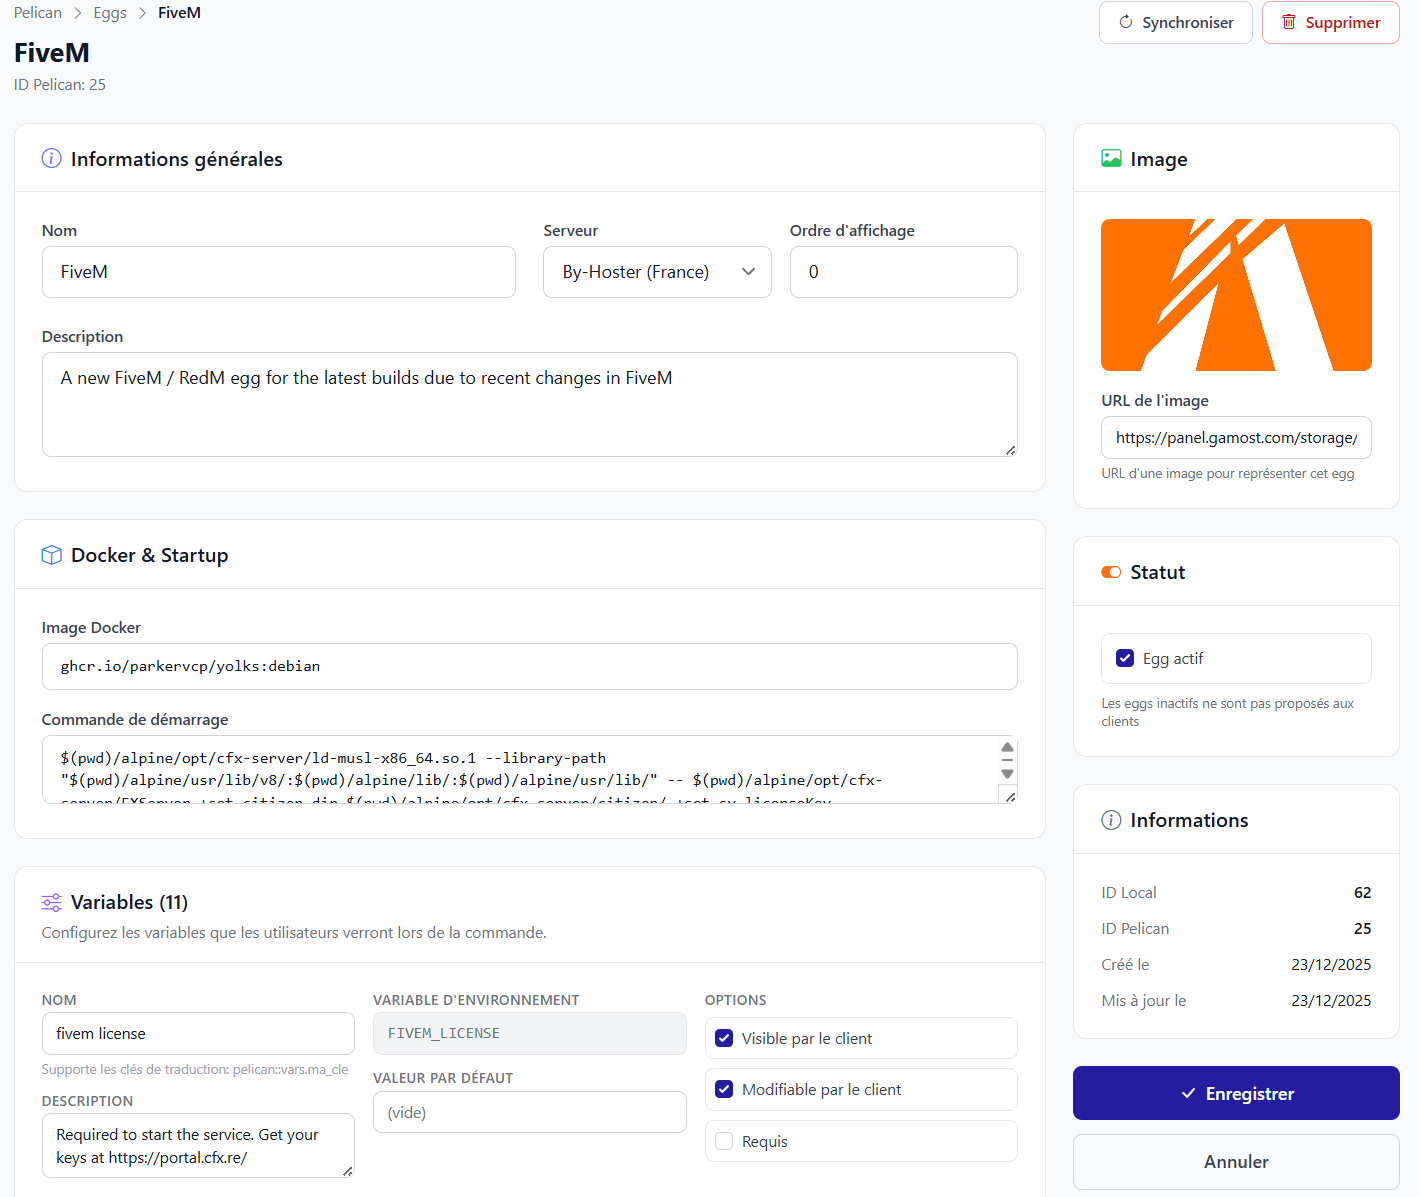
Each egg contains:
- Its Docker image
- Its startup command
- Its environment variables
- Options
user_editable,required, etc.
These variables can then be made editable on the customer side.
7) Pelican Product Configuration
Each ClientXCMS product can deliver a Pelican server.
Path:
Admin → Store → Products → (Product) → Configuration → Pelican
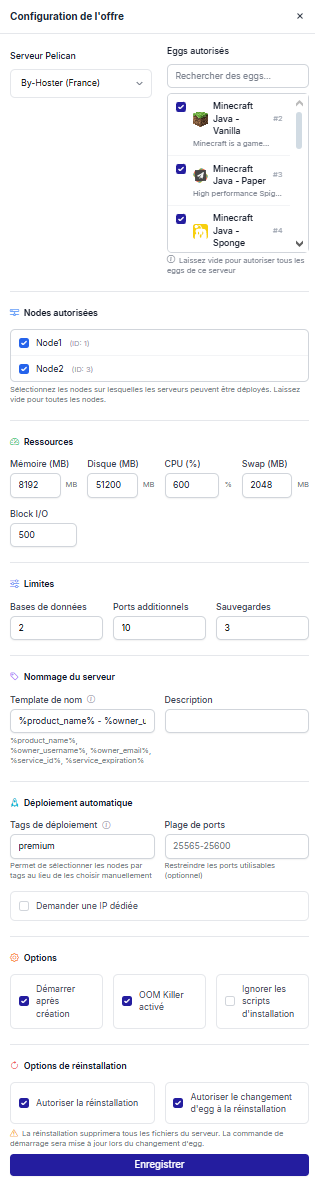
You can define:
- The Pelican server used
- The default egg or allowed eggs
- Allowed nodes
- Resources (RAM, CPU, disk...)
- Features (DB, backups, allocations)
- Deployment options (ports, dedicated IP, tags)
- Customer permissions (reinstallation, variables, egg)
8) Customer Experience - Ordering and Management
8.1 Egg and Variable Selection at Purchase
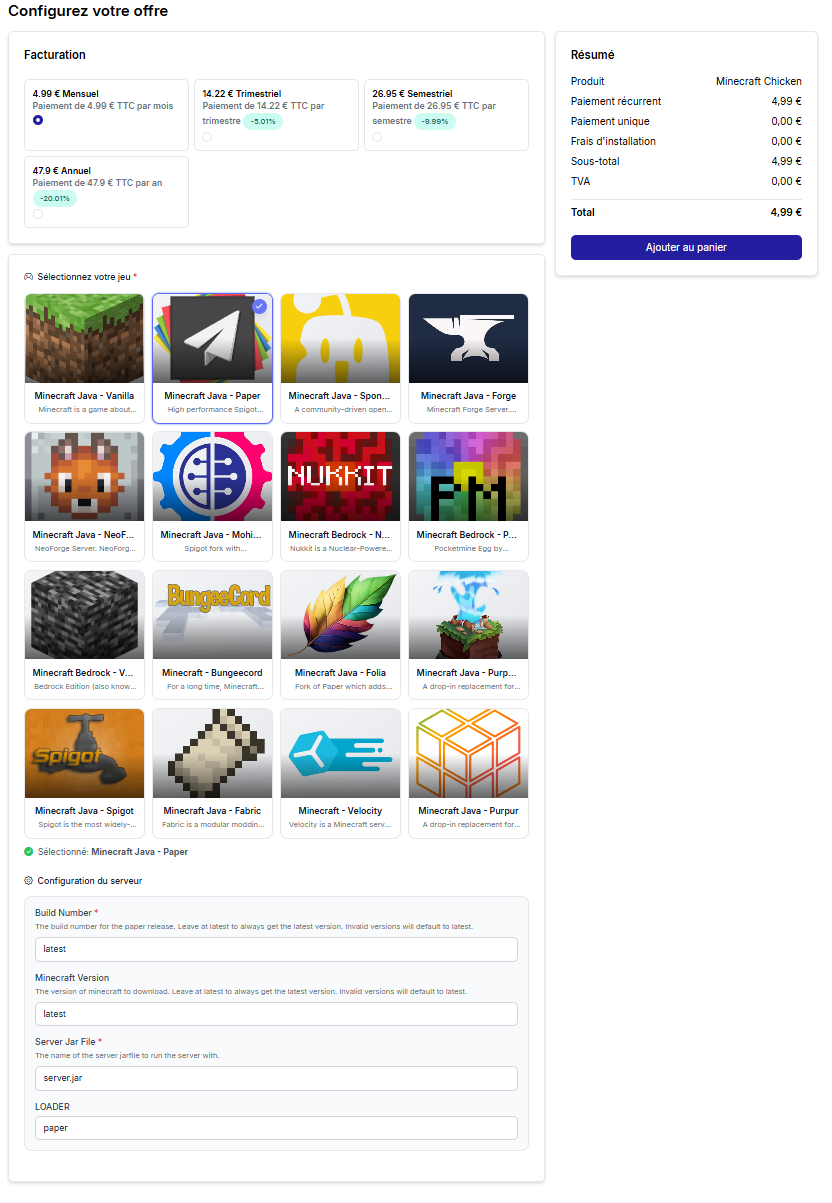
Depending on the configuration:
- The customer can choose their egg
- Fill in certain variables
- Add paid options
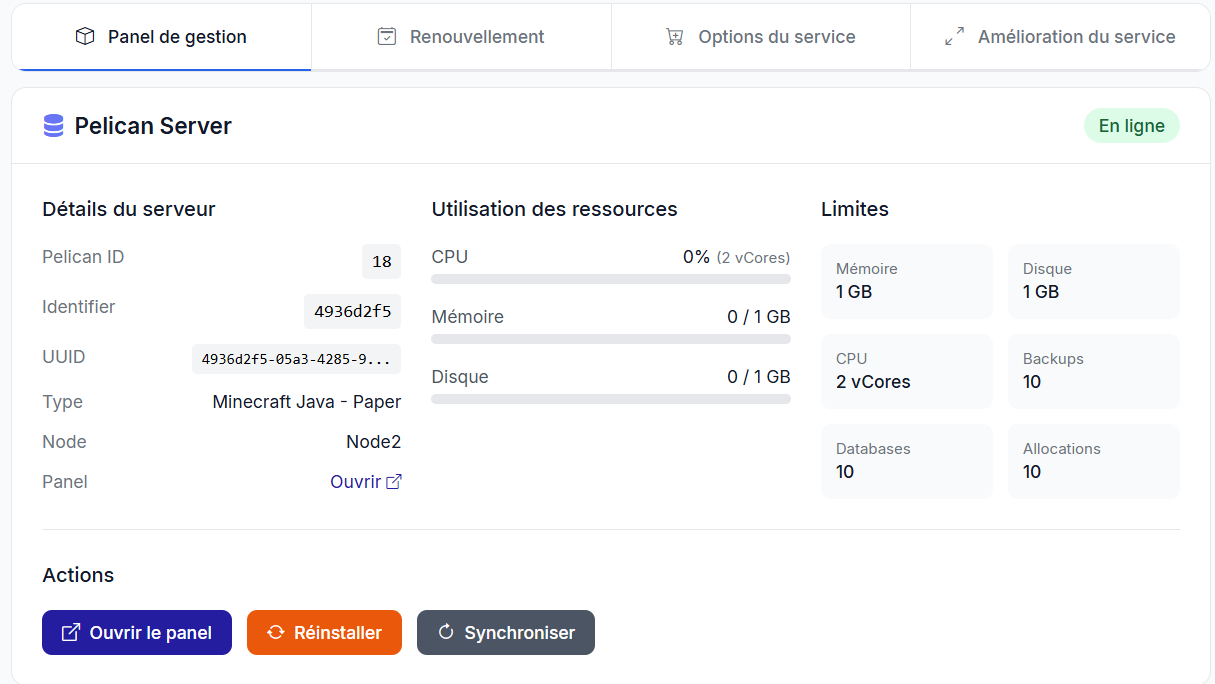
8.2 Customer Panel - Server Management

The customer can:
- Start / stop / restart their server
- View real-time status
- Reinstall the server
- Modify allowed variables
8.3 Server Reinstallation
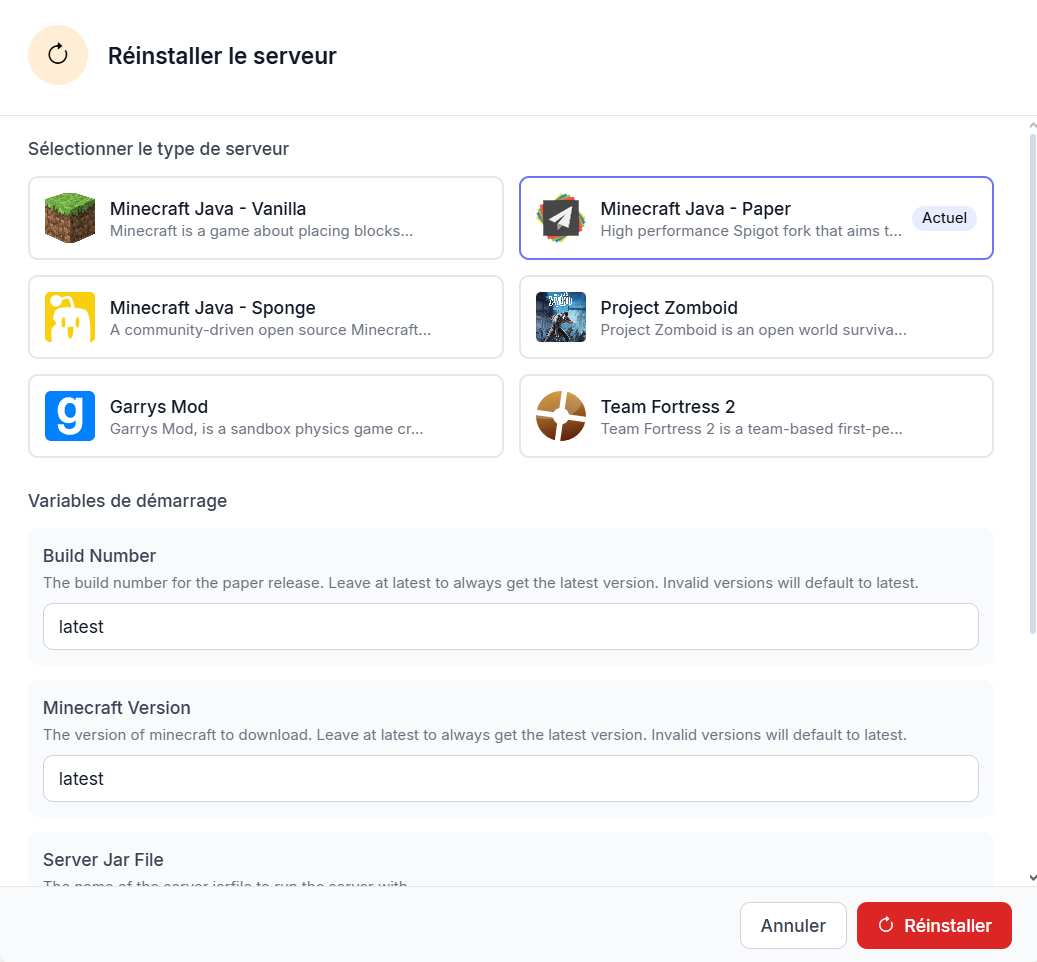
Reinstallation can:
- Reuse the same egg
- Or allow an egg change (if authorized)
9) Service Administration
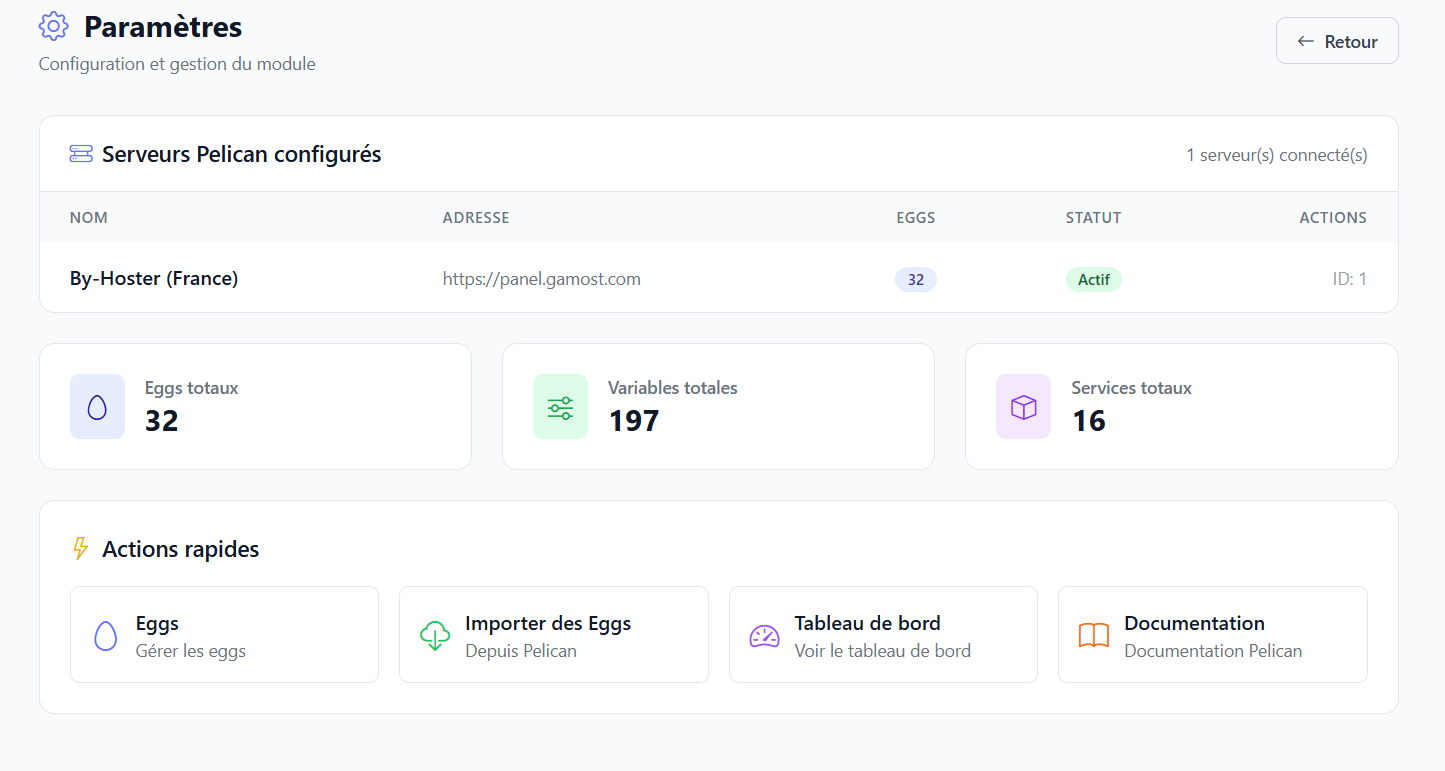
9.1 Pelican Dashboard
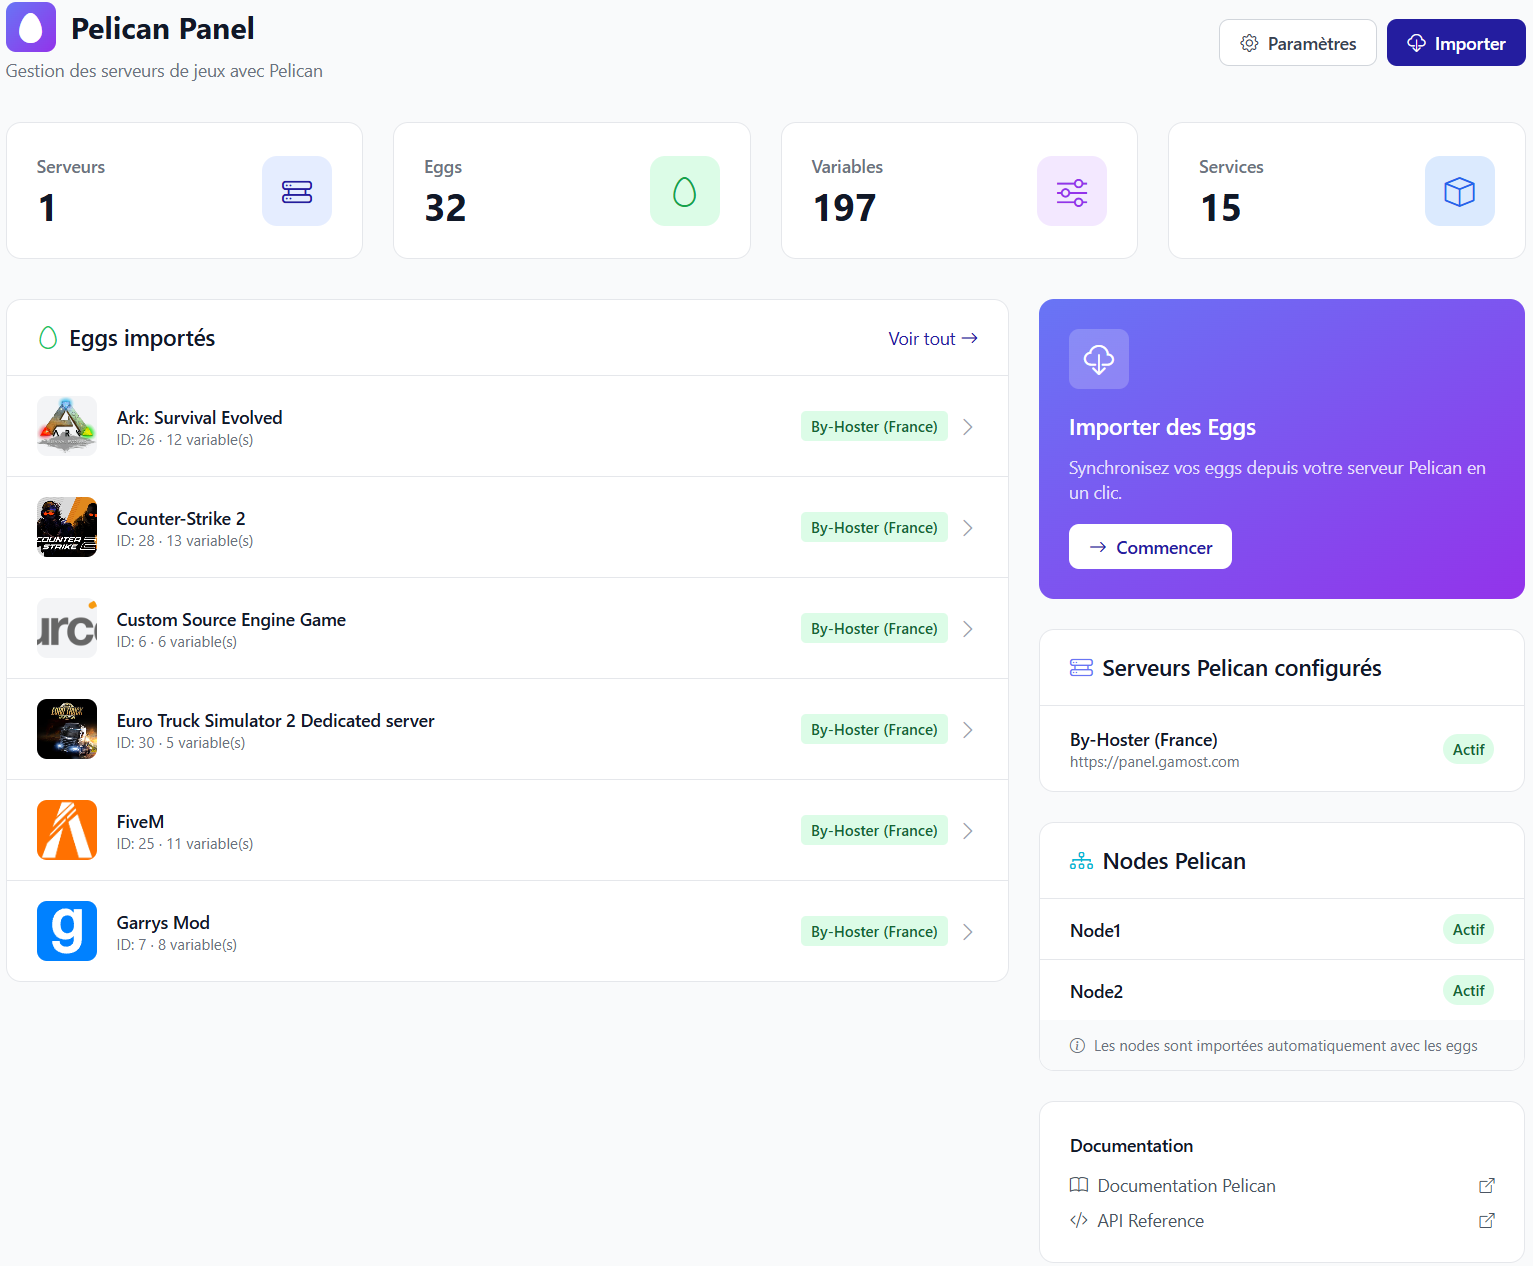
From this dashboard, the administrator quickly accesses:
- Pelican server status
- Egg management
- Maintenance tools
9.2 Admin-Side Service Management
Available actions:
- Suspend / reactivate
- Reinstall
- Delete
- Update resources
- Synchronize with Pelican
10) Settings and Cache
The module uses a cache system to:
- Speed up the admin interface
- Reduce Pelican API calls
A button allows you to clear the cache at any time.
11) Conclusion
The Pelican module for ClientXCMS is a turnkey solution, designed for:
- Professional hosting providers
- Automated server sales
- A modern customer experience
- Simple and powerful administration
It allows you to go from a simple Pelican panel to a real commercial offering ready to sell.