Creating a Theme
When creating a theme, it is strongly recommended to enable debugging and the development environment to see errors in your theme. To enable debugging, you must add the keys APP_DEBUG=true and APP_ENV=local in the .env file of your installation.
APP_DEBUG=true
APP_ENV=local
Theme Structure
resources/themes/
└── theme_name/
    ├── assets/
    │   ├── css/
    │   │   └── app.css <!-- Your main css file -->
    │   ├── js/
    │   │   └── app.js <!-- Your main js file -->
    │   └── images/
    ├── config/
    │   └── config.json
    │   └── config.blade.php
    │   └── rules.php
    ├── database/
    │   └── seeders/
    │       └── ThemeNameSeeder.php
    │   └── db_settings.php
    ├── lang/
    │   └── fr/
    │       └── messages.php
    ├── views/
    │   ├── layouts/
    │   │   └── auth.blade.php <!-- Layout for authentication pages -->
    │   │   └── client.blade.php <!-- Layout for client pages -->
    │   │   └── front.blade.php <!-- Layout for front pages -->
    └── theme.json
    └── menus.json
Theme Creation Command
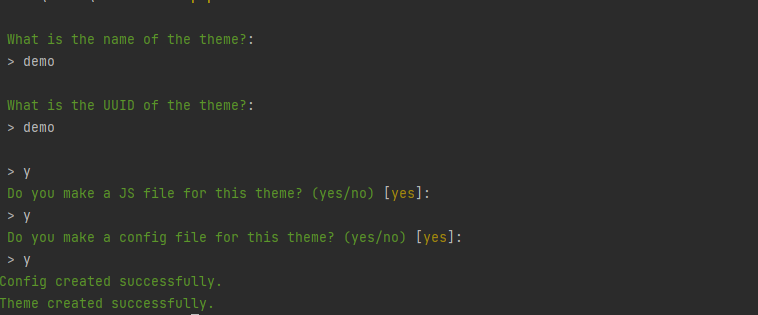
To create a theme, you can use the clientxcms:create-theme command from the artisan CLI.
php artisan clientxcms:create-theme
The command will ask you for the theme name and will create the theme structure for you based on your answers.
Creation via CLI with options
To create a theme without going through the interactive questions, you can use the following command:
php artisan clientxcms:create-theme \
  --name="My theme" \
  --uuid="my-theme" \
  --parent="default" \
  --description="Theme description" \
  --author-name="ClientXCMS" \
  --author-email="contact@clientxcms.com" \
  --css=1 \
  --js=1 \
  --config=1 \
  --lang=1
Option details
--name: displayed theme name.--uuid: unique theme identifier.--parent: parent theme used as a base. Possible values:defaultorbootstrap.--description: theme description.--author-name: author name.--author-email: author email address.--css: creates the main CSS file for the theme.--js: creates the main JavaScript file for the theme.--config: creates the theme configuration files.--lang: creates the theme language files.
Theme File
The theme.json file is the theme configuration file. It contains the theme information.
{
  "uuid": "example",
  "name": "Example",
  "description": "This is an example theme",
  "version": "1.0",
  "author": {
    "name": "ClientXCMS",
    "email": "contact@clientxcms.com"
  },
  "supported_options": {
    "menu_dropdown": true,
    "multi_footer_columns": true
  },
  "default_theme_mode": "dark",
  "demo": "https://demo.clientxcms.com",
  "seeder": {
    "file": "database/seeders/ExampleSeeder.php",
    "class": "Database\\Seeders\\ExampleSeeder"
  }
}
Adding a Preview Image
You can add a preview image for your theme by adding a screenshot.png file in the resources/themes/theme_name/ folder.
Technology
We use the Blade template engine for views. For assets, we use vite with preline based on tailwindcss. You are free to use whatever technologies you want for your theme in terms of CSS.
You can run the following command to compile your theme's assets.
npm run dev
Theme Views
Theme views allow you to customize the appearance of your website. You can modify theme views by editing files in the resources/themes/theme_name/views/ folder of your installation.
We recommend not modifying the default theme files. You can override them by creating a child theme.
If you are not familiar with Blade, you can consult the Blade documentation to learn their syntax for conditions, loops, etc.
If you haven't implemented a view in your theme, the default theme will be used.
Asset Management
Assets are managed by vite. You can add your css and js files in the resources/themes/theme_name/css/ and resources/themes/theme_name/js/ folders of your installation.
You can use the following example to add your css files.
@tailwind base;
@tailwind components;
@tailwind utilities;
@import 'bootstrap-icons/font/bootstrap-icons.min.css';
@import 'flatpickr/dist/flatpickr.min.css';
You can add your CSS and Javascript file imports in your blade files with the @vite() function in your header for example as shown below.
@vite('resources/themes/yourtheme/css/app.scss')